Objective: To create a spectrometer that has a few optimized functionalities for horticultural lighting research. This puts the price point up a bit, but hopefully will stay no greater than $100 USD.
How will this spectrometer be used?
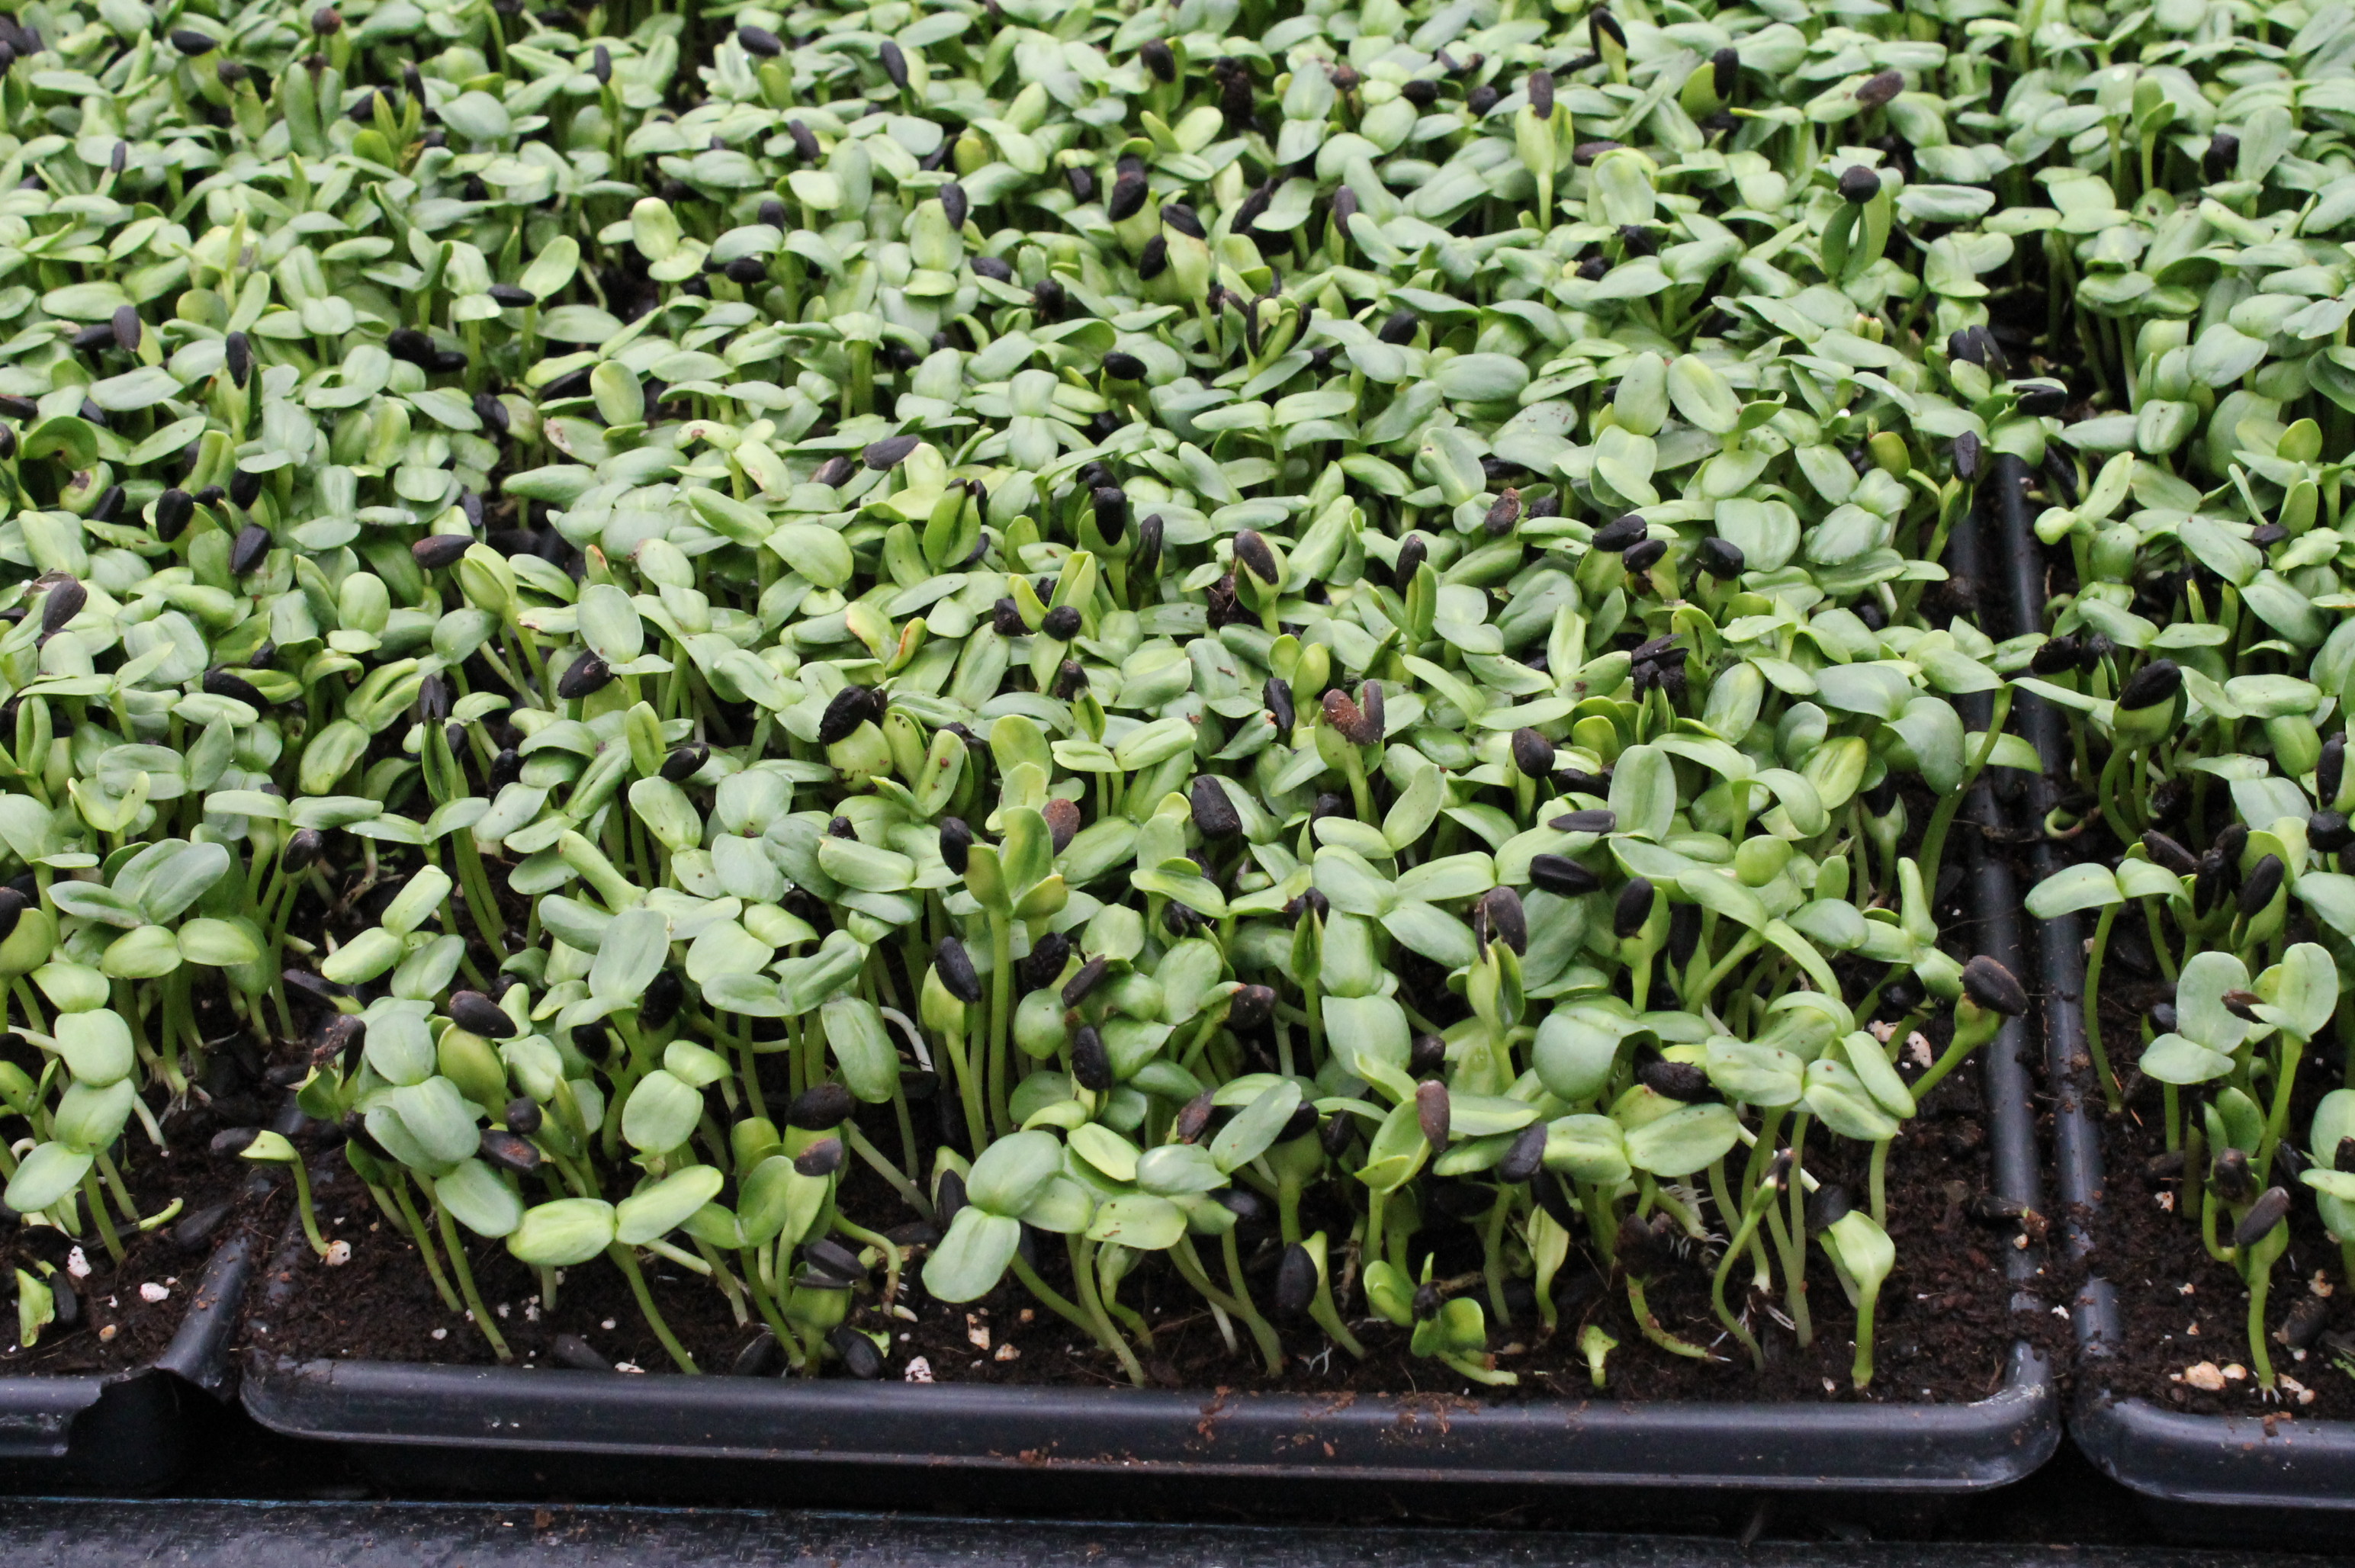
A calibrated spectrometer that measures ambient light is an important measurement tool for high quality horticultural lighting research. For many experiments, the goal is to evaluate various light treatments (e.g. with varying intensity or spectral quality) to see which produces desired outcomes in plant growth, flowering, or morphology (plant shape). A spectrometer is used to measure exactly how much light at which wavelengths will be received by the plants under each treatment. However, knowledge of just the lighting fixtures is not enough, because the intensity per m2 changes with distance from the source roughly following the inverse square law, and also due to nearby reflective surfaces. Thus, the exact intensity has to be measured on a plane relevant to the plants, such as canopy height.
A practical method to characterize the light treatments is to take a series of measurements at pot-height or canopy-height after setting up the lights to get an average intensity and standard deviation, and to gauge the consistency of spectrum over the treatment area. Sometimes, if light intensity is substantially brighter in the center of the plot, this can be managed by periodically rotating the plants within a treatment (e.g. every few days) to reduce effects due to light variation.
Functionality Needed:
- Extended range (at least 400 - 800 nm). UV would be great but technically too difficult to achieve
- High resolution (1-2 nm)
- Wavelength & Gain calibrated (using Spectral Workbench)
- Live capture with a button to capture a "Dark spectrum" (noise subtraction), ability to set # of captures to average, and option for an output graph giving data in photon flux units (micromoles * m^-2 * s^-1)
- Integration of light from 180 degrees (hemisphere) centered in the direction of the spectrometer opening, so the output represents the photon flux density on a horizontal plane.
Upgrades required to achieve above functionality (based on the lego spectrometer kit):
1. NoIR camera upgrade to achieve extended range into the Near Infrared (NIR). This requires the use of a Raspberry Pi Zero W
2. To improve resolution: In addition to the 8 MP camera, an upgraded diffraction grating and use of razor blades for the slit (target 0.1 mm) should maintain acceptable resolution. (Photos and Measurements from dhaffnersr explained why using razor blades is a good choice, and see Optimal Slit Width post by stoft about why 0.09 mm is desirable)
3. Calibration of wavelength can be done with a fluorescent light, gain can be calibrated using solar measurements or known light source (e.g. Solux)
4. Live capture and processing will be achieved by programming the Pi Zero to act as a webcam, so it plugs into the USB slot in the laptop and can be used to Live Capture on Spectral Workbench just like any other webcam, except we maintain more control over the exposure time and camera settings. The extra processing required may be programmed on the Spectral Workbench capture module using Scripts, and since it's being processed on the laptop, the processing speed should still be fast.
5. To enable light capture from 180 degrees centered on the direction of the spectrometer's opening, a cosine correcting diffusing material can be used, so that the light is collected from the entire horizontal surface of the spectrometer's tube opening rather than relying on the light being shone directly into the slit. I found a few candidates < $15 so far from ThorLabs.
Reference Professional Spectrometer:
Range: 350-800 nm
Grating: 600 g/mm
Slit: 50 µm
Resolution: 3 nm
Sampling Optics: CC-3-DA direct-attach cosine corrector (diameter: 7140 µm)
Progress:
June 25, 2019 - Assembly III(Final Assembly)
June 12, 2019 - Described a Method for HDR Imaging
June 12, 2019 - DVD vs. Holographic Film grating comparison
June 2, 2019 - Assembly part II
May 30, 2019 - Assembly part I
May 26, 2019 - Raspberry pi running with IP Camera accessible over USB as an ethernet gadget using this tutorials:
- https://publiclab.org/notes/warren/04-20-2018/prepare-an-sd-card-for-a-raspberry-pi-camera-from-scratch
- https://learn.adafruit.com/turning-your-raspberry-pi-zero-into-a-usb-gadget/ethernet-gadget#if-you-are-using-windows-as-the-host-machine
April 13, 2019 - All materials sourced except razor blades
April 2019 - Currently, I'm sourcing all the parts for this project. I just wanted to lay out my ideas in case anyone has some feedback before it's built. I'll try to update here as it progresses.
20 Comments
This is really cool! We'd love to see build photos as you go. We're also really interested in lighting setups and would love to see more documentation online about how to properly control lighting! Thanks!
Reply to this comment...
Log in to comment
Hi Warren, thanks! I'll definitely try to document my process well as it comes along. I have a lot of motivation to get this going because I want to start some home based horticultural research, and be set up before the end of the summer '19.
Just for clarification, what are you referring to regarding lighting control? I'm guessing you might be talking about calibration, but I the point of this spectrometer is to characterize lighting setups for plant experiments so I wasn't sure.
On Mon, Apr 8, 2019 at 1:51 PM \<notifications@publiclab.org> wrote:
Is this a question? Click here to post it to the Questions page.
Reply to this comment...
Log in to comment
Interesting project.
I did not readily find spectral response curves from Sony on the IMX219 sensor though others in that family of devices appear to have some sensitivity out to 800nm. Might be good to find real data.
On #2, 'good' diffraction gratings are expensive and I suspect for IR more so. For upgrades to the DVD material, I'd suggest focusing on 'true parallel' gratings on rigid material as the distortion from curved DVDs or from holographic film gratings are a bigger issue IMHO than line density. Just a thought. Agreed; a razor blade slit is best; totally opaque with very well defined slit opening edge - just keep them parallel.
On #3, yes CFL for wavelength is good as other choices get very expensive. For amplitude, I'd suggest the Solux 4700k halogen as there is data to 1100nm and the spectral output curve is 'smooth' and stable after warmup.
On #5, I may not be following your optics, but remember the slit provides light collimation and thus formation of a very narrow-angle ('beam' if you will) of photons orthogonal to the diffraction grating to produce the grating's interference pattern to produce the spectrum. Please pardon if I missed your point, but light 'shining directly into the slit 'at' a small # lines of the grating is want you need. Think of it as illuminating only limited number of grating lines - 20? 50? or such as opposed to the entire grating. The 'broader' the illumination of the grating, the greater the distortion (spreading) of the spectrum because the incident angle changes. If you are wanting to collect light from a larger physical area (to integrate the light collection perhaps) then I can understand collecting light by optics or reflection to a diffuser 'spot area' and then 'point' the spectrometer slit at that spot.
Hope these few thoughts are helpful. You could also browse here: [ https://publiclab.org/notes/author/stoft ] in case some of my past related observations provide some useful ideas for your project.
Cheers, Dave
Is this a question? Click here to post it to the Questions page.
Hi Dave, I looked at some of your posts before writing this one, actually! Your work is super helpful.
I also couldn't find IR data from the Sony IMX219 sensor, but I just sent them a message so we'll see if they can give any information when they respond.
On (2) Did you or anyone try comparing the rigid grating (I think the upgrade kit from Public Lab has rigid gratings) vs. the holographic film ones? I tried searching but didn't find anything.
On (3) Solux 4700K seems like a good option for the relative gain. I still would probably want to use the sun for absolute intensity management - perhaps those two combined with CFL for wavelength calibration would give something really nice.
For (5) The diffuser is a common attachment on ambient light spectrometers like This STS-RAD from Ocean Optics. This is the type of spectrometer I'm used to using for characterizing LED or sunlight intensity at crop level, i.e. an ambient light spectrometer. The idea is that a leaf receives light from all angles, but not all angles equally (mostly from perpendicular direction to the leaf surface) so the diffuser integrates the light hitting the horizontal plain.
It's possible that the diffuser might negatively affect the resolution, but in the STS-VIS and other spectrometers I believe it really just is the diffusing material hovering a short distance above the slit. Since the lego model already has that tube sticking out, I figured if I put the diffuser over the tube it would be very similar.
Thanks for your comments! Jasmine
Is this a question? Click here to post it to the Questions page.
Jasmin, glad my previous notes were helpful.
I did find one plot for the IMX219, but it was not from Sony and only covered to 700nm. The IMX265 curves do appear to better push the range out past 700. The reason I mention this is that as the response 'tails off' the sensitivity often drops quickly and noise swamps the measurements.
True, the solar spectra is fairly well characterized. However, there are a few practical difficulties. 1) The shear intensity of sunlight overloads the spectrometer. While neutral density filters can provide attenuation, those filters need their own calibration data (though good ones might be flat enough over 400-800nm -- but again, good response data would be required to know it). 2) Solar spectra changes with a) time of day, b) atmospheric water vapor, c) altitude, d) latitude, etc. so you'd need at least some good reference curves which match your measurement location and environment. The curve differences are significant -- which is why digital camera's have deg-K whit-balance settings ... just to get a simple approximation. Finally, the solar spectra isn't actually flat or smooth (though for a simple spectrometer one can average...) So, a local broadband source, which has spectral data, is rather convenient.
Ok, so you are just wanting to average the received light so the diffuser would both integrate the light and act like a distant source. However, the photons which reach the diffraction grating will still be those whose incident angle is inline with the slit and diffuser; all others will just be scattered in other directions. A typical result (for the PLab web-cam type spectrometers, is reflected-light (reflected off the subject[plant]) being very weak. This is quite different from the 'typical' PLab experiment of looking a absorption by a liquid of light from a direct source. From my own similar experiments, this will likely require a very bright light source and-or (can't use a 'slash' in this on-line editor) get quite close to the plants. This just means some preliminary proof-of-concept experiments for light level. After all, you are interested in only the reflected light, not the source light.
Of course, this raises the question: Could useful information be gleaned from simply extracting RGB hostogram data from a color photo of the plants (and doing the analysis in software...)?
Or, using the spectrometer but looking at a bright light source shining through leaf material -- and integrating many results from many leaf regions? Just other thoughts.
Dave
Is this a question? Click here to post it to the Questions page.
Hi Dave, I just heard back from Sony regarding the IMX219 Sensor response. Here's the pdf and a screenshot: IMX219_Spectrum.pdf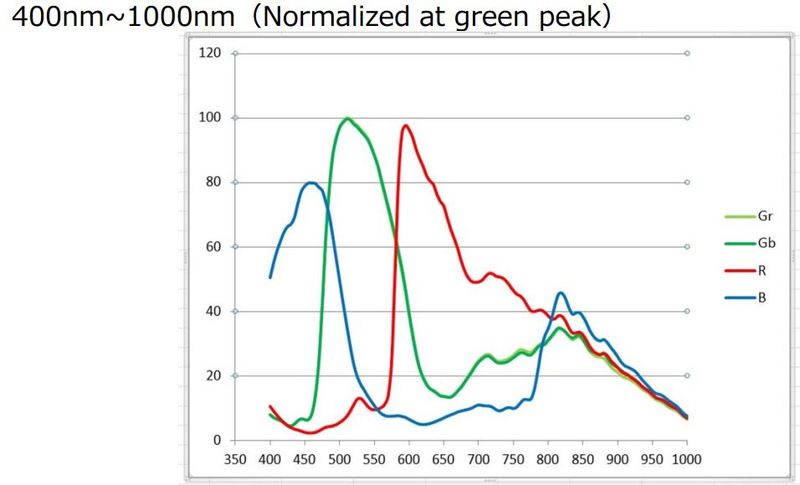
Although it does trail off, it seems like it should still give usable data up to around 800 nm, from the way it looks. Once I get all the parts confirmed, maybe I'll make a post with as many datasheets as I can find for everything and just list them all together.
For the solar spectrum, I think you're right that a smooth spectrum emitter is better for relative intensity, since it won't be affected by the atmosphere. I'm really interested in getting a calibration for absolute intensity though (e.g. Watts per m2) and that's where the sun comes in handy.
For example, for an 8 month period I measured direct solar radiation with my lab's spectrometer and calculated its intensity, and found that when there are no visible clouds or haze over the sun, the intensity is quite consistent with solar elevation. I published the data recently in the last Appendix in my masters thesis (here). One thing I didn't get a chance to delve into is how closely my measured data corresponds with simulated data, for example solar simulators like MODTRAN, although I'm also looking for an open source version of a solar simulator that can take the atmosphere, water vapor, latitude, longitude etc. into account.
If the simulated data match closely with measured data, which I'm hoping it does, then it would be reasonable justification to use the sun as just a absolute intensity calibration. So the order would be 1) use CFL for wavelength calibration 2) use Solux for relative intensity correction and 3) use a few clear-day direct solar measurements for absolute intensity calibration. Maybe if I have the diffuser on, and use a very short integration time, the sensor won't be flooded, but I am not aware if there is a minimum integration time that can be used for the NoIR camera hooked up to the Raspberry Pi.
As for the plant measurements, I think I should add a paragraph in the research note describing how this will be used. It's not for looking at the plants, but just for characterizing the light sources that will shine on the plants. This is for lighting research in horticulture, where I want to design various light treatments to see how plants respond under different spectra. However, in order to have useful data, it is highly important that the light spectra and intensities are well characterized so if you compare two spectra a) it's controlled and repeatable and b) it's a fair comparison so one treatment is not giving more photons from 400-700 nm than the other so the differences will be attributable to spectral quality and not due to overall photons available for photosynthesis.
Definitely, looking at the RGB reflectance of the plants using photos would be another useful form of analysis, which I may do. I've seen other people get reasonable results by putting the leaves in a scanner as then the lighting is very consistent and you don't have to deal with shadows.
Sorry it seems this comment is a little long winded!
Jasmine
Is this a question? Click here to post it to the Questions page.
Ah, I've seen the curve on the web but it was not attributed to the specific sensor. It's helpful to now have that information. It looks like the double response from B&G improves the sensitivity out near the IR.
It appears you want to use the sun as an absolute reference for W per M2 and therefore "calibrate" another (eg LED) light source for intensity. However the sun's distance means that light is uniform over area. A local light source (plant lights) would be quite close so intensity follows the inverse-square law so would not be uniform....
I suspect the Sony sensor is made via an extremely repeatable process such that relative to any simple 'absolute power calibration' based on some known spectrum (eg. solar) a one-time measure (for a single given mechanical configuration of a spectrometer) is all that would be required. I suspect sensors would not vary by much in sensitivity -- though the data sheet should have numbers.
Ok, so your interest in only in the light sources ... so the plants are therefore not part of the measurement. That means you would just perform direct measurements of various light sources -- no reflectance measurements. Right? That simplifies some things.
Characterizing the light applied to the plants could take several forms. Eg: 1) Step-and-repeat the spectrometer over an area of light (for the plants) for a given source and map both average intensity and spectral content, 2) attempt to diffuse via collection of light from a broad area to find an average, 3) if the light is bright enough, place the source at a distance, measure the spectrum (rough diffusion via distance) and the average a few near-field measurements for average intensity.
I'm just guessing here as I'm not visualizing the full concept of your experimental hypothesis, clarity of the required results, the methods to acquire the data or the uncertainty of the measurements (to know the expected limits to the proposed methods). Perhaps these would be good thought experiments to design up-front as a proof of concept. Measurement uncertainties have a way of creeping in and having significant affect on final results.
Dave
Is this a question? Click here to post it to the Questions page.
A few more thoughts...
On absolute 'average' intensity - You could use a Solux source (at fixed distance and known orientation) as a transfer standard. This would mean finding an attenuated solar measurement with close to the same measured level as a setup with a Solux lamp but then you would have a portable 'standard'.
On camera integration time: There are limits. If the source intensity is beyond some limit, the sensor will simply saturate no matter the exposure window. At lower intensities, there will be a trade-off with noise. Integration time is necessary to obtain sufficiently low measurement noise levels to not affect the collected data. SNR is really important with spectrometer measurements -- especially toward the IR where the sensitivity is dropping rapidly.
Dave
Yes that's exactly what I intend to do with the sun. Given sensor stability, and no shifts or changes in the spectrometer's build, calibration would only have to be redone periodically to ensure consistency. I'd really like to compare the result to a professional spectrometer after everything is done to see just how accurate (or inaccurate) it turns out to be.
I plan to characterize the light using the 1st method you mentioned, by taking a series of measurements on a grid below the light fixture and taking the average intensity and spectrum. For most bulb lights, spectrum is not too variable on a plane below, but it's possible for certain LED arrays to have hot spots of certain colors. I've added a paragraph clarifying this in the research note.
So I was reading about minimum exposure time of the Pi cameras and learned that it uses something called a "rolling shutter", which means it reads each line in the sensor individually in sequence. This can cause "banding" with light sources that flicker, where some lines in the sensor register more light than other lines. I don' t yet know if this can be a major issue for calibration, but I have seen what may be banding effects in some of the spectral workbench uploads by others, so I wonder if this would be an issue.
To get around the banding problem, either we need to find a way to hack the camera to have a global shutter mode, or maybe just take a few photos of the same spectra and average the result. This would be especially important at short integration times, and the averaging might also help to reduce noise associated with short exposure time.
I was just reading on the pi website about the rolling shutter and I was wrong about the global shutter (it said only cameras with physical shutters can use a global shutter mode). I think we are stuck with rolling shutter and just have to think of ways to overcome the resulting noise.
Reply to this comment...
Log in to comment
Hi! I think the question of rolling shutter might deserve it's own question posted, to really dig into - it's a great question! One thought I had was that the orientation of the camera probably has a big effect on the banding. Banding I've seen can often look like venetian blinds, and doesn't seem to have an effect that's inconsistent across each cross-section of the image. That is, the banding has typically happened at a resolution that makes bands in parallel to the cross-sections, limiting the damage they can do. But if the camera is rotated 90 degrees, that'd change a lot. Probably we need to start citing specific spectra/images to really dig into this topic. Thanks for bringing it up!!!
On Wed, Apr 10, 2019 at 1:51 PM \<notifications@publiclab.org> wrote:
Is this a question? Click here to post it to the Questions page.
Sure I'll post a question about it! After stewing on it a while, I don't think it should be a huge issue in most relevant contexts, (esp. for other people looking at absorptance), but maybe the only real big thing to pay attention to is that the grating is spreading the spectrum horizontally so that it aligns with the cross section.
Reply to this comment...
Log in to comment
Ok, the project concepts are taking shape which always prompts more thoughts.
1) By 2D mapping the light spectrum and relative intensity, you will have some arrays of data characterizing the light source. That suggests two approaches: A) average the data (and possibly rotate the plants or B) keep the plant layout and apply the 2D mapping to the plant data. Either way, the plans would have be uniquely identified but with averaging, data would be tossed which generally obscures later analysis.
2) True, some light sources do not have 'steady-state' power sources (eg. HPS lamps in gymnasiums which pulse at 60 Hz and wreck havoc with normal digital photography). Others might 'flicker' at higher rates. To avoid the issue either the sampling rate must be much faster (and then process the data to get an average) or use sensor integration which is much longer than the pulse rate to let the integration time perform the averaging. Fortunately, plant growth is a very slow process relative to all of this.
2a) An 8MPix sensor has about 2800 lines and at the typical 30 fps max scan rate, lines are read at about 85kHz max. Since fluorescent lights with a ballast run at about 20kHz, the higher scan rate could probably produce 'banding'.
2b) So, what to do? I'd suggest dropping the sensor scan rate to increase integration time and then collect multiple spectrum data sets for time-dependent post-measurement analysis. Multiple spectra data sets are a good idea anyway to A) assure the data is valid and B) look for errant low-frequency noise and stability issues. 3D 'waterfall' plots can be very useful for analyzing spectral plots over time.
2c) Averaging. Caution is always warranted when averaging. It is best, when possible, to have more raw data to analyze because noise can take many forms. One large "glitch", which represent only single uncorrelated anomalies, can significantly affect an average value -- but that error will be hidden. Also, averaging always throws data away. Think more in terms of extracting useful information than just tossing information away.
Averaging true Gaussian noise is extracting the true signal from totally uncorrelated noise. However, the noise in PLab spectrometer plots is not all Gaussian so simple averaging does toss useful information which can be extracted by looking for raw data correlations over multiple spectra data sets. Again, fortunately, plants are slow critters.
3) You might look into the variance of sunlight vs a Solux source. While the Solux source does requires a few minutes warm-up, it is very stable. Yes, both sun and Solux are stable, they do have slightly different spectra. From my own observations, I suspect that a Solux lamp (reserved only for doing 'calibrations' so as to drop lamp aging to effectively zero) would provide a more repeatable reference.
Here's the question: if, with periodic checks against the sun, there was some variation. Do you decide that variation was the Solux lamp or just atmospheric water vapor, time of year, smog, etc. -- or some of each? My thought: Use a commercial device (with known, published measurement uncertainties) to measure the Solux. Do that a number of times with repeat measurement setups (to account for those variations) and check the stability. This is not to avoid using a solar reference, but as a potential means of detecting which source is the variable in terms of calibration.
Sorry for the long post; just tossing around some ideas to consider.
Dave
Is this a question? Click here to post it to the Questions page.
Great fodder for thinking about. 1) Agreed, having an individual light measurement per plant has advantages in certain scenarios. I guess it comes down to experimental design and how stats analysis is planned afterwards. Taking an individual intensity measurements would add light intensity as a factor, so as long as the rest of the design and analysis manages that appropriately it would be fine.
2) This gives some good ideas for doing some data checks with flickering light sources. E.g. take a series of photos of a light source at a selected frequency, look at histogram and deviation of resulting intensities to see what the distribution is like, and how many measurements are required to get a decent average.
Re: averaging, I thought it would be easier to just average right away so there's just not copious amounts of data to deal with later, but maybe there's a way of saving the data still and also getting an average simultaneously so error checking can still happen. Or I suppose gathering all the data in hoards and processing/averaging after would still be fine as you'd still see the general result (just a bit more noisy) during the live capture.
3) Using a Solux as a portable calibrating source seems like a worthwhile effort. Adding to what you said, it'd also be good to test how the light varies in different outlets in different buildings, in case that might be a factor too. Even without a commercial device, I think a good sense of the solux's stability could be obtained by just measuring a bulb over time after turning it on, and doing that a number of times. If we assume, that the built spectrometer in question is stable, (and the light vs. spectrometer setup is extremely consistent) even if it's not fully calibrated, then the result should also be telling of the solux's stability.
Thanks J
Observation of some basic system parameters will help define the limits.
1) A single stable source (Solux and CFL) plus the PLab-class spectrometer will allow determining the measurement limits.
2) 2D mapping of an example plant light source (testing a range of mapping resolutions) will find the measurement limits of 2D mapping.
3) Repeat and long-time measurements (spectrometer +Solux, +CFL, +PlantLight, +attenuatedSolar, +etc) will uncover measurement error limits
4) Monitoring a stable source while inducing mechanical stress to the spectrometer adds another error limit.
Identifying the various measurement errors, then allows making a set of measurements relative to a transfer standard (eg. a Solux) which means the data will have a known reference so future data sets can be accurately compared.
The smaller Solux run on 24VDC so power modules and achieve 0.5% stability [ https://publiclab.org/notes/stoft/04-14-2016/spectrometer-stability ]. PLab-class spectrometer mechanical stability is often worse.
Just a hint - Mechanical rigidity of a PLab-class spectrometer cannot be over-stressed and 'fixing it' later by averaging data generally throws away a lot of useful information.
Deciding how much data to collect is likely dependent on the above observations. If the plant light sources are variable, additional data might be warranted to allow finding additional correlations in the data. Look for repeatability, drift, synchronous and asynchronous noise and stability-related errors.
Oops responded to the wrong comment, moving here:
Hi all! Great input here. Just noting that we've had a major revision to the PL spectrometer design that should address a lot of the rigidity issues, though perhaps not as much as @stoft's wood design. In any case a major improvement over the paper box based design. You can read more about it at https://publiclab.org/lego
Reply to this comment...
Log in to comment
This may be OBE but Hufkens has posted files of the PI response curves:
https://khufkens.github.io/pi-camera-response-curves/
which were also referenced here:
https://publiclab.org/notes/MaggPi/06-17-2018/how-can-you-use-computer-vision-to-reduce-spectral-overlap
I am not familiar with your project to understand all the issues but one way to avoid the 60 Hz flicker issue (even though I am not certain it is an issue) is to use an LED source.
Thanks! It looks like khufkens predicted the response from >700 as the data was not yet available. If you look at the spectrum published by Sony, it's actually higher than the prediction at 800nm, especially in the B pixel, which is great.
Regular LED sources would work. If I ever measure a dimmable LED source that uses pulse width modulation for dimming then flickering could become an issue.
So I guess for everyone doing absorptance measurements halogen or non-dimming LED sources then banding should never be an issue. Even for calibrating with fluorescent lights, if there is flicker it shouldn't be a big issue since it's only being used for wavelength calibration, so intensity is irrelevant.
Phew, I had myself worried there but it seems like banding won't be a major issue.
With non steady-state sources, measurement error results from asynchronous data sampling. The 'fix' is either long integration time (assuming the source RMS level actually is stable) or a measurement rate several times the nyquist rate so the sample data represents the actual signal.
Wavelength calibration via CFL (using PLab-class devices) is typically limited by system noise which causes spectral peak 'smearing' and 'jitter' -- though a bit of processing can help.
Finally, assuming stable DC light sources, with PLab-class devices, the biggest measurement error source tends to be broadd-band, non-Gaussian noise generated by mechanical instability.
Reply to this comment...
Log in to comment
Login to comment.