This is the final assembly post based on the Horticultural Spectrometer Upgrade - Planning project.
Recent achievements included:
- manufacture and installation of razor blade slit (Assembly II)
- comparison of DVD grating vs. holographic film
- preparation of DVD grating for installation
This post will discuss the final assembly steps which includes:
- installation of DVD grating
- sealing the enclosure to prevent light leaking in
- introducing an air vent to prevent condensation

1. Installation of the DVD Grating
To install the DVD grating, I put a line of Elmer's Glue-All Multi-Purpose Glue in front of the camera unit, and using tweezers, gently positioned the grating inside, leaning against the camera lens. I used the RPi Cam Web Interface (that comes with pi-builder) to check that the angle produced a clean image, and the spectrum was aligned horizontally, not on an angle. This method seemed to work well because it didn't put any strain on the grating, keeping it nice and straight (ultimately, maintaining sharp emission/absorption lines).
Then, I let it set and dry, which took at least 12 hours. While it was drying I left a part of the lego roof over top of the camera and grating so dust would not settle on those parts.
Why Elmer's and not a stronger glue?
The choice of glue is important, because while I could have used superglue, as I did previously for the razor slit and the camera installation, superglue releases a type of gas that reacts with plastics, making the plastic go cloudy (the areas of lego around the camera became white due to this). This gas could potentially damage the plastic diffraction grating, so as soon as the grating was installed, superglue was not to be used anywhere near the internal parts of the spectrometer.
Elmer's glue is different because it uses water as a solvent (as far as I could read) so although it takes a lot longer to dry, it won't have any strange reactions with plastic components. There may be a stronger glue to use, but Elmer's was easily available and for me it worked.
2. Sealing Light Holes
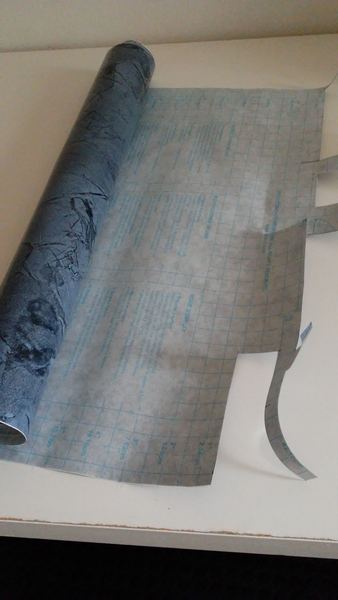
Ensuring minimal light leakage into the lego housing is important to ensure no stray light other than the spectrum itself enters the camera lens. However, light can pass through small cracks between the lego pieces - enough that at certain angles from the side, you can see right through to the other side of the spectrometer. To seal the holes, I bought a vinyl roll from the 99 Cent store, for $1. It is the type of material you are supposed to line cabinets or drawers with.
Why vinyl?
Vinyl was an ideal choice because it is waterproof, easy to cut, very inexpensive, and completely opaque (not all options were opaque though). It also has its own adhesive so you just peel-and-stick.
Application was as simple as cutting 4 pieces of the same dimensions as the lego spectrometer sides, not including the roof and floor (in case I ever need to remove them).
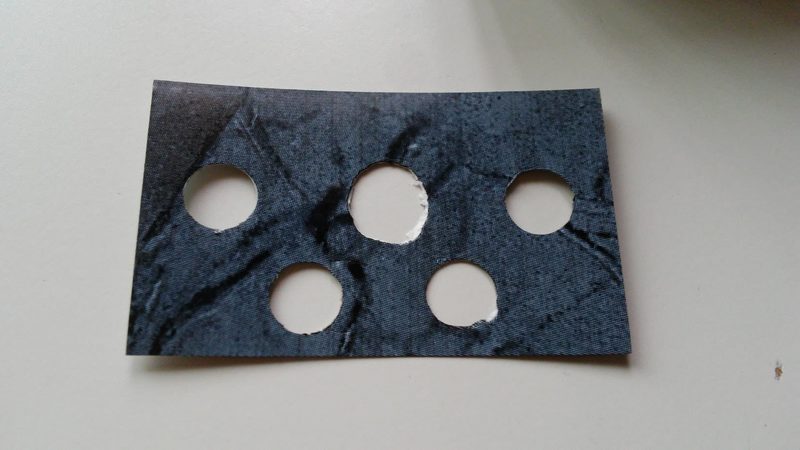
For the front, I marked off the locations of the holes, and punched them out with a hole-punch. A standard hole punch is just over 6 mm in diameter, which is just the right size.


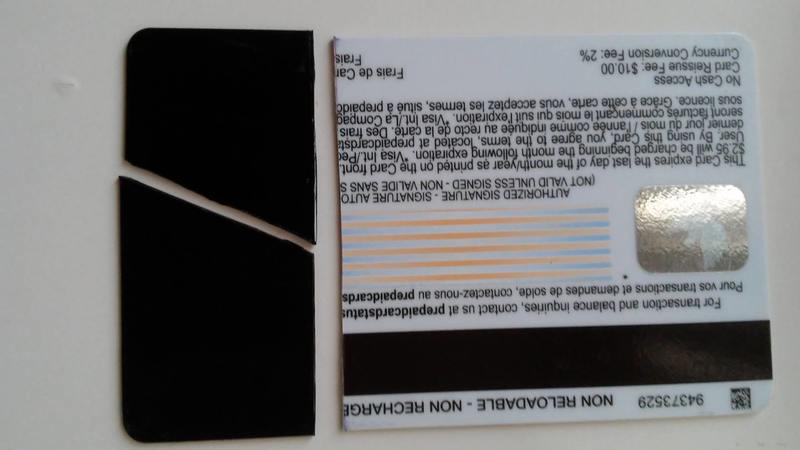
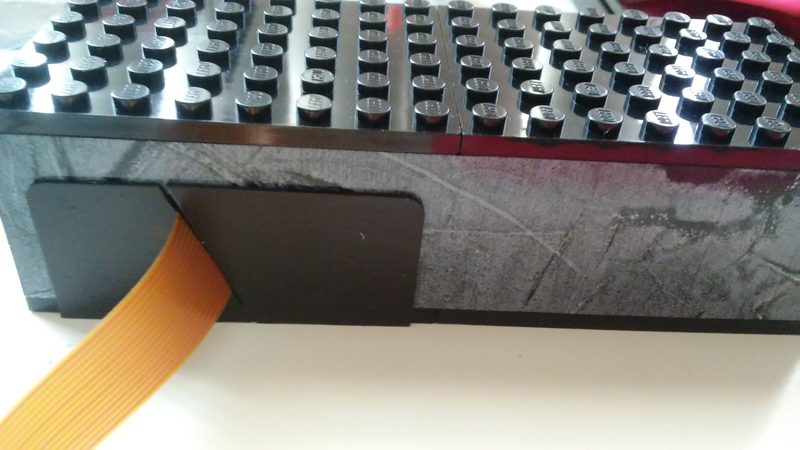
Finally, to seal the large gap on the side where the camera cable emerges, I cut up an expired credit card and painted it black:

3. Creating an air vent
Before I glued on the credit card pieces, I punched a hole in the card piece that would go behind the camera cable. If all the holes were sealed, I worried that if the temperature, humidity or air pressure changed, it could cause problems including condensation on the components. An air vent would allow vapor to pass in and out, ensuring that air pressure and water vapor are consistent with the surroundings.
An ideal vent filter would have been a Gore filter, which is a special material that lets vapor pass but is impermeable to liquid water. However I was keen to proceed and cut a piece of microfiber cloth (used for cleaning spectacles) instead. I would recommend a Gore filter if you can, though.

At this point it's really hard to ignore the resemblance to an ice cream sandwich.

3. Testing
To test the enclosure for light leakage, I took an image with the spectrometer pointed at the bright sky with the same settings as an earlier image (below).

In the "After" image, the background is a lot darker, despite having pointed the spectrometer at a brighter part of the sky compared to before. However, there are still a few light leaks, seen as glare on the left and below the main spectrum.
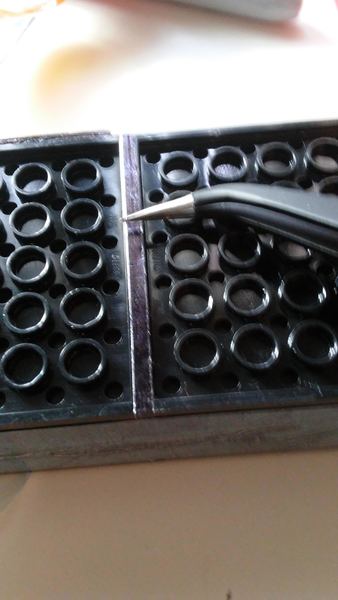
My suspicion was that the light leaks could be from the cracks in the roof and floor, between the two large lego pieces. So, I cut two thin pieces of aluminum tape, colored them black with a sharpie and covered the cracks. While I suppose vinyl would have worked again, I thought that the aluminum might have a better adhesive when the strips are so thin.


4. Testing Again
This time, after I took a picture of the bright sky again, the background appeared totally black. I'd call that a success! (EDIT: After my eyes adjusted, I can see now that the light seal is not perfect; I have to check for imperfections in the light seal).

5. Conclusions, Moving Forward
From here onwards the challenge is mainly related to software and experimental setups. The raspberry pi has a lot of potential so I hope we can make use of it.
There is one minor hardware tweak (with a major effect) that I'm saving for later, that is adding a cosine corrector (diffusing material) on the front of the spectrometer. The purpose of this is to collect light not only from straight on, but from a 180 degree hemisphere in front of the spectrometer for ambient light measurements. I'd like to do some tests before installation but it will be better to have a handle on the data first.
PS! If you can't find opaque vinyl and would like some, I now have a lot of extra and would be happy to mail some if you just cover the postage please! (Really though just ask because I'd hate to see it going to waste).
Time to eat some ice cream bars...

2 Comments
@warren awards a barnstar to jenjimah for their awesome contribution!
Reply to this comment...
Log in to comment
Hi @jenjimah, thank you so much for sharing your work. I have a question, did this final assembly manage to get the functionalities you set out to achieve?
Like the range, resolution of (1-2nm) etc.
I'm really inspired and would like to create a IoT handheld spectrometer using the same camera, but with 3D printing instead of using lego.
Thanks!
Is this a question? Click here to post it to the Questions page.
Reply to this comment...
Log in to comment
Login to comment.