Thermal camera
Applications
There are two primary types of environmental investigations that are driving the development of DIY thermal imaging tools and methods: a "heat-busters" program in East Harlem, and a near-forensic-level water quality monitoring program in the Gowanus Canal.
Approaches
There are three prototypes in development:
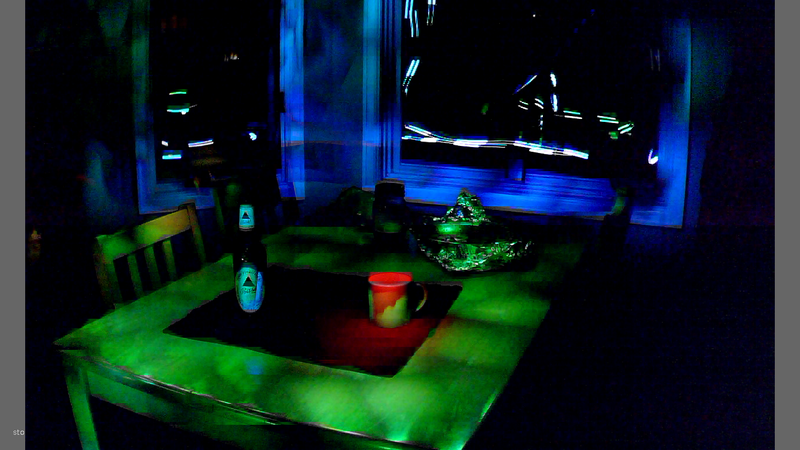
- A Thermal Flashlight (described on this page): a RGB LED flashlight with a non-contact infrared sensor that "paints" the temperature of the surface directly on the wall for capture with a second timelapse camera.
- Thermal Fishing: dragging a thermometer through the water, taking contact measurements mapped to a RGB light, also for capture with a second timelapse camera.
- A scanning thermal camera on a lego turntable (software also in development) that sweeps back and forth across a scene, recording the temperature variation to build up an image.
Problem
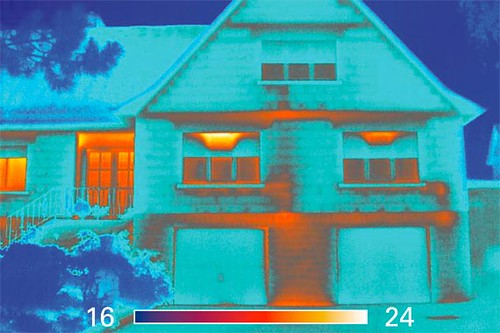
"FLIR" cameras can produce images such as the one below, and are typically used to identify heat leaks, but even low-resolution FLIR cameras can cost thousands of dollars. Our goal is to make this kind of investigation (and the potential savings) cheap, easy, fun, and informative for those of us without $10k in our pockets.

Thermal Flashlight
The first approach results in a kind of "light painting" -- a color heatmap overlaid directly onto the scene. This is the simplest, cheapest, and to date, most effective way we have developed of measuring heat leaks or cool leaks indoors and outdoors.
Building your own
Parts list
- 1 Melexis MLX90614 non-contact IR thermometer (3v)
- 1 common-cathode RGB LED
- 2 4.7k Ohm resistors
- 2 100 Ohm resistors
- 1 180 Ohm resistor
- 1 0.1 μF capacitor
- wire
- a breadboard or circuit board & soldering eqmt.
- Arduino
- 9v battery and holder
Cost: ~$60
These research notes will be integrated into this page to provide instructions on building and using your own thermal flashlight:
- http://publiclaboratory.org/notes/warren/12-12-2011/circuit-diagram-simple-thermal-flashlight (includes source code)
- http://publiclaboratory.org/notes/ad/11-28-2011/thermal-camera-arduino-uno-mlx90614-ir-thermometer (includes source code)
Several meetups have been organized to build and test thermal flashlights, at RISD (Providence, RI) and in Brooklyn, NY. We are organizing one now in Somerville, MA:

