Thermal photography
Applications
Thermal imaging can be used to document heat/AC leaks from insulation gaps on a building's facade, reveal warmer ground water inflows (either fresh or chemical-laden) or "thermal pollution" from industrial processes entering ocean-temperature waterbodies, as well as identify areas on the human body experiencing infection or stress (includes epidemiological applications).
Community applications so far include both a "heat-busters" program in East Harlem and a "forensic" water quality monitoring program in the Gowanus Canal.
Approaches
There are three prototypes in development:
- A Thermal Flashlight (described on this page): a RGB LED flashlight with a non-contact infrared sensor that "paints" the temperature of the surface directly on the wall for capture with a second timelapse camera.
- Thermal Fishing: dragging a thermometer through the water, taking contact measurements mapped to a RGB light, also for capture with a second timelapse camera.
- A scanning thermal camera on a lego turntable (software also in development) that sweeps back and forth across a scene, recording the temperature variation to build up an image.
Problem
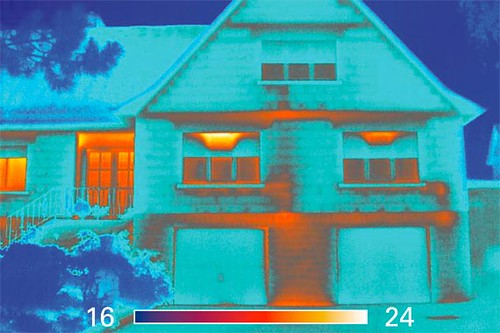
"FLIR" cameras can produce images such as the one below, and are typically used to identify heat leaks, but even low-resolution FLIR cameras can cost thousands of dollars. Our goal is to make this kind of investigation (and the potential savings) cheap, easy, fun, and informative for those of us without $10k in our pockets.
Thermal Flashlight
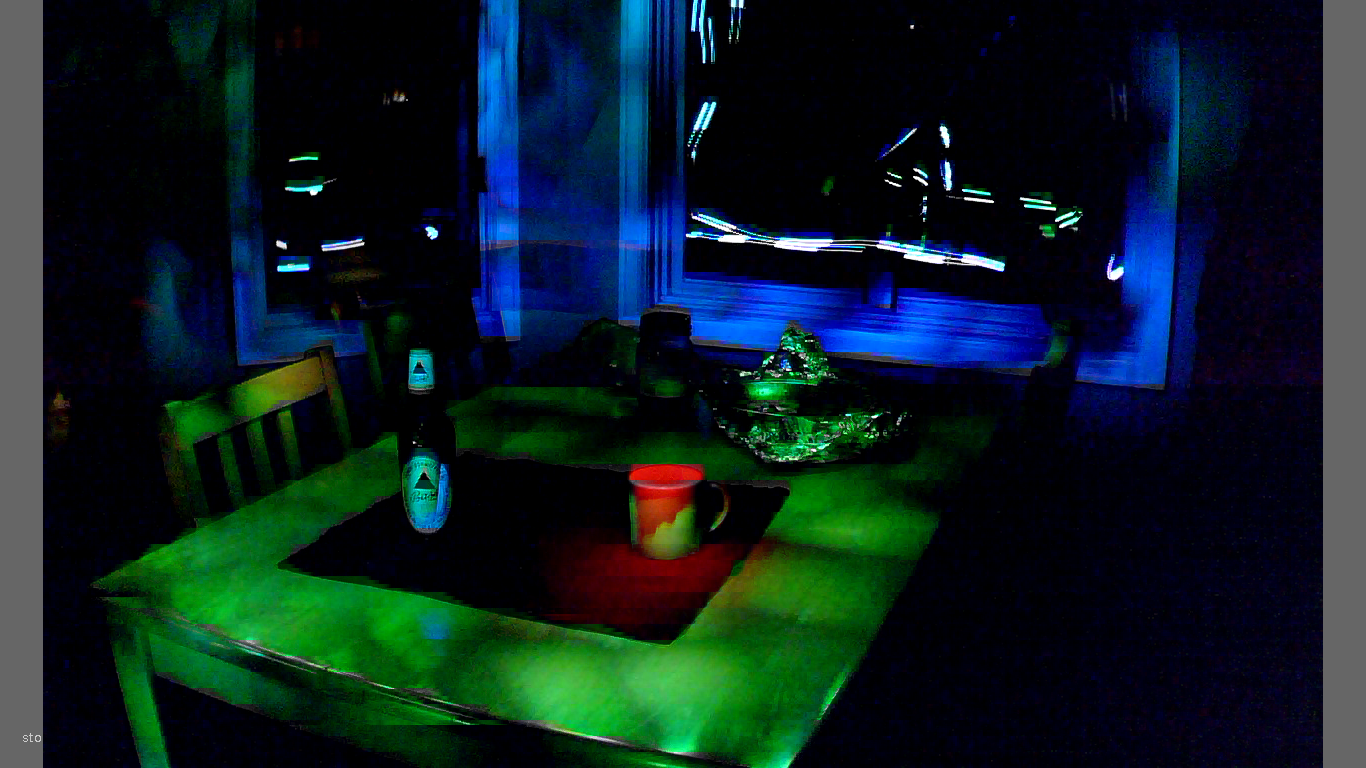
The first approach results in a kind of "light painting" -- a color heatmap overlaid directly onto the scene. This is the simplest, cheapest, and to date, most effective way we have developed of measuring heat leaks or cool leaks indoors and outdoors. Simply put, the "flashlight" puts out red light if it's pointed at something hot (default 75 deg F or more) and blue light if it's pointed at something cold *(default 60 deg F or less):

Using a Thermal Flashlight
To capture the light painting over time, we have been using timelapse photography or the prototype Public Lab Thermographer website (or its inspiration, GlowDoodle), as seen in the top image on this page.
- Within view of the camera or laptop, sweep the flashlight beam over the scene at a distance of about 12 inches.
- Try to stay out of the way of the beam, and don't point it directly at the camera or it will create a "starburst" and may mess up your image.
- It's helpful to wear dark clothing so you don't show up in the image as you're moving around.

Building your own
Parts list For a Thermal Flashlight with 3.6 V Melexis Sensor and Common Anode LED.
- 1 Melexis MLX90614 non-contact IR thermometer (3v). Data sheet: http://www1.futureelectronics.com/doc/MELEXIS/MLX90614ESF-DAA.pdf
- 1 common-anode RGB LED
- 2 4.7k Ohm resistors
- 2 100 Ohm resistors
- 1 180 Ohm resistor
- 1 0.1 μF capacitor
- wire
- a breadboard or circuit board & soldering eqmt.
- Arduino
- 9v battery and holder
Alternative variations of the Flashlight can be made with a 5.5V Melexis Sensor and Common Cathode LED. For the 5.5 V sensor follow this diagram: http://publiclaboratory.org/notes/sara/2-7-2012/circuit-diagram-5v-melexis-sensor For the common cathode circuit board follow this diagram: http://publiclaboratory.org/notes/warren/2-11-2012/common-cathode-variant-thermal-flashlight-code
Links to purchasing equipment:
Consumable Parts:
- LEDs (1 per flashlight, but they sell as a pack of 25): http://www.sparkfun.com/products/10818
- Arduino Uno (1 per flashlight): http://www.sparkfun.com/products/11021
- Capicator (1 per flashlight): http://www.sparkfun.com/products/8375
- Resistor pack (this pack has a 180 ohm resistor which we found other packs not to have): http://www.eio.com/p-19326-velleman-kres-e12-pack-of-610-e12-series-resistors.aspx
- 3.6 V infra red thermometer (1 per flashlight): http://www.futureelectronics.com/en/technologies/semiconductors/analog/sensors/temperature/Pages/6314181-MLX90614ESF-DAA.aspx. Data sheet: http://www1.futureelectronics.com/doc/MELEXIS/MLX90614ESF-DAA.pdf
If you are starting an electronics kit from scratch:
- a 40Watt soldering Iron (if you want it to be permanent otherwise duct tape or Velcro works temporarily)
- hookup wire (solid not stranded- 22 or 24 gauge, you can get this at Radio Shack)
- pliers called "wire strippers" to get the plastic wrap off the hookup wire (can get at Radio Shack)
- solder for 40Watt iron, lead-free.
- a breadboard (1 per flashlight). If you aren't soldering: http://www.adafruit.com/products/64. If you are soldering: https://www.adafruit.com/products/571.
- a USB cable to connect the arduino to the computer via USB for power 5Volts (can get at Radio Shack)
- household sponge for cleaning solder off tip
- 9 volt battery with connector wires (can get at Radio Shack- 1 per flashlight)
Cost: ~$40-$60
Source code
ThermalFlashlight.ino on Github
Step-by-step instructions
Further resources
Related research notes These research notes will be integrated into this page to provide instructions on building and using your own thermal flashlight:
- http://publiclaboratory.org/notes/warren/12-12-2011/circuit-diagram-simple-thermal-flashlight (includes source code)
- http://publiclaboratory.org/notes/ad/11-28-2011/thermal-camera-arduino-uno-mlx90614-ir-thermometer (includes source code)
Sample walkthroughs
Several meetups have been organized to build and test thermal flashlights, at RISD (Providence, RI) and in Brooklyn, NY. We are organizing one now in Somerville, MA:
- Thermal Flashlight workshop
- May 26 AS220 workshop
- Thermal Fishing Bob presentation from NE barnraising
