This tutorial shows how to use Image Sequencer to take two DIY multispectral images (one infrared, one visible light) and composite them into an NDVI image.
Made with support from the #AREN project at NASA.
Image Sequencer is an online tool for image processing -- based on the idea of a storyboard. Each modification makes a new copy of the image, resulting in a series of images showing each step. It is designed for use in browsers, as well as on the Raspberry Pi.
By doing NDVI analysis in Image Sequencer (although it is still under development), you can see each step separately, and re-use the whole sequence of steps on different images. To try this yourself, use the link below, and the test images from the comments section of this post: https://publiclab.org/notes/warren/12-24-2010/ndvi-test-lima-peru
Image Sequencer workflow
https://publiclab.github.io/image-sequencer/examples/#steps=import-image,blend,ndvi,colormap
Video tutorial
If you have your own 2-image multispectral photos to try with this process, share them in the comments below. Since Image Sequencer is still under development, there are plenty of planned improvements, but @tech4gt, @ccpandhare and I would love your input and ideas for refining and improving it!
Example images
To practice, and to confirm that you get the same results, go through the steps in the sequence above using these example images:
Visible:
Infrared:
Example output
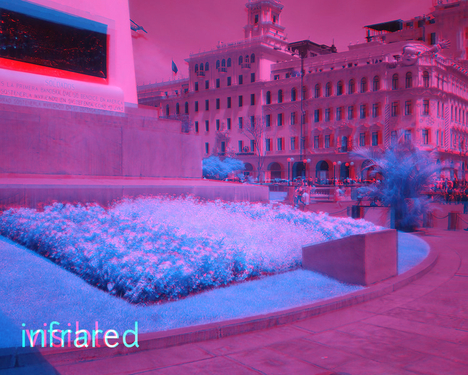
If you go through the above steps, you should get an image like this after the "blend" step, which displays infrared in the blue channel, and visible light in the red channel:
After the NDVI step, you'll see this image, where NDVI values of -1 are black, and NDVI of 1 are white:
The final step should colormap it with the default colormap, resulting in an image like this:


9 Comments
@tech4gt @ccpandhare check it out! :-)
Reply to this comment...
Log in to comment
@imvec @xose too!
Reply to this comment...
Log in to comment
This is so cool @warren
Reply to this comment...
Log in to comment
During the leptos development we bought this board. We'are now playing with a point and shoot NDVI with raspi. I'll give the "IVMECH" board a chance again and try two raspberry pi cameras V2 ;) It would be possible to get a visible light image together with a near infrared one.
Image sequencer is amazing!
http://www.ivmech.com/magaza/en/development-modules-c-4/ivport-v2-raspberry-pi-camera-module-v2-multiplexer-p-107
Reply to this comment...
Log in to comment
Cool! We've tested blue filters with Raspberry Pi cameras, and it works well although the separate camera technique does result in cleaner separation between images.
Reply to this comment...
Log in to comment
Just a note to self - as we plan out auto-registration features for this, could be good to look at #image-registration !
Reply to this comment...
Log in to comment
😃
Reply to this comment...
Log in to comment
how to process single multispectral image with the modified webcam and red filter? Because when I saw your example, it is processing 2 images that consists of visible and only NIR image.
Is this a question? Click here to post it to the Questions page.
Hi, you can use this simpler sequence for that:
https://sequencer.publiclab.org/examples/#steps=ndvi,colormap
This will just apply NDVI and the colormap to a single image. You may need to select the filter color you're using (looks like a red filter).
Also, you need to white balance your image -- in the camera, ideally. See this page for more on this! https://publiclab.org/wiki/infrablue-white-balance
You may be able to get by a bit by white balancing after the fact, using this sequence. But your data won't be as good as if you white balance the camera itself!
https://beta.sequencer.publiclab.org/examples/#steps=white-balance{red:400|green:197|blue:222},ndvi,colormap
Reply to this comment...
Log in to comment
Login to comment.