Inside the PMS 5003
Looking to get inside this sensor to do maintenance or
curious about what it looks like on the inside? We had a malfunctioning Purple
Air channel, so we swapped out the PMS 5003 in our PurpleAir and opened the old
malfunctioning sensor up. Here's more on how to open a PMS5003 sensor and clean
it, while keeping it intact.
Materials:
- X-acto knife or small blunt utility knife
- Small electrical screw driver (Phillips head)
- Small electrical screw driver (flat head)
- Q-tips
- Distilled water
_
Opening the Outside Cover_
The easiest way to leave the outside blue/silver cover
intact is to shimmy under it with an X-acto knife (or other, less sharp utility
knife if you have one) and lift and hold the edge on each half of the metal
plating open with a small electronics screwdriver (see the pictures below). Be very careful if you use a sharp X-acto knife like we did, always face the blade away from you and if you have a blunt utility knife use that instead. If you can get under the metal plating with just a small flat head electronics screw driver that's another good option
_
_
It's easiest to start on the side with the tan connection port on it, as you can use the port to get under the metal outside of the sensor. The goal is to get under the metal plating with the Xacto-knife and bend the metal up slightly to lift it off of the black slide clips the metal is attached to. 
Follow the same process around each half of the sensor's metal exterior. Be careful for springs falling out, there are 4 springs in the sensor and they will jump out once you get each side open, so it's best to work over a large flat surface so they don't fall on the floor and get lost.
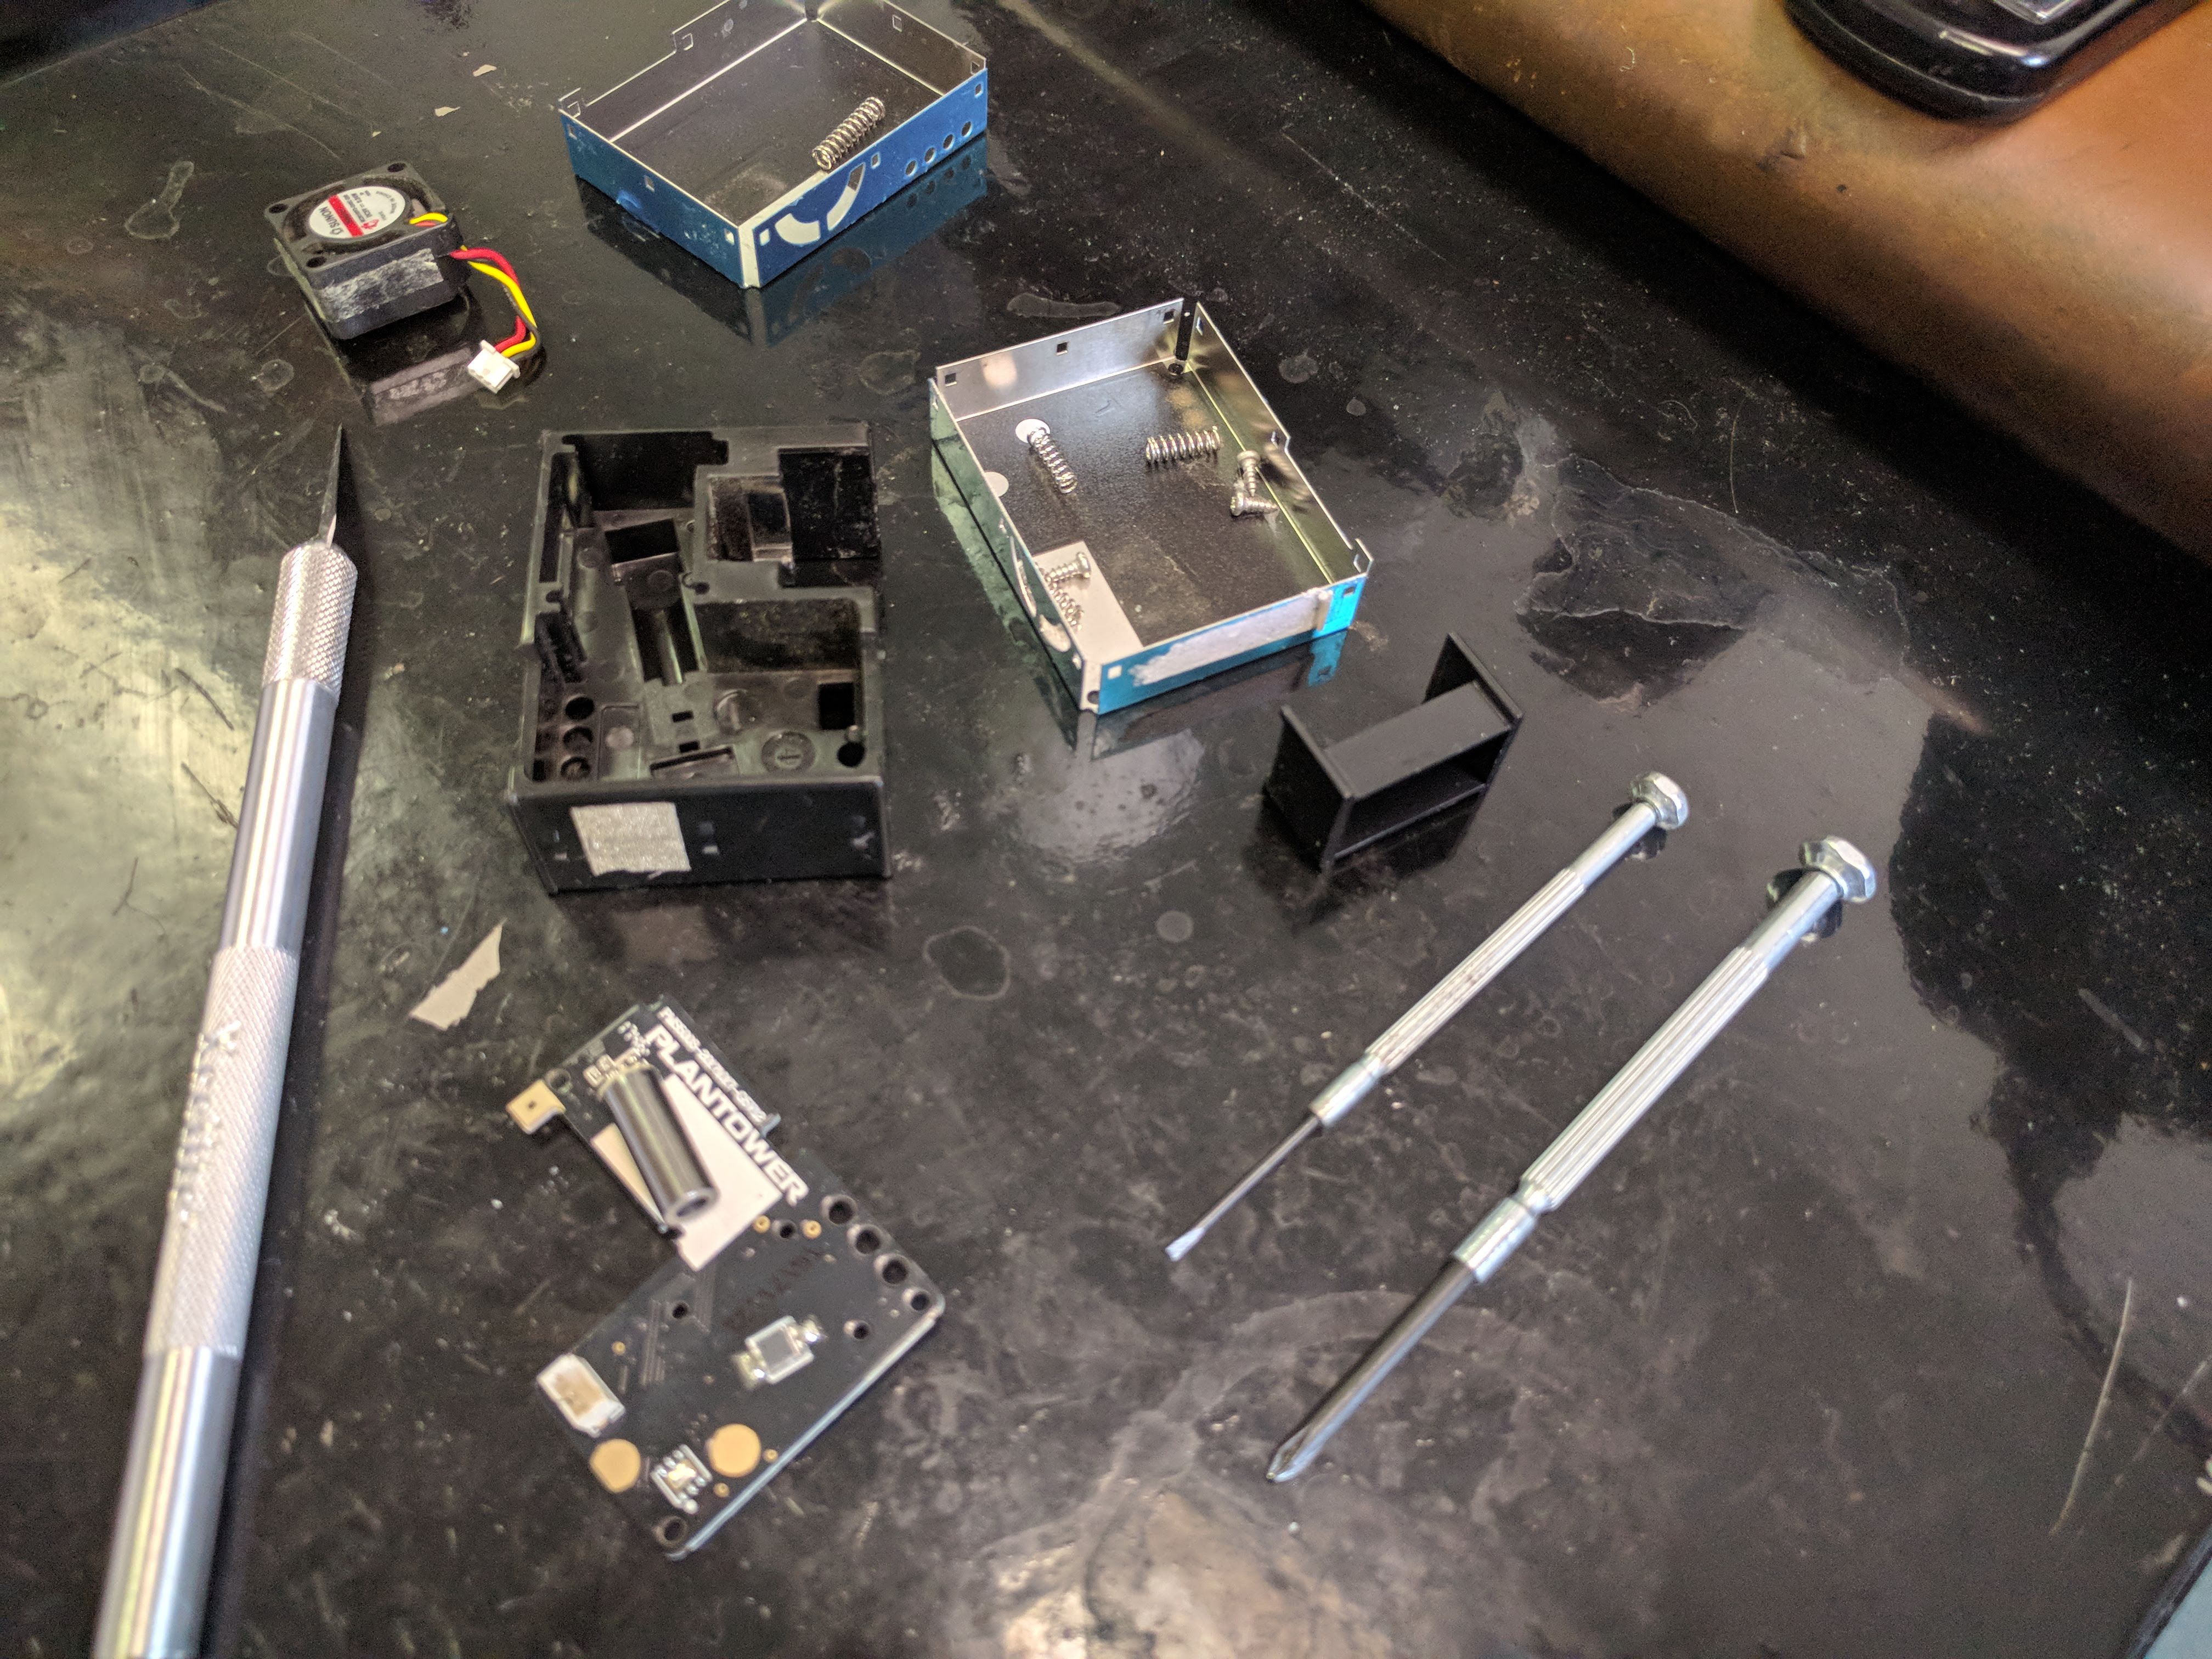
Taking out the Circuit Board
Once you have the metal off of the sensor you should be able
to see the inside circuit board on one side of the sensor and the laser and fan
plug on the other. Disconnect the fan plug by pulling the red black and yellow
wire until it dislodges from the back of the board. 
Flip the board over and you'll see a small H-shaped plastic
cover over the connection port. Slide that out by hand and it will reveal the
rest of the board. 
There are three screws on the board, use a small Philips head screwdriver to remove them. Then, you can slide the board out. Before you handle the circuit board make sure to ground yourself against a metal surface so you don't fry the board with static.
The easiest way to slide the circuit board out is to take a
small screwdriver and lever it under the board through the connection port hole.
Once you slide it out you can start cleaning the sensor. 

Cleaning the Sensor
We used a method from the Shinyei PPD60PV datasheet involving distilled water and q-tips. Take a small amount of distilled water and dip one end of a q-tip in. Carefully go over the lens of the sensor with the damp q-tip and the IR receiver located opposite of the lens. Use the other end of the q-tip to gently dry off the sensor and wait a few minutes for it to air dry. Make sure to not to touch the tips of the q-tip with your hands, as the oils from your hands could get on the q-tip and may affect the sensor.

Use the q-tip to clean the rest of the inside surface of the
sensor. Ours had a small spider in it (RIP little guy) who made a home in our
sensor, causing it to malfunction. Make sure you get any dirt or debris on the
inside surface of the metal and plastic.
Reassembling the Sensor
Reassembly is relatively straightforward. Once the sensor
components are dry (about 5 minutes), place it the board back into the plastic
case, threading the cable through the hole in the plastic. Reconnect the fan cable
to the back side of the board and flip the sensor so the board is visible.
Screw in the three screws that attach the board to its plastic case. Insert the
H-shaped plastic cover into the slot over the connection port. Make sure the
springs are back in the holes on each side of the sensor. Then, slide the metal
covers over each side of the assembled sensor. You may have to press the metal
down over the black slide clips, but if it's not too bent, they should click
back into place. 
Testing the Sensor - UPDATE 10/08/18
For our first test of the repaired sensor, we used an Arduino mega and some adapted code from Adafruit. Below is a picture of the setup.


For some reason, this did not track well at all with the PurpleAir, so we initially thought the sensor may still be broken and the repair may have failed. However, this may have been due to our code or the way our sensor was connected to the board. Still working on this, but once I have it I'll post a graph of our PurpleAir values vs our repaired PMS5003.
For our second test, we decided to insert the repaired sensor back into the PurpleAir and see if it tracked with the other operational Channel A of the PurpleAir sensor. Taking apart a PurpleAir and swapping out sensors is relatively easy, if there's a desire for a similar guide or some tips, leave a comment and we can do a similar tutorial. Below are some early comparison graphs of the repaired sensor, note that the repair happened at around 11:30 and the repaired sensor was Channel B


These graphs seem to track as well as before the repair took place. Before the repair, we were using a brand new PMS5003 we inserted into Channel B, which was running for about a month. This suggests that, despite our first test, the repair was most likely a success.
Since it's only been a few hours, we'll keep monitoring how well these track (and maybe have an R2 value over a few days or so), but for now it tentatively looks like you can clean and repair a PMS5003 and fix a broken channel in a PurpleAir. However, your mileage may vary if you try to compare different code or configurations of the PMS5003 to the PurpleAir data.
Thanks for reading and good luck!
14 Comments
@kkoerner so cool to see this post as well as the guts of the air sensor. Looking forward to the update on the results.
Reply to this comment...
Log in to comment
This is great, Karl!
So many people are using the PMS 5003 these days and probably wondering how to do this. I'm looking forward to circulating this farther after you do the post-op validation.
Reply to this comment...
Log in to comment
Love this!
Reply to this comment...
Log in to comment
Hi @kkoerner, you wrote above that "Taking apart a PurpleAir and swapping out sensors is relatively easy, if there's a desire for a similar guide or some tips, leave a comment and we can do a similar tutorial."
I'd love to take you up on that offer! It would really help to:
Sure thing, I'll see if I can get something written up within the next week.
I 'm having trouble with the PVC case, wondering if you've taken that apart before getting to the blue box
I found this post from 2017
azchrisf
Posts: 240 Copperwood WX
Re: personal air pollution sensor « Reply #35 on: December 25, 2017, 11:21:08 AM »
Incase anyone is interested, I opened up my sensor to take a look. I took pictures of the board and components. It's basically a cobbled together experiment...not really professional.
Pictures: https://www.dropbox.com/sh/8h5wu03y97385ns/AAAH2s3hma7h4qTDHP4ydDoya?dl=0
Is this a question? Click here to post it to the Questions page.
+1
One of the channels in my PurpleAir started reporting a value of 0 constantly. I suspect I’m going to have to take it apart and replace or clean the sensor.
Would love guidance on how to take apart the PurpleAir. I’m not the best at hardware.
Reply to this comment...
Log in to comment
I had the same exact problem with my PMS 7003 sensor! I was getting suspiciously high particulate matter readings on a very clear day. I found this article after some googling so I decided to clean the sensor. After prying the case open I found a tiny spider's nest in the corner of the pcb! You can see the nest in the left of the pcb, just above the fan in my photo. After wiping down the pcb and the sensor everything is working normally again. Thanks for this helpful article.
Is this a question? Click here to post it to the Questions page.
haha! Were you surprised???
Is this a question? Click here to post it to the Questions page.
Haha yeah it was very surprising. Before I opened it I figured it was just a little dust.
Reply to this comment...
Log in to comment
I did this! Don't forget the springs. There are 3 sizes and four springs. So far the device corresponds to a duplicate system. Was reading very high. Cleans well. So far so good. Not easy to dissemble . Take your time.
Reply to this comment...
Log in to comment
How was the sensor malfunctioning? was it reading zero? I debating whether to unpack a purpleair, but it doesn't seem to be malfunctioning in the way that indicates a spider invasion.
Is this a question? Click here to post it to the Questions page.
Reply to this comment...
Log in to comment
I used your manual to clean my Purpleair PMS5003 sensor. Ended up messing both of them up (sensor values didn't match by a large margin) - it's almost impossible to delicately clean them.
Ended up buying new PMS5003 and putting them in instead, they are so cheap these days.
Reply to this comment...
Log in to comment
Login to comment.