Video Spectrometer Construction

Introduction
This page documents the construction of the video spectrometer.
This hardware design will soon be released under the CERN Open Hardware License 1.1. A draft agreement is under development here: http://publiclaboratory.org/wiki/ohl-agreement and should be complete in a few days.
Construction takes approx. 1 hour. Open-source software to operate this spectrometer is available at: http://github.com/jywarren/spectral-workbench
Materials
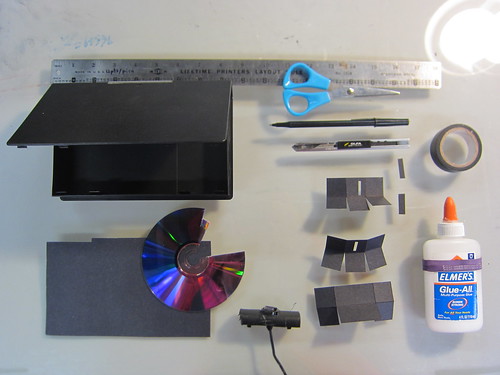
Everything necessary to make a DIY Spectrometer (let's try to reduce this list!):
- a black VHS case like from Blockbuster
- a straight-edge
- scissors
- X-acto knife
- a pen
- black tape (gaffe or electrical)
- white glue
- hot glue and a hot glue gun
- a letter or A4-sized sheet of stiff black card paper
- a DVD-R
- a USB webcam, preferably over 640x480/VGA resolution, 780 HD is best
- a computer
Construction

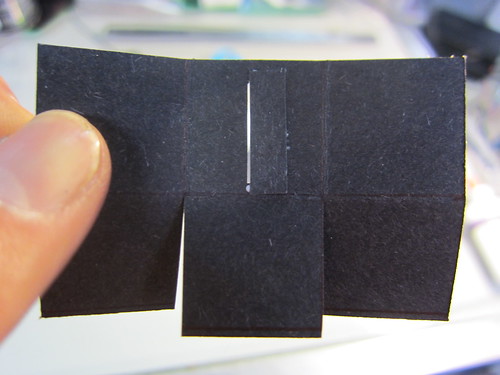
1. Cut a 2x3 square piece of black cardstock where each square is 7/8" x 7/8"
Crease it as shown so you can make a stable box-like shape. Cut an extra bit of 7/8"-long card as shown -- this will be used to make a very narrow slot. Be sure the sides of the slot and the extra bit are completely straight! Use a straight-edge.
This is the "bracket" for your precision slot.
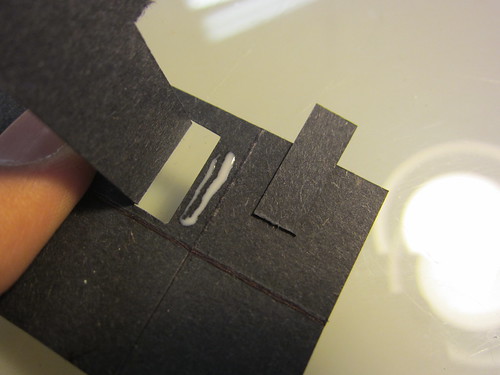
2. Glue the strip onto your bracket to make a very precise slot
It should be less then 1mm wide. You can use a piece of card paper to keep a consistent width, but I prefer to eyeball it. If you use just a tiny bit of white glue, it should give you a few seconds to get it right before it's too dry to move. Let this dry thoroughly before continuing.
3. Check your precise slot by looking through it at a light
The slot should be roughly centered, horizontally, and should extend to within 3-4mm of either the top and bottom. It should be of even width, a bit less than a millimeter.
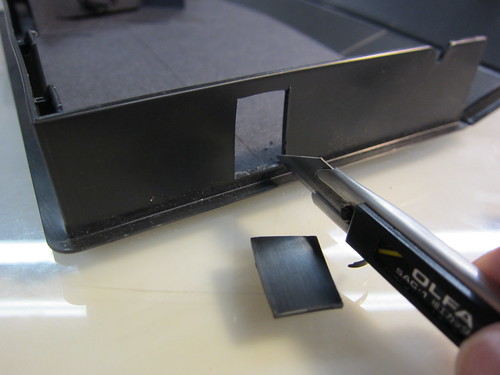
4. Cut a hole centered on the guideline you drew
It should be as tall as your slot but leave enough plastic to remain stiff.
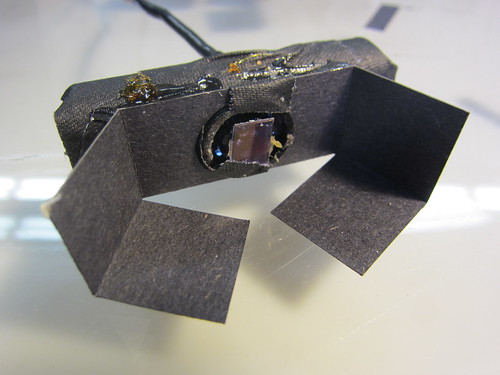
5. Glue your slot in so it covers the hole you cut
You'll have to bend the center flap under so that the slot directly abuts the hole. Make sure it lines up with the light beam guideline you drew.
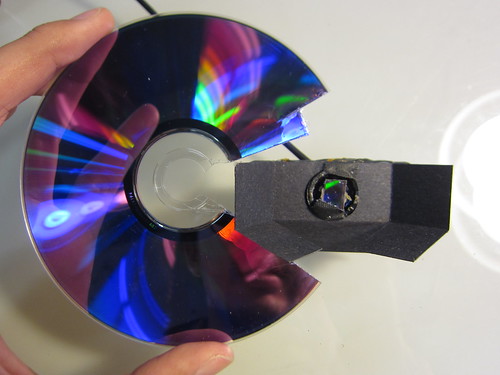
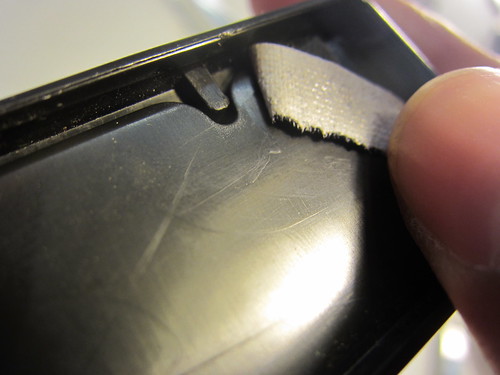
6. Cut a piece of DVD-R and peel it apart carefully
Don't get any fingerprints on it! The DVD piece should be in the orientation shown -- so that the "track lines" of the DVD-R remain vertical in the camera's image. You won't be able to see the lines, so keep track of them as you make the cut and get ready to attach it to the camera.
Once you cut the DVD-R piece, you should be able to split the layers apart using the tip of an X-acto knife. Choose the most transparent part.
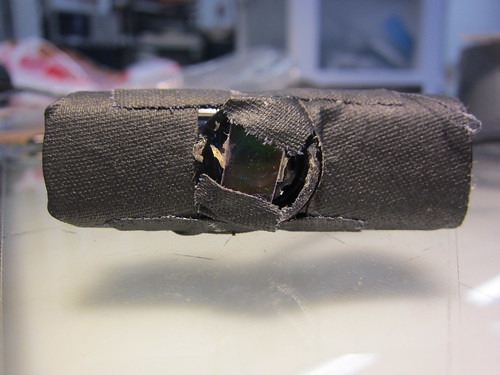
7. Tape or glue the DVD-R bit in front of the lens
Here I covered the camera too, since it has built-in LED lights which would interfere with our readings.
8. Mount your camera
Use hot glue or something similar to firmly and sturdily mount your camera on a piece of card (cut similarly to your slot). How you do this will vary depending on your webcam but it should be horizontal and pointed straight . This can be tough -- a lot of hot glue can be helpful.
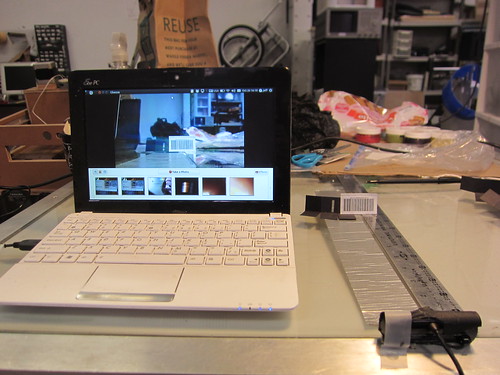
10. Look at a barcode through the webcam to adjust its range of focus
Rotate the camera lens to adjust the focus. You may need to gently use a pair of needle-nosed pliers at first. Anything between around 4-11 inches away from the lens should be in focus. This means your slot will be in focus when it's installed opposite the camera.
10. Turn the camera lens to focus it
A barcode is a nice test since it has many fine lines -- just like the spectra will have. It should be in focus at about 8" away from the camera.
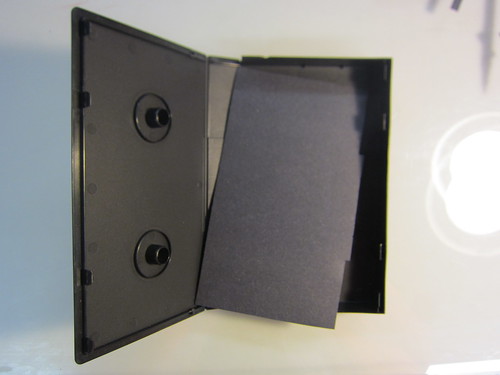
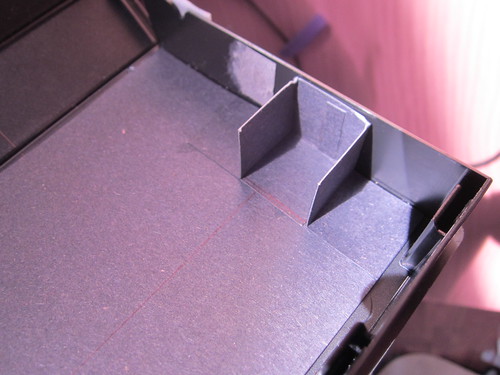
11. Make a base card
Cut a flat piece of black card (the stiffer the better!) and glue or double-sided tape it to the bottom of your VHS case.
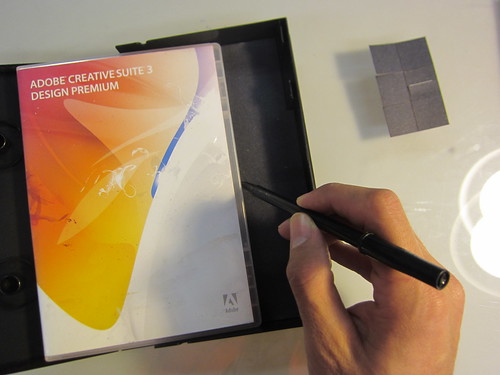
12. Use some proprietary software (packaging) to draw a straight line
This will be the path of your beam of light, so it should allow room for a webcam at one end, and a narrow slot at the other. I drew it a little closer to the outer edge of the case, maybe 2" from the edge.
Adobe Creative Suite is so great for drawing straight lines! ;-)
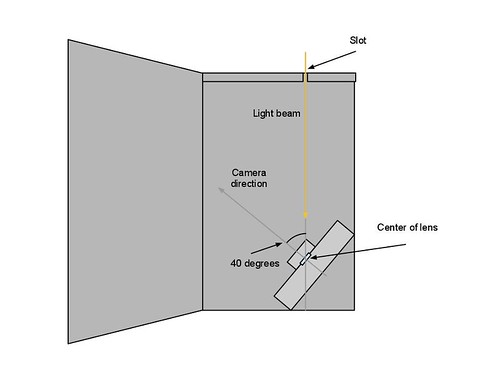
13. Position the webcam to point 40 degrees away from the slot
This varies by camera, so don't glue it down yet.
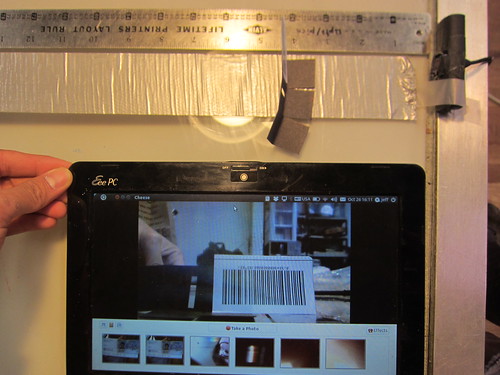
14. Line up the camera lens with your drawn guideline
For this camera, it was at 50 degrees away from pointing straight at the slot. See the following step for a protractor you can use to measure.
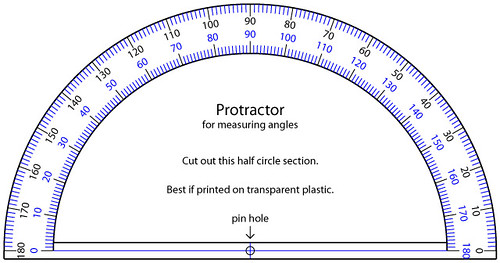
14a. Protractor
Print this or trace it to measure the angle of your camera.
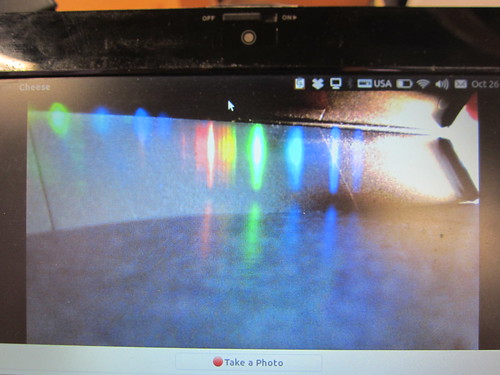
15. Adjust the angle of the camera so that you can see the whole spectrum
Even with the top open, you can see that there are finer lines (indicating good focus and a narrow, precise slot) and see the range of colors. An angle of 40 degrees away from the slot should be good but you may need to make finer adjustments, and it varies by camera. Once you have it, glue the camera in place and secure it with a lot of hot glue.

16. Knot the USB cable and tape it in place
Leave a couple inches of slack in the box. You can cut a small hole for the cable to exit the box; the knot assures that the camera is not disturbed even if you yank the cable.
17. Close off any potential light leaks with dark tape
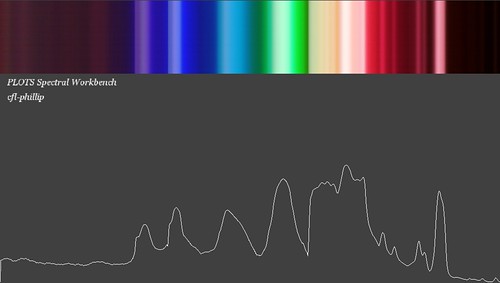
18. Boot up the Spectral Workbench software to see a spectrum
http://github.com/jywarren/spectral-workbench
You may have to press the up/down arrows to choose the height you're sampling from. Press Tab to choose the calibration mode which will help you line things up.
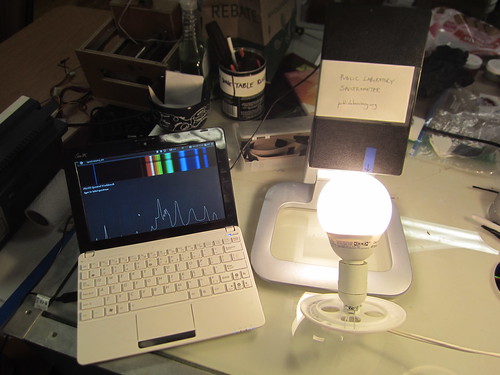
19. A completed spectrometer
I added a blue tape with an arrow so you know where the slot is, and mounted it on an old LCD monitor stand. Pro-fessional!
Using your spectrometer
The PLOTS Spectral Workbench software is not yet complete, but with a little configuration you should be able to get it running and start saving spectra. A video on how to use the spectrometer is coming soon.
Design refinements
The design is still being modified and improved. If you have ideas for how to make it better, chip in on the mailing list. Some ideas are listed here; feel free to contribute:
- The webcam mounting is not the most stable. What about using friendly plastic, which softens and becomes moldable in warm water, to create a very sturdy base for the camera? In a kit, we could ship an ounce or two for a couple dollars. 28 oz = $50. If it goes wrong you can always warm it up again.