Revisions for Soda Bottle Rig
| 8 CURRENT | warren |
February 23, 2017 02:00
| about 8 years ago
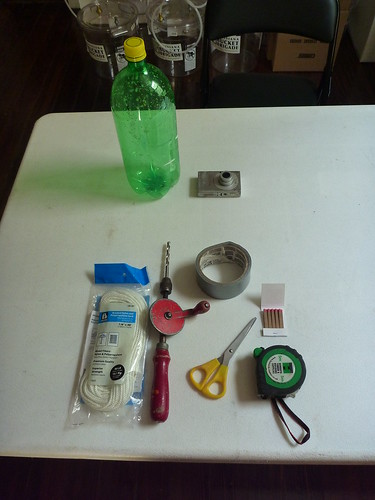
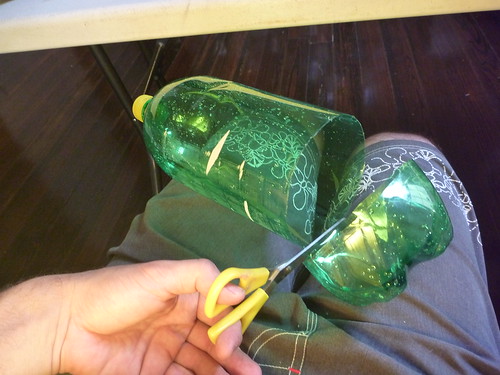
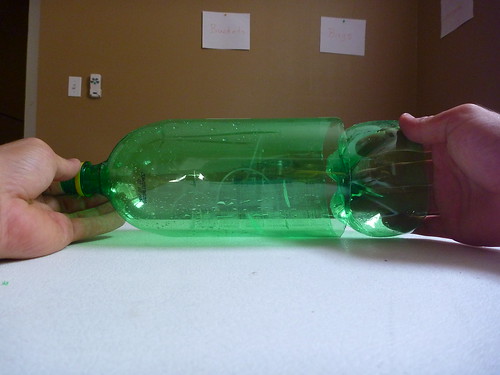
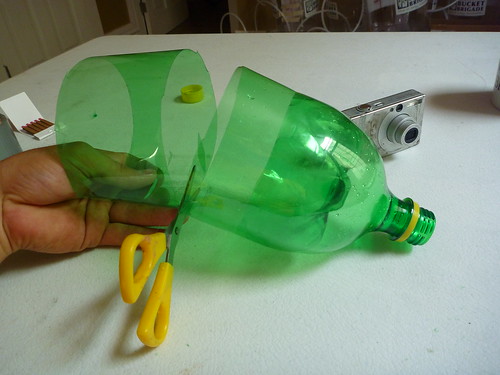
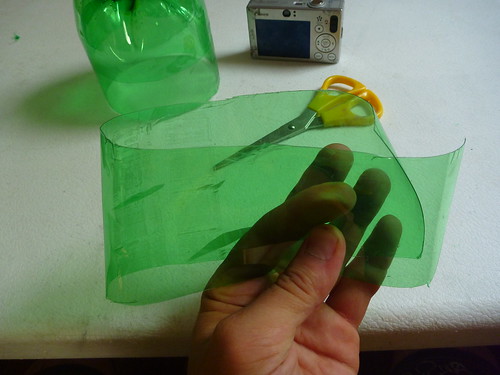
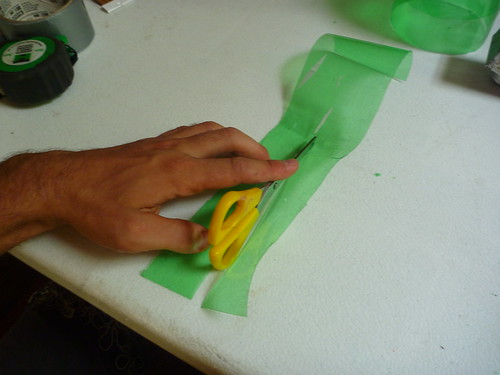
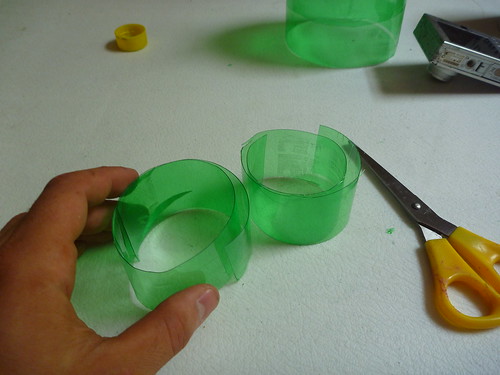
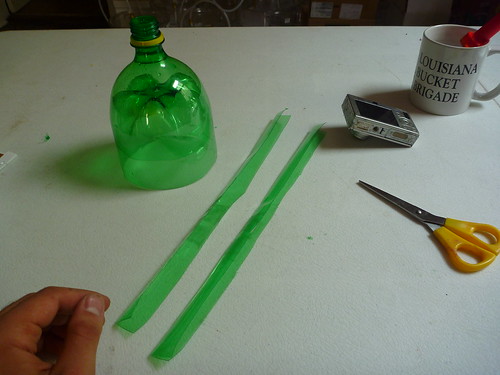
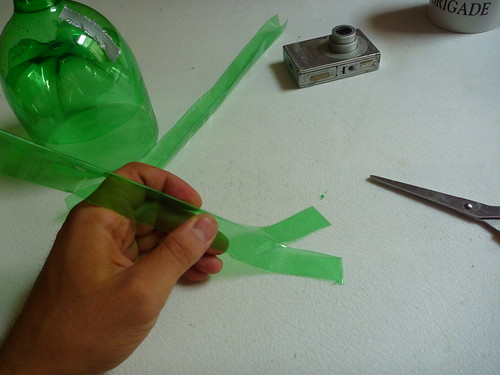
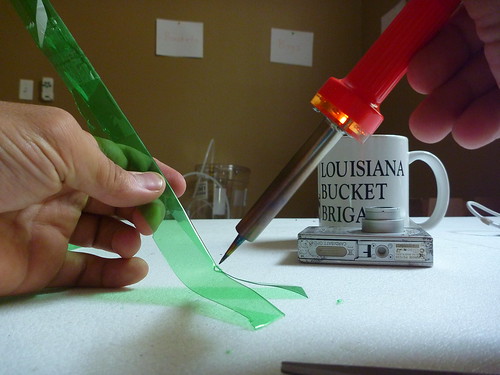
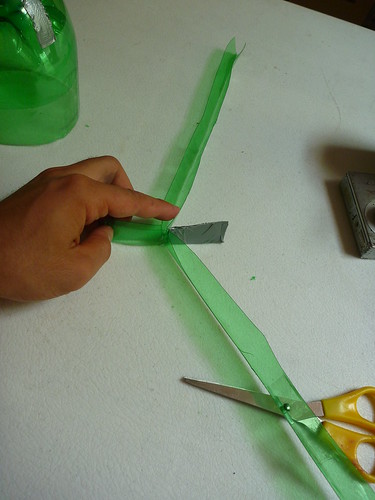
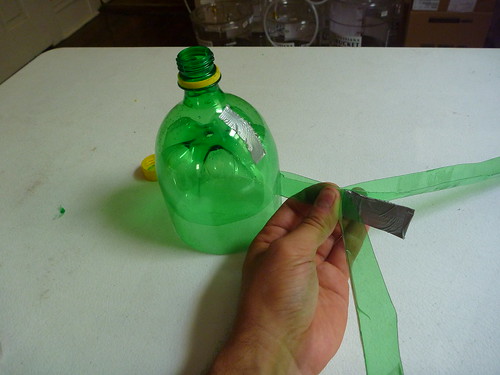
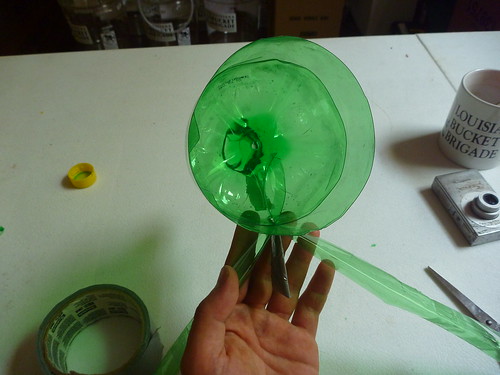
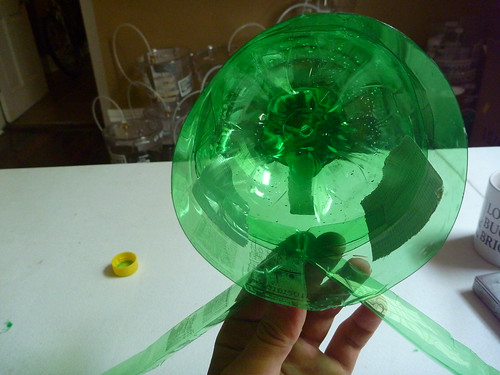
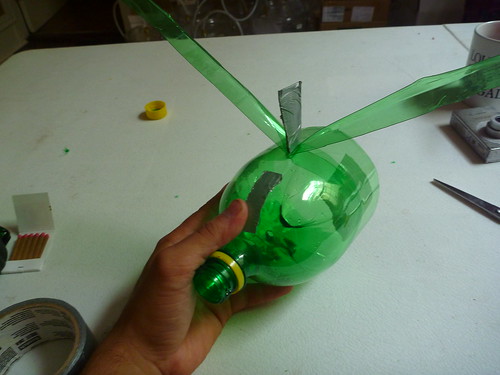
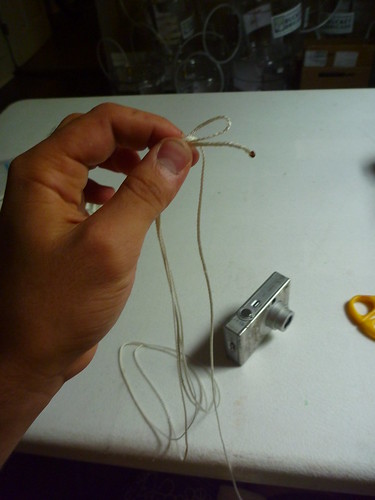
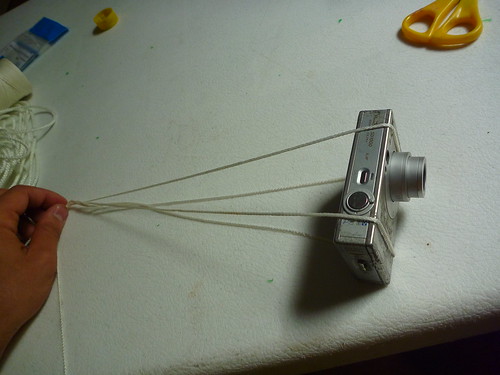
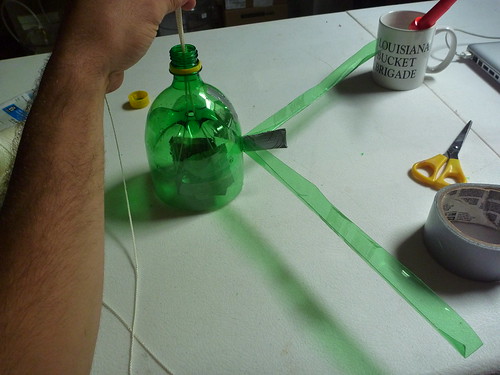
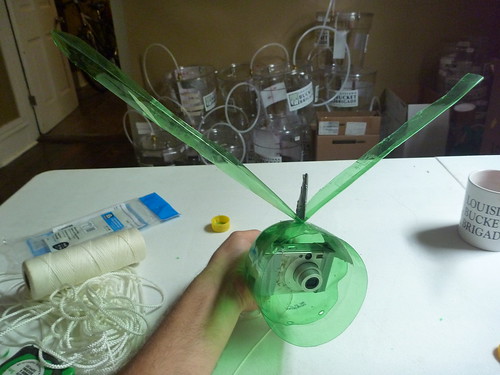
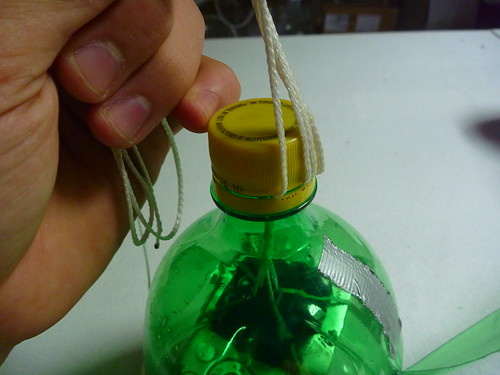
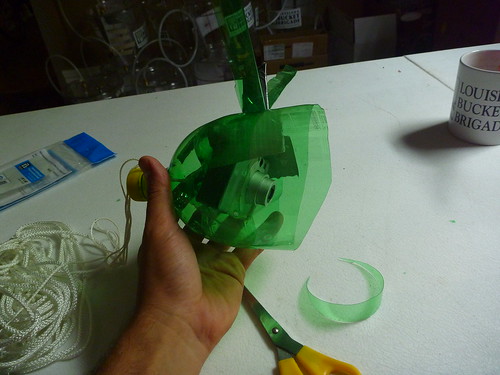
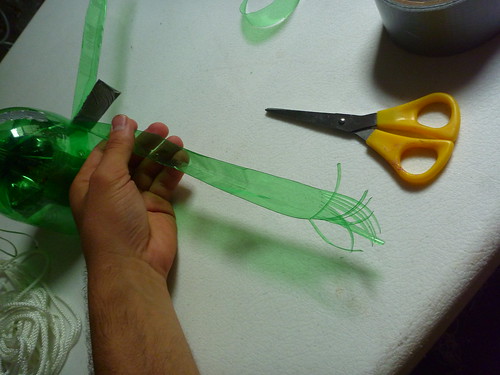
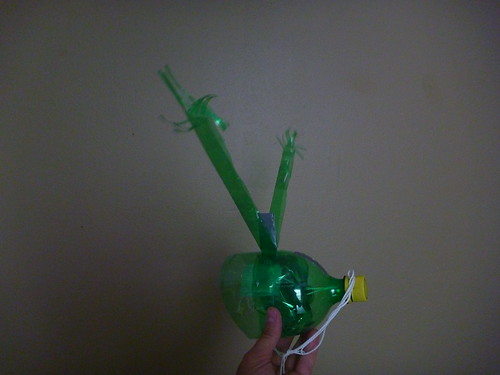
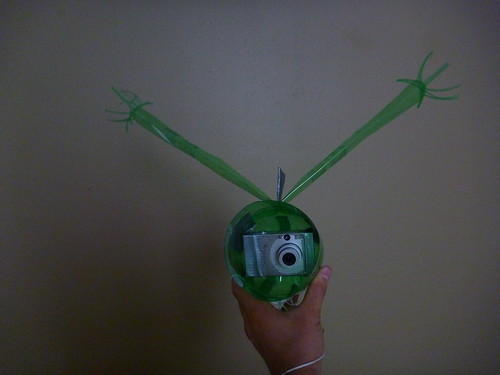
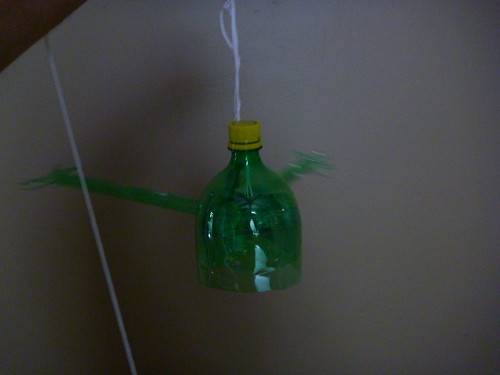
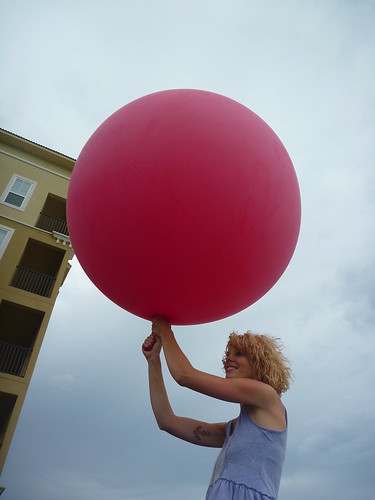
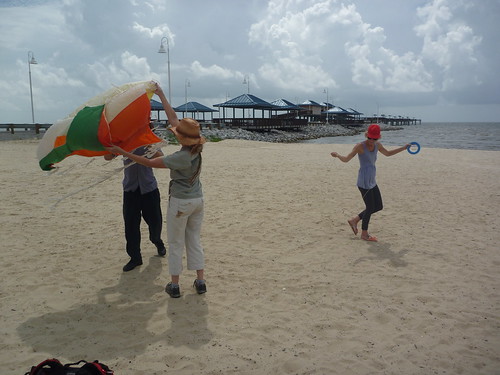
A cut-off soda bottle can be used as a cheap camera mounting because the camera sits snugly against the inside of the bottle. The camera is also effectively protected from impacts - a disadvantage of the Picavet suspension. Making a rubber band harness for the soda bottle rig: Fitting and flying a camera in a soda bottle rig: Simplified Soda bottle rig: Build a Soda Bottle RigYou can also follow this visual step by step instructions below: Tools you'll need Drill the bottom of the bottle Cut the bottom of the bottle : Insert the bottom of the bottle you just cut in the bottle itself until the head : Cut a large strip of the bottle, leaving enough on the bottle head side to host a camera : Cut the large stripe : Cut the large stripe in the length : Now you have 2 narrow stripes : Fold them in 2 in the length : Both of them : Cut the end of each of the narrow stripes in a "pig feet" : If you have a welder, you can make the "pig feet" more durable by "welding" the end of the cut : Put "feet to feet" the folded stripes : Duct tape one side of the "feet nails" : Mark where you want to insert the feets : With a blade - ideally with the soldering iron, make a cut the width of the stripe : Insert the "wings" :) Tape the wings in : Almost there, nice! Taking shape! Pass the long thin rope through the nozzle : Make 2 loops (4 threads) with the thread : Adjust the tension of the 2 loops : A simple knot with the 4 threads in : Fix the threads with string tape to camera (real strong, if you use bad tape your camera may fall from 500ft in the water / in the sand / on the rocks :_( Pull the rope back in the body : Pull stronger till the camera doesn't move much anymore: Screw the cap in, with the threads forced (and probably twisted while you screw in): The screw cap with hold the 4 threads securely, it easier to adjust, and also be easy to remove : Test the balance of your devicem ideally with a fan, your camera mount should swing gently in the wind and follow the wind like a weather vane :) To avoid having of the mount with the pictures you take, you can crop the extra plastic : If you want to avoid turbulence and aggravate wind drag you can make fringes at the end of each wings : You are ready to fly ! Get out of here, inflate a balloon: or a kite : Attach your camera mount to the kite, and walk on the beach / or sail !
Watch a video by Pat Coyle about the origins of the soda bottle rig here: |
Revert | |
| 7 | mathew |
September 19, 2012 23:28
| over 12 years ago
This design has been retired in favor of the
PET Bottle and Rubber Band Rig »
A cut-off soda bottle can be used as a cheap camera mounting because the camera sits snugly against the inside of the bottle. The camera is also effectively protected from impacts - a disadvantage of the Picavet suspension. Making a rubber band harness for the soda bottle rig: Fitting and flying a camera in a soda bottle rig: Simplified Soda bottle rig: Build a Soda Bottle RigYou can also follow this visual step by step instructions below: Tools you'll need Drill the bottom of the bottle Cut the bottom of the bottle : Insert the bottom of the bottle you just cut in the bottle itself until the head : Cut a large strip of the bottle, leaving enough on the bottle head side to host a camera : Cut the large stripe : Cut the large stripe in the length : Now you have 2 narrow stripes : Fold them in 2 in the length : Both of them : Cut the end of each of the narrow stripes in a "pig feet" : If you have a welder, you can make the "pig feet" more durable by "welding" the end of the cut : Put "feet to feet" the folded stripes : Duct tape one side of the "feet nails" : Mark where you want to insert the feets : With a blade - ideally with the soldering iron, make a cut the width of the stripe : Insert the "wings" :) Tape the wings in : Almost there, nice! Taking shape! Pass the long thin rope through the nozzle : Make 2 loops (4 threads) with the thread : Adjust the tension of the 2 loops : A simple knot with the 4 threads in : Fix the threads with string tape to camera (real strong, if you use bad tape your camera may fall from 500ft in the water / in the sand / on the rocks :_( Pull the rope back in the body : Pull stronger till the camera doesn't move much anymore: Screw the cap in, with the threads forced (and probably twisted while you screw in): The screw cap with hold the 4 threads securely, it easier to adjust, and also be easy to remove : Test the balance of your devicem ideally with a fan, your camera mount should swing gently in the wind and follow the wind like a weather vane :) To avoid having of the mount with the pictures you take, you can crop the extra plastic : If you want to avoid turbulence and aggravate wind drag you can make fringes at the end of each wings : You are ready to fly ! Get out of here, inflate a balloon: or a kite : Attach your camera mount to the kite, and walk on the beach / or sail !
Watch a video by Pat Coyle about the origins of the soda bottle rig here: |
Revert | |
| 6 | warren |
April 27, 2012 18:08
| almost 13 years ago
This design has been retired in favor of the
PET Bottle and Rubber Band Rig »
A cut-off soda bottle can be used as a cheap camera mounting because the camera sits snugly against the inside of the bottle. The camera is also effectively protected from impacts - a disadvantage of the Picavet suspension. Making a rubber band harness for the soda bottle rig: Fitting and flying a camera in a soda bottle rig: Simplified Soda bottle rig: Build a Soda Bottle RigYou can also follow this visual step by step instructions below: Tools you'll need Drill the bottom of the bottle Cut the bottom of the bottle : Insert the bottom of the bottle you just cut in the bottle itself until the head : Cut a large strip of the bottle, leaving enough on the bottle head side to host a camera : Cut the large stripe : Cut the large stripe in the length : Now you have 2 narrow stripes : Fold them in 2 in the length : Both of them : Cut the end of each of the narrow stripes in a "pig feet" : If you have a welder, you can make the "pig feet" more durable by "welding" the end of the cut : Put "feet to feet" the folded stripes : Duct tape one side of the "feet nails" : Mark where you want to insert the feets : With a blade - ideally with the soldering iron, make a cut the width of the stripe : Insert the "wings" :) Tape the wings in : Almost there, nice! Taking shape! Pass the long thin rope through the nozzle : Make 2 loops (4 threads) with the thread : Adjust the tension of the 2 loops : A simple knot with the 4 threads in : Fix the threads with string tape to camera (real strong, if you use bad tape your camera may fall from 500ft in the water / in the sand / on the rocks :_( Pull the rope back in the body : Pull stronger till the camera doesn't move much anymore: Screw the cap in, with the threads forced (and probably twisted while you screw in): The screw cap with hold the 4 threads securely, it easier to adjust, and also be easy to remove : Test the balance of your devicem ideally with a fan, your camera mount should swing gently in the wind and follow the wind like a weather vane :) To avoid having of the mount with the pictures you take, you can crop the extra plastic : If you want to avoid turbulence and aggravate wind drag you can make fringes at the end of each wings : You are ready to fly ! Get out of here, inflate a balloon: or a kite : Attach your camera mount to the kite, and walk on the beach / or sail !
Watch a video by Pat Coyle about the origins of the soda bottle rig here: |
Revert | |
| 5 | mathew |
January 30, 2012 04:41
| about 13 years ago
This page has been replacedThe new page is PET Bottle and Rubber Band Rig A cut-off soda bottle can be used as a cheap camera mounting because the camera sits snugly against the inside of the bottle. The camera is also effectively protected from impacts - a disadvantage of the Picavet suspension. Making a rubber band harness for the soda bottle rig: Fitting and flying a camera in a soda bottle rig: Simplified Soda bottle rig: Build a Soda Bottle RigYou can also follow this visual step by step instructions below: Tools you'll need Drill the bottom of the bottle Cut the bottom of the bottle : Insert the bottom of the bottle you just cut in the bottle itself until the head : Cut a large strip of the bottle, leaving enough on the bottle head side to host a camera : Cut the large stripe : Cut the large stripe in the length : Now you have 2 narrow stripes : Fold them in 2 in the length : Both of them : Cut the end of each of the narrow stripes in a "pig feet" : If you have a welder, you can make the "pig feet" more durable by "welding" the end of the cut : Put "feet to feet" the folded stripes : Duct tape one side of the "feet nails" : Mark where you want to insert the feets : With a blade - ideally with the soldering iron, make a cut the width of the stripe : Insert the "wings" :) Tape the wings in : Almost there, nice! Taking shape! Pass the long thin rope through the nozzle : Make 2 loops (4 threads) with the thread : Adjust the tension of the 2 loops : A simple knot with the 4 threads in : Fix the threads with string tape to camera (real strong, if you use bad tape your camera may fall from 500ft in the water / in the sand / on the rocks :_( Pull the rope back in the body : Pull stronger till the camera doesn't move much anymore: Screw the cap in, with the threads forced (and probably twisted while you screw in): The screw cap with hold the 4 threads securely, it easier to adjust, and also be easy to remove : Test the balance of your devicem ideally with a fan, your camera mount should swing gently in the wind and follow the wind like a weather vane :) To avoid having of the mount with the pictures you take, you can crop the extra plastic : If you want to avoid turbulence and aggravate wind drag you can make fringes at the end of each wings : You are ready to fly ! Get out of here, inflate a balloon: or a kite : Attach your camera mount to the kite, and walk on the beach / or sail !
Watch a video by Pat Coyle about the origins of the soda bottle rig here: |
Revert | |
| 4 | mathew |
August 27, 2011 04:41
| over 13 years ago
A cut-off soda bottle can be used as a cheap camera mounting because the camera sits snugly against the inside of the bottle. The camera is also effectively protected from impacts - a disadvantage of the Picavet suspension. Making a rubber band harness for the soda bottle rig: Fitting and flying a camera in a soda bottle rig: Simplified Soda bottle rig: Build a Soda Bottle RigYou can also follow this visual step by step instructions below: Tools you'll need Drill the bottom of the bottle Cut the bottom of the bottle : Insert the bottom of the bottle you just cut in the bottle itself until the head : Cut a large strip of the bottle, leaving enough on the bottle head side to host a camera : Cut the large stripe : Cut the large stripe in the length : Now you have 2 narrow stripes : Fold them in 2 in the length : Both of them : Cut the end of each of the narrow stripes in a "pig feet" : If you have a welder, you can make the "pig feet" more durable by "welding" the end of the cut : Put "feet to feet" the folded stripes : Duct tape one side of the "feet nails" : Mark where you want to insert the feets : With a blade - ideally with the soldering iron, make a cut the width of the stripe : Insert the "wings" :) Tape the wings in : Almost there, nice! Taking shape! Pass the long thin rope through the nozzle : Make 2 loops (4 threads) with the thread : Adjust the tension of the 2 loops : A simple knot with the 4 threads in : Fix the threads with string tape to camera (real strong, if you use bad tape your camera may fall from 500ft in the water / in the sand / on the rocks :_( Pull the rope back in the body : Pull stronger till the camera doesn't move much anymore: Screw the cap in, with the threads forced (and probably twisted while you screw in): The screw cap with hold the 4 threads securely, it easier to adjust, and also be easy to remove : Test the balance of your devicem ideally with a fan, your camera mount should swing gently in the wind and follow the wind like a weather vane :) To avoid having of the mount with the pictures you take, you can crop the extra plastic : If you want to avoid turbulence and aggravate wind drag you can make fringes at the end of each wings : You are ready to fly ! Get out of here, inflate a balloon: or a kite : Attach your camera mount to the kite, and walk on the beach / or sail !
Watch a video by Pat Coyle about the origins of the soda bottle rig here: |
Revert | |
| 3 | mathew |
August 27, 2011 03:42
| over 13 years ago
A cut-off soda bottle can be used as a cheap camera mounting because the camera sits snugly against the inside of the bottle. The camera is also effectively protected from impacts - a disadvantage of the Picavet suspension. Making a rubber band harness for the soda bottle rig: Fitting and flying a camera in a soda bottle rig: Simplified Soda bottle rig: Build a Soda Bottle RigYou can also follow this visual step by step instructions below: Tools you'll need Drill the bottom of the bottle Cut the bottom of the bottle : Insert the bottom of the bottle you just cut in the bottle itself until the head : Cut a large strip of the bottle, leaving enough on the bottle head side to host a camera : Cut the large stripe : Cut the large stripe in the length : Now you have 2 narrow stripes : Fold them in 2 in the length : Both of them : Cut the end of each of the narrow stripes in a "pig feet" : If you have a welder, you can make the "pig feet" more durable by "welding" the end of the cut : Put "feet to feet" the folded stripes : Duct tape one side of the "feet nails" : Mark where you want to insert the feets : With a blade - ideally with the soldering iron, make a cut the width of the stripe : Insert the "wings" :) Tape the wings in : Almost there, nice! Taking shape! Pass the long thin rope through the nozzle : Make 2 loops (4 threads) with the thread : Adjust the tension of the 2 loops : A simple knot with the 4 threads in : Fix the threads with string tape to camera (real strong, if you use bad tape your camera may fall from 500ft in the water / in the sand / on the rocks :_( Pull the rope back in the body : Pull stronger till the camera doesn't move much anymore: Screw the cap in, with the threads forced (and probably twisted while you screw in): The screw cap with hold the 4 threads securely, it easier to adjust, and also be easy to remove : Test the balance of your devicem ideally with a fan, your camera mount should swing gently in the wind and follow the wind like a weather vane :) To avoid having of the mount with the pictures you take, you can crop the extra plastic : If you want to avoid turbulence and aggravate wind drag you can make fringes at the end of each wings : You are ready to fly ! Get out of here, inflate a balloon: or a kite : Attach your camera mount to the kite, and walk on the beach / or sail !
Watch a video by Pat Coyle about the origins of the soda bottle rig here: |
Revert | |
| 2 | mathew |
August 27, 2011 03:30
| over 13 years ago
A cut-off soda bottle can be used as a cheap camera mounting because the camera sits snugly against the inside of the bottle. The camera is also effectively protected from impacts - a disadvantage of the Picavet suspension. Making a rubber band harness for the soda bottle rig: Fitting and flying a camera in a soda bottle rig: Simplified Soda bottle rig: Build a Soda Bottle RigYou can also follow this visual step by step instructions below: Tools you'll need Drill the bottom of the bottle Cut the bottom of the bottle : Insert the bottom of the bottle you just cut in the bottle itself until the head : Cut a large strip of the bottle, leaving enough on the bottle head side to host a camera : Cut the large stripe : Cut the large stripe in the length : Now you have 2 narrow stripes : Fold them in 2 in the length : Both of them : Cut the end of each of the narrow stripes in a "pig feet" : If you have a welder, you can make the "pig feet" more durable by "welding" the end of the cut : Put "feet to feet" the folded stripes : Duct tape one side of the "feet nails" : Mark where you want to insert the feets : With a blade - ideally with the soldering iron, make a cut the width of the stripe : Insert the "wings" :) Tape the wings in : Almost there, nice! Taking shape! Pass the long thin rope through the nozzle : Make 2 loops (4 threads) with the thread : Adjust the tension of the 2 loops : A simple knot with the 4 threads in : Fix the threads with string tape to camera (real strong, if you use bad tape your camera may fall from 500ft in the water / in the sand / on the rocks :_( Pull the rope back in the body : Pull stronger till the camera doesn't move much anymore: Screw the cap in, with the threads forced (and probably twisted while you screw in): The screw cap with hold the 4 threads securely, it easier to adjust, and also be easy to remove : Test the balance of your devicem ideally with a fan, your camera mount should swing gently in the wind and follow the wind like a weather vane :) To avoid having of the mount with the pictures you take, you can crop the extra plastic : If you want to avoid turbulence and aggravate wind drag you can make fringes at the end of each wings : You are ready to fly ! Get out of here, inflate a balloon: or a kite : Attach your camera mount to the kite, and walk on the beach / or sail !
Watch a video by Pat Coyle about the origins of the soda bottle rig here: |
Revert | |
| 1 | warren |
June 01, 2011 19:53
| almost 14 years ago
A cut-off soda bottle can be used as a cheap camera mounting because the camera sits snugly against the inside of the bottle. The camera is also effectively protected from impacts - a disadvantage of the Picavet suspension. Watch a video by PatCoyle about the soda bottle rig here: Build a Soda Bottle RigYou can also follow this visual step by step instructions below: Tools you'll need Drill the bottom of the bottle Cut the bottom of the bottle : Insert the bottom of the bottle you just cut in the bottle itself until the head : Cut a large strip of the bottle, leaving enough on the bottle head side to host a camera : Cut the large stripe : Cut the large stripe in the length : Now you have 2 narrow stripes : Fold them in 2 in the length : Both of them : Cut the end of each of the narrow stripes in a "pig feet" : If you have a welder, you can make the "pig feet" more durable by "welding" the end of the cut : Put "feet to feet" the folded stripes : Duct tape one side of the "feet nails" : Mark where you want to insert the feets : With a blade - ideally with the soldering iron, make a cut the width of the stripe : Insert the "wings" :) Tape the wings in : Almost there, nice! Taking shape! Pass the long thin rope through the nozzle : Make 2 loops (4 threads) with the thread : Adjust the tension of the 2 loops : A simple knot with the 4 threads in : Fix the threads with string tape to camera (real strong, if you use bad tape your camera may fall from 500ft in the water / in the sand / on the rocks :_( Pull the rope back in the body : Pull stronger till the camera doesn't move much anymore: Screw the cap in, with the threads forced (and probably twisted while you screw in): The screw cap with hold the 4 threads securely, it easier to adjust, and also be easy to remove : Test the balance of your devicem ideally with a fan, your camera mount should swing gently in the wind and follow the wind like a weather vane :) To avoid having of the mount with the pictures you take, you can crop the extra plastic : If you want to avoid turbulence and aggravate wind drag you can make fringes at the end of each wings : You are ready to fly ! Get out of here, inflate a balloon: or a kite : Attach your camera mount to the kite, and walk on the beach / or sail !
|
Revert | |
| 0 | warren |
June 01, 2011 19:50
| almost 14 years ago
A cut-off soda bottle can be used as a cheap camera mounting because the camera sits snugly against the inside of the bottle. The camera is also effectively protected from impacts - a disadvantage of the Picavet suspension. Watch a video by PatCoyle about the soda bottle rig here: Build a Soda Bottle RigYou can also follow this visual step by step instructions below: Tools you'll need Drill the bottom of the bottle Cut the bottom of the bottle : Insert the bottom of the bottle you just cut in the bottle itself until the head : Cut a large strip of the bottle, leaving enough on the bottle head side to host a camera : Cut the large stripe : Cut the large stripe in the length : Now you have 2 narrow stripes : Fold them in 2 in the length : Both of them : Cut the end of each of the narrow stripes in a "pig feet" : If you have a welder, you can make the "pig feet" more durable by "welding" the end of the cut : Put "feet to feet" the folded stripes : Duct tape one side of the "feet nails" : Mark where you want to insert the feets : With a blade - ideally with the soldering iron, make a cut the width of the stripe : Insert the "wings" :) Tape the wings in : Almost there, nice! Taking shape! Pass the long thin rope through the nozzle : Make 2 loops (4 threads) with the thread : Adjust the tension of the 2 loops : A simple knot with the 4 threads in : Fix the threads with string tape to camera (real strong, if you use bad tape your camera may fall from 500ft in the water / in the sand / on the rocks :_( Pull the rope back in the body : Pull stronger till the camera doesn't move much anymore: Screw the cap in, with the threads forced (and probably twisted while you screw in): The screw cap with hold the 4 threads securely, it easier to adjust, and also be easy to remove : Test the balance of your devicem ideally with a fan, your camera mount should swing gently in the wind and follow the wind like a weather vane :) To avoid having of the mount with the pictures you take, you can crop the extra plastic : If you want to avoid turbulence and aggravate wind drag you can make fringes at the end of each wings : You are ready to fly ! Get out of here, inflate a balloon: or a kite : Attach your camera mount to the kite, and walk on the beach / or sail !
|
Revert |


