3D printed mini spectrometer and absorption cell holder with LED.
I took the basic design of the simple paper spectrometer and created a 3D printable version.

The design is intended to interface with a Microsoft HD webcam. There are two parts - the cam interface and grating holder and the spectrometer body with the slit. This version of the spectrometer is printed using PLA filament. After initial alignment and testing the two parts are attached together using superglue (plastic is the ideal material for superglue, it bonds the parts together).

The .stl files attached fix the need for any grinding like I did here to get the grating to fit (it originally was supposed to slide in from the side, but the tight fit scratches the holographic grating off the DVD piece. I highly recommend the metallic duct tape or a good quality electrical tape for attaching anything that needs to be light tight. You could also take some flat black spray paint to the inside of the spectrometer body to reduce straylight.

For the absorption cell body, the spectrometer is a tight fit with the slit lined up vertically. An LED or LED array fits in the end (the is formed for the large style LED (not shown)). Use a piece of note card or cardstock as a diffuser so that you don't get lots of stray light in the spectrometer and can get a more uniform illumination of the slit. A standard 1cm liquid cuvette should fit in the square slot for absorption measurements.
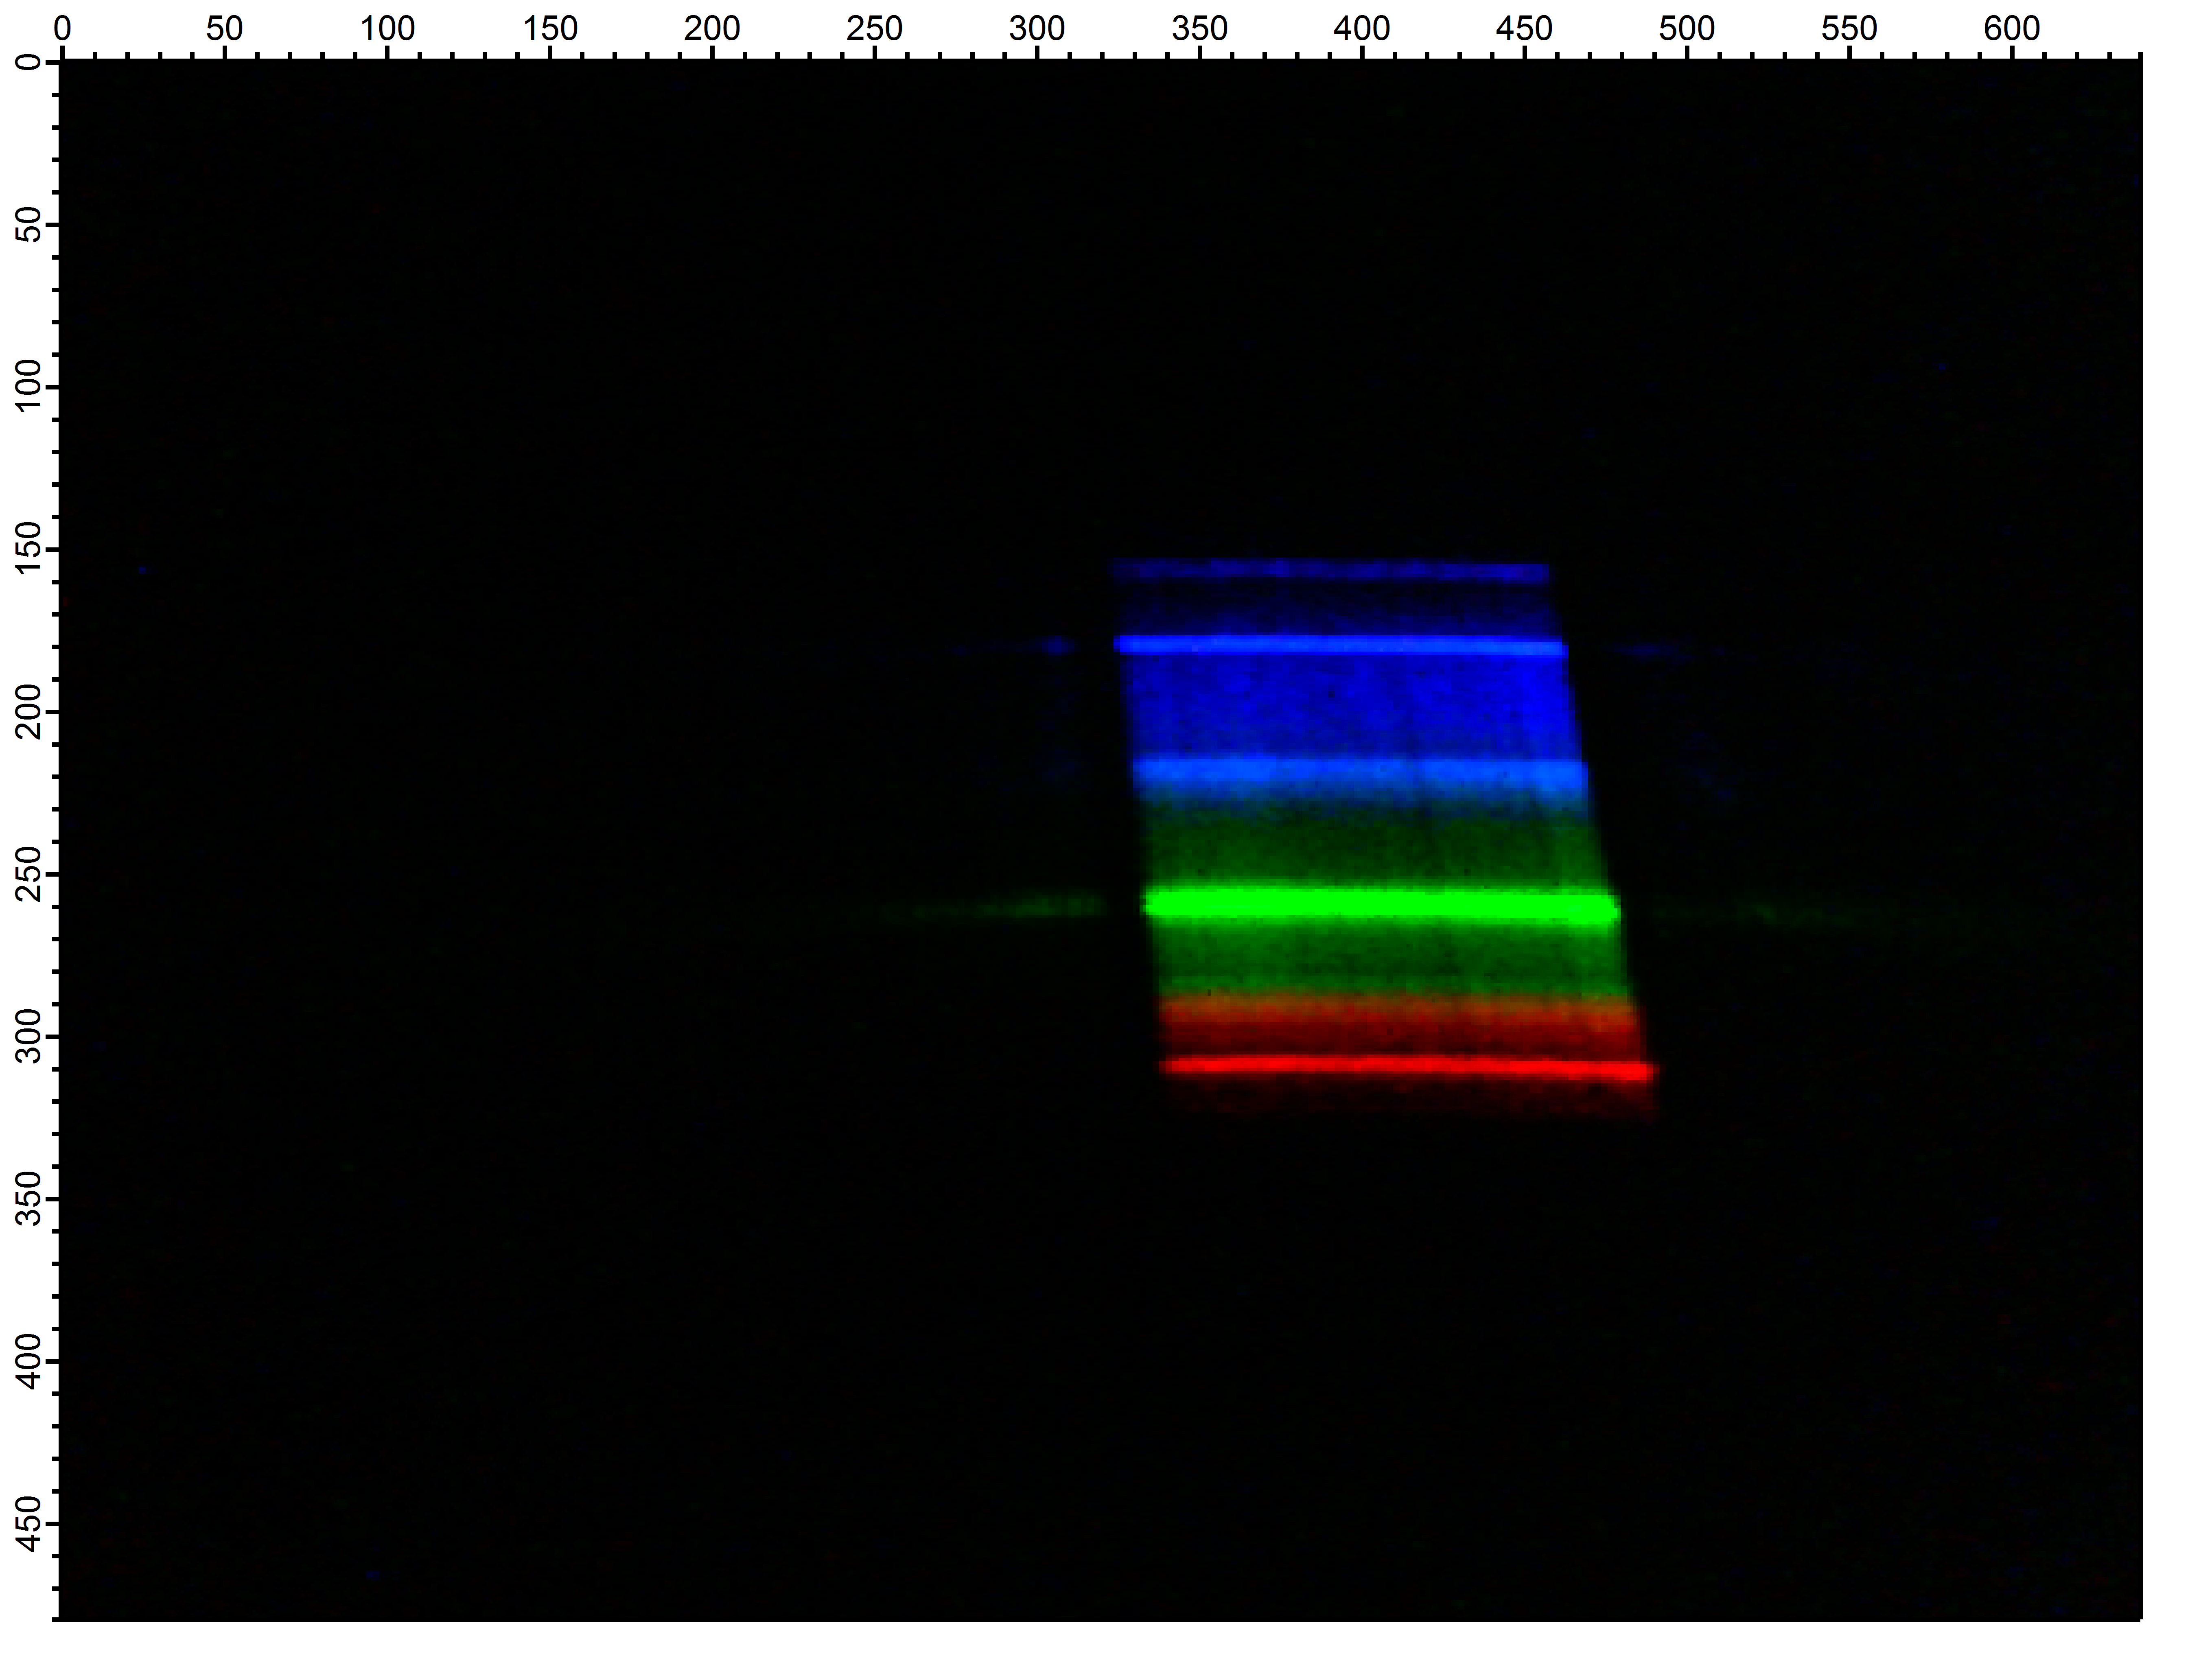
For absorption spectroscopy you will need to be able to fix the integration time (frame-rate) of the camera. you can do this by using the computer's camera controls and then also adjust the focus, contrast, etc. Once you do this (and turn off the auto adjust settings) you should be able to go back to spectralworkbench and take spectra that will work for absorption measurements. I used IGOR (Wavemetrics) to control the camera and then also bin the rows for more photons (you can also zoom in to remove rows that aren't needed). Here is the image from the camera:

If we compress all of the columns in the picture into a spectrum of a Fluorescent tube lamp and calibrate it, we get the following:

I approached this project because I wanted a fairly simple absorption cell that I could control the timing and focus of the camera better as well as have a reproducible placement of the absorption cell (1 cm cuvette). 3D printing seemed like a good way to go about this. Enjoy!
For a good table of CFL lines with a graph and a table: https://commons.wikimedia.org/wiki/File:Fluorescent_lighting_spectrum_peaks_labelled.gif
Camera mount: Cammount.STL Spectrometer Body: Spectrometerbody2.STL Absorption Cell: AbsorptionCell_Body_final.STL
14 Comments
Very interested to see this, kudos! We've had some difficulties finding standard ways to disable exposure compensation on webcams, and there's been a lot of interest in using the Raspberry Pi cam to do fixed exposures. Any interest in trying that out?
Great documentation - thanks!
Is this a question? Click here to post it to the Questions page.
Reply to this comment...
Log in to comment
Related question here: https://publiclab.org/notes/warren/09-28-2016/upgrade-a-diy-spectrometer-with-a-raspberry-pi-camera
Reply to this comment...
Log in to comment
Warren, looking at your post (and specifically the size of the camera you are referring to, you could easily interface that by just attaching it to the end of the camera port in my design (I did something similar with one of my prototypes with an older webcam that I had removed from its case - I just taped it on). The Microsoft cam was a good one because it has a ruond body (and I have read about this camera being used with a telescope, so its optics are pretty good: http://dslrmodifications.com/lifecam/lifecam1.html).
Reply to this comment...
Log in to comment
Yes, that sounds right. I think the remaining issue was that unfortunately it wasn't clear if the RPi camera can be accessed via the browser webcam API. But it seemed there were some ways forward on that.
Thanks!
Reply to this comment...
Log in to comment
@rthalman, @warren I have replicated the design using the printer in my local library as well as the modification to the Life cam where I removed the IR cut filter. I also discovered that the lens can and should be refocused manually to sharpen the image after removing the IR cut filter. The grating was mounted onto the cam itself. I found that the cuvette holder was a bit too small and had to grind the hole with a miniature flat file. The printed slit was ca 0.28 mm and replaced with the 0.08 mm from PLAB store. The cam itself seems to get noticeably warmer, probably due to the autofocus circuitry causing a significant rise in the dark current.. The spectra can be seen with sun sky tags and Cam5 nIR titles. https://spectralworkbench.org/spectrums/99613#
stef
Reply to this comment...
Log in to comment
@stef Thanks for trying out my plans. I also found that the slit width that was printed was sub-optimal. I made a narrower slit with aluminum duct tape (the kind used for HVAC). I'm sorry about the cuvette hole size - I had increased it, but that depends on two factors (the exact size of your cuvette and the printing bead-width of the model of 3-D printer. For my modified slit, I can get a spectral resolution of ~5nm FWHM.
Did the camera not get as warm when you turn off the auto-focus? For the solar spectrum that you captured, is this a sky spectrum or looking at the sun? Also, there seems to be light in the UV (according to the spectrum scale) - I would assume that that is straylight, but I guess that the calibration may not be valid in that range?
Again, thanks for trying out my plans!
Is this a question? Click here to post it to the Questions page.
Reply to this comment...
Log in to comment
@rthalman: Hey, I'm not complaining, your design got me going on the 3D printing thing. Insofar as to the Cam temperature, by turning off the autofocus, the cam stays at the last setting selected but power is still generated to maintain that setting hence the heat. The lens is attached to a coil in a magnetic field for the focus selected. I've just dissected/destroyed another cam and noticed that it had an aluminum plate-heat sink attached to dissipate the heat. That configuration lends itself to adding a Peltier cooler to minimize the thermal noise, a work in progress. As to the printed slit, I suspect it is the thickness printed and/or the width that caused reflections/interference. I have replicated @stoft paper on his method of producing slits 5 times and got 5 different results. I use the flat razor blades. As far as the solar spectrum mentioned, it was the sky as direct viewing the sun caused much saturation of the cam. I bit the bullet and purchased a variable neutral density filter to attenuate the input. Not sure how it will affect the "purity" of the spectrum. The UV bump you mentioned could be stray light or the thermal noise as the level was quite significant. The calibration using two mercury lines may not be as accurate-don't know - over the entire spectral range. Regards stef
Reply to this comment...
Log in to comment
This is so exciting to see. @stef, would you be willing to post a response using the "Document your attempt to build this" button above the builds section above?
@rthalman and @stef, how long do you think this took to make, and how difficult was it? There are some extra tags we can add to flesh out how this build is shown on the site.
Is this a question? Click here to post it to the Questions page.
Reply to this comment...
Log in to comment
Also, is it possible to order this print on Shapeways, do you think? I'd love to get one but don't have a 3d printer. Anyone want to try uploading to to Shapeways and sharing a link I can order from? I'm happy to pay above cost if someone has experience setting it up.
I want to try putting it into a sturdier enclosure and using a Raspberry Pi camera.
Is this a question? Click here to post it to the Questions page.
Reply to this comment...
Log in to comment
@warren I have the .stl files in the description, you can upload those to Shapeways. In PLA on shapeways the absorption cell body costs $26; the Spectrometer Body runs $15 and the Camera Mount $9.47 for a total project cost of $50.91.
I can't seem to find where to make a link to the object, but they all seem to load correctly and to size (scaling should be in inches when you upload).
As for time, once I got the printed parts it took maybe 20-30 minutes to assemble, most of which was getting the grating installed and then aligning the camera and then once I was satisfied taking the super glue to attach the camera mount to the spectrometer body.
Thanks again @stef for playing with my design! If anyone is interested I also took the paper cut version and made a silhouette cut file to make one out of cardstock...
Reply to this comment...
Log in to comment
@warren, @rthalman I will share the build details once I get some fotos. The public library operates on a cost recovery system so the cost of the project was about $12 cdn for all 3 pieces. I sent them the *.stl files and in a couple of days picked them up. The only fly in the ointment is the que to start. The webcam mod took most of the time. I would be interested in the paper version file as well.
Regards stef
Reply to this comment...
Log in to comment
Wow, excellent! You can share a design on Shapeways by clicking "Edit product with this model" in the upper right:
Then you can check "Offer for sale to others" here:
Do you think you could add the papercut silhouette version to this listing of mods to the kit? We'd love to feature it!
https://publiclab.org/wiki/foldable-spec#Upgrades
Is this a question? Click here to post it to the Questions page.
Reply to this comment...
Log in to comment
Also see this one: https://publiclab.org/notes/briandegger/12-11-2015/silhouette-cut-public-lab-mobile-spectrometer-v2 -- though it's not too fleshed out!
Reply to this comment...
Log in to comment
Ok, so here are the links to shapeways: Absorption Cell Body: https://www.shapeways.com/model/3dtools/5722864/0/123?key=0955c52c1c8596f6422b736ebda012d9 Spectrometer Body: https://www.shapeways.com/model/3dtools/5722868/0/6?key=8df89dffdd3817b6867277d54db4644b Camera Mount: https://www.shapeways.com/model/3dtools/5722877/0/6?key=25723f30c0b902a6c7e7b6f3af975f50
@stef @warren Also, the link for the cut file for the Cameo look similar to the one I made, so I won't post mine (I just digitized the pdf that the original fold-able paper one had).
Is this a question? Click here to post it to the Questions page.
Reply to this comment...
Log in to comment
Login to comment.