What I want to do
This demo was conducted as part of a fire science class at Parts and Crafts with elementary and middle school-aged students. The goal was three-fold:
Use the spectrometer to illustrate the difference between blackbody radiation and emissions spectrum (the lightbulb demo under "Things to Do with your Spectrometer")
Capture emissions spectra of different metal salts
Do both of these things kitchen-counter-style, in the absence of any formal lab setup, in a way that passes my "Yep, I'll do this with kids!" threshold. This is my first time running a fire science class so navigating this threshold is an ongoing consideration.
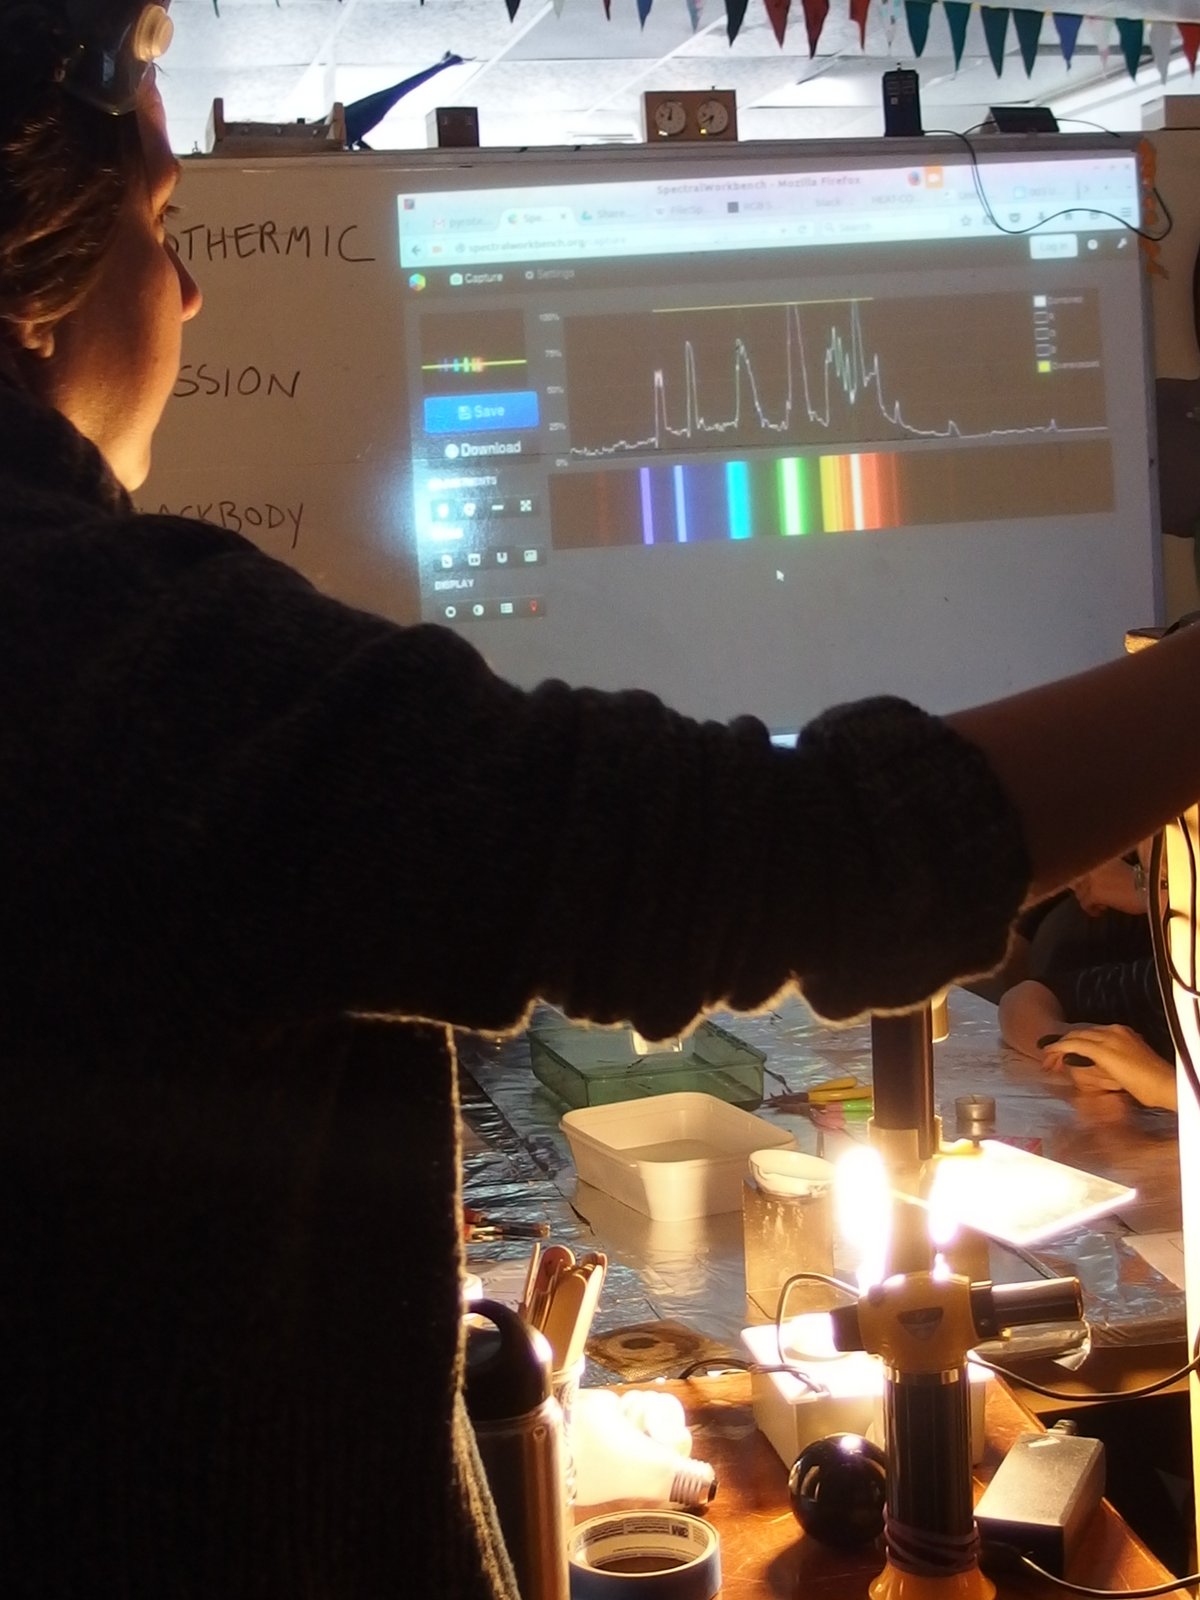
Setup and materials
PLOTS spectrometer: We used an earlier version and didn't modify the arm at all. In future, we'll set up a better rig for more flexibility.

Butane torch: We used this version but any hand-held torch would do. Must produce a steady blue flame and be small enough to easily hold.

Metal salts: All chemicals were purchased from the Science Company. Preparation involved dipping popsicle sticks in water and then into their respective salts. We tested the following chemicals:
- Calcium chloride: CaCl2 (orange)
- Sodium chloride: NaCl (orange)
- Strontium chloride: SrCl2 (red)
- Copper chloride: CuCl2 (blue-green)
- Potassium chloride: KCl (lavender-orange)
Wires for testing: Copper, iron, zinc, and aluminum
My attempt and results
Flame tests
We tested strontium, copper, sodium, and potassium.


Good to know you can do this method and not burn the house down. Popsicle sticks + torch is quick and dirty but works in a pinch, especially if you don't have a bunsen burner handy.
 Copper chloride
 Potassium chloride
 Strontium chloride
 Sodium chloride (we got a great emission line for sodium but weren't on the ball capturing the spectrum)
Blackbody observations
Following the flame tests we did a very quick demo of blackbody radiation, comparing iron wire, copper wire, zinc wire, and aluminum foil according to a temperature gradient.
 Zinc wire
 (from http://www.blksmth.com/heat_colors.htm)
The goal was to identify which heat transfer (which wire heats faster) vs. temperature (which ultimately gets hotter) based on the color of the wire.
Questions and next steps
Swan bands Why are blue flames blue? (great explanation here) Given that "playing with matches" (and candles) is the most common interaction kids this age are going to have with fire, it seems useful to understand a little bit about what's going on here. Unfortunately the butane torch itself was not bright enough to get an emission spectrum for the free carbon.
 This is what they're supposed to look like. Sadly, none spotted.
Blackbody radiation When we heated the zinc, it sparked bright blue, which matches its emission spectrum. This was a) AWESOME and b) completely unexpected (sorry no photos). Is this actually the emission spectrum that we're seeing?
We did have a pretty great comparison for copper and iron.
 We also saw this distinctive orange color when we burned the iron wire. Emission line?
Capturing blackbody on the spectrometer
Lightbulb test: When you raise the temperature of an incandescent bulb, it looks like the spectrum shifts toward the blue as you "turn up" the lightbulb. This corresponds to what you would expect, right? (no pics, sorry)
Capturing blackbody radiation: We used popsicle sticks to test the metal salts --- which meant that inevitably, five or six seconds in, the popsicle stick would catch fire and start burning independently. This meant that we had a number of samples where we captured both the emission line and the full spectrum of the incandescent flame, which was a cool and unexpected result.
Why I'm interested
Explaining the relationship between heat and light in exothermic reactions.
6 Comments
Thank you for this incredible documentation! Do you have a list of what you purchased from the Science Company? I bet other people would like to replicate this demonstration!
Is this a question? Click here to post it to the Questions page.
Reply to this comment...
Log in to comment
Listed!
Reply to this comment...
Log in to comment
Very good work.
Another possible demonstration. I worked for a pharmaceutical company. We would check the incoming stoppers to see if they had been chlorinated ( to reduce friction) by taking a clean piece of copper wire, heating it over a Bunsen burner until the flame was clean (mostly yellow), rubbing a stopper on the hot wire, and then putting the site either under the burner (in the air intake) or in the flame. If chlorine is present, you should see a green flame. This went down to relatively low levels of coordination ( under 100 ppm). Don't know if these stoppers are still used, but you might try it on chlorinated stoppers, as well as chlorobutyl based stoppers, just to see how it works. It will take several tries to find the green flame you are looking for.
Reply to this comment...
Log in to comment
@mimiss @purl - this is so neat! Definitely thought you should take a look.
Just to give an idea of what's going on, you're paralyzing a bit of the stopper. Then burning it to see the flame and flame color. It's very similar to the flame tests of long ago.
I hate autocorrect. It's pyrolyzing, but autocorrect thought was an error and made it paralyzing. Sorry.
Reply to this comment...
Log in to comment
Login to comment.