Guide for installing the open source satellite image decoding software NOAA APT 1.2.0 and NOAA APT 1.3.0 on Mac OS 10.15
Since 2018, the most popular satellite image decoding software WXtoImg, has been abandoned by its creators. With changes in Windows and Mac Operating Systems, this means the last version of WXtoImg has a limited lifetime and usability. Although WXtoImg still runs on Windows, it will not run on Mac OS 10.15 Catalina, because Catalina no longer supports 32 bit applications like WXtoImg. WXtoImg is a closed source, proprietary software.
There are lots of alternatives to WXtoImg, but all of them require compilation, Python, and / or don't provide graphical user interfaces. The vast majority of these alternatives will not run on Mac OS, and very few are open source. This situation led Martin Bernardi to create an open source, user friendly satellite image decoding software for both Windows and Mac users, called NOAA APT 1.2.0. The software is also potentially useful for advanced GNU/Linux users.
NOAA APT 1.2.0 takes a raw WAV file recording of a NOAA satellite pass and decodes the image embedded in the audio file. The software has a number of other features including:
- Add map overlays with countries, states, provinces and lakes.
- Easy to use Graphical User Interface
- Possible to disable syncing and export every step of the decoding process, useful for corrupted recordings
- Telemetry band reading
- Resampling WAV files preserving modification timestamps
- Modifying timestamps of files
- Editing filter parameters from a configuration file
- Rotating the output image, in case of ascending (South to North) passes.
NOAA APT 1.3.0 was released in Autumn 2020. This new version of the software has a number of additional features including: - Customisable false colour imagery
A fully packaged version of NOAA APT 1.2.0 or NOAA APT 1.3.0 for downloading and installing on a Mac does not exist yet. However @sashae has collaborated with Martin and radio amateur Bill Liles to produce an 11-step series of instructions for 'compiling' NOAA APT 1.2.0 and NOAA APT 1.3.0 on Macs running 10.15 Catalina (it will probably work on Mac OS Big Sur too).
Instructions:
Locate the Terminal application on your Mac. Open Terminal and type in the following commands in order, pressing enter after each command.
1. Install Rustup:
curl --proto '=https' --tlsv1.2 -sSf https://sh.rustup.rs | sh
Terminal may ask if you want to proceed with the installation. Enter '1' to 'proceed with installation' and press enter.
2. To finish installing Rustup:
source $HOME/.cargo/env
3. To install Homebrew:
/bin/bash -c "$(curl -fsSL https://raw.githubusercontent.com/Homebrew/install/master/install.sh)"
4. You will be prompted to enter your password: type in your computer password and press enter.
If prompted to continue the installation press enter.
5. To install gtk+3:
brew install gtk+3 adwaita-icon-theme openssl
6. Installing NOAA APT 1.2.0 - OR - NOAA APT 1.3.0: Open a Browser and paste in the following link to download and extract NOAA APT 1.2.0:
https://github.com/martinber/noaa-apt/archive/v1.2.0.zip
Or this link to extract NOAA APT 1.3.0: https://github.com/martinber/noaa-apt/archive/v1.3.0.zip
Unzip and save the "noaa-apt-1.2.0" or "noaa-apt-1.3.0" folder in your Downloads folder.
7. Back in Terminal you have to move to the downloaded folder and run the cargo command to compile:
cd Downloads/noaa-apt-1.2.0/
OR
cd Downloads/noaa-apt-1.3.0/
8. Then enter the following command:
export PKG_CONFIG_PATH=/usr/local/lib/pkgconfig/
9. Then enter the command:
cargo build --release
10. A pop up window will ask you to allow Terminal to access files in your Downloads folder. Choose 'OK'.

Pop up window
11. To run the program, the command is:
./target/release/noaa-apt
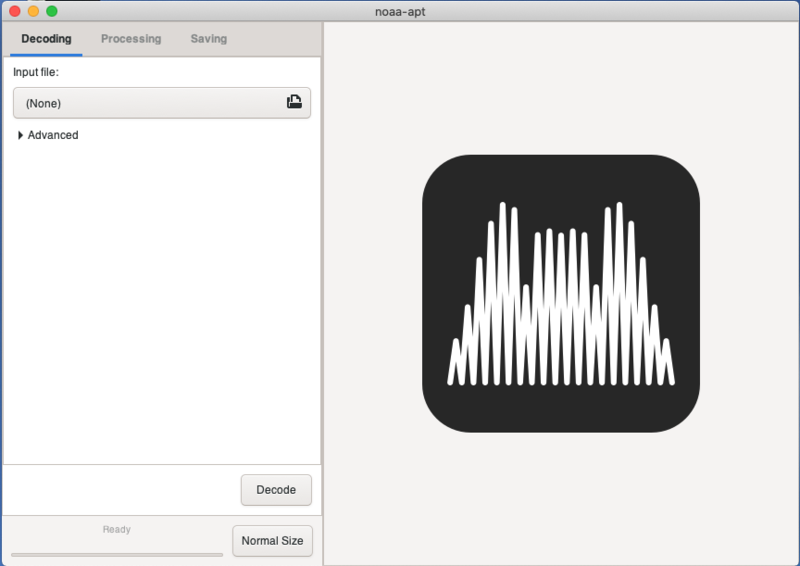
The following window will appear which launches the programme:
A manual for using the programme is found here:
https://noaa-apt.mbernardi.com.ar/usage.html
Note: to open NOAA APT 1.2.0 or NOAA APT 1.3.0 in the future, try opening Terminal and entering
1. cd Downloads/noaa-apt-1.2.0/
2. ./target/release/noaa-apt
OR
1. cd Downloads/noaa-apt-1.3.0/
2. ./target/release/noaa-apt
...and pressing enter. If that doesn't work, you may need to open Terminal and enter the following three commands in order to start up the programme:
1. cd Downloads/noaa-apt-1.2.0/
2. cargo build --release
3. ./target/release/noaa-apt
- OR -
1. cd Downloads/noaa-apt-1.3.0/
2. cargo build --release
3. ./target/release/noaa-apt
@sashae would like to recognise and thank Martin Bernardi who authored NOAA APT 1.2.0 and helped write these instructions for Mac OS; Bill Liles for an initial round of testing and feedback; and Jol Thoms for further testing on Mac OS.

5 Comments
I had trouble with zlib.pc and found this workaround: brew install zlib cp /usr/local/opt/zlib/lib/pkgconfig/zlib.pc /usr/local/lib/pkgconfig/zlib.pc Then proceed to build.
I ran your fix and got a little further but I'm running into this issue now too: 2020-12-10 23:02:43,724 INFO [noaa_apt::gui::gui] GUI opened zsh: segmentation fault ./target/release/noaa-apt
UPDATE: I am running Mac OS 11.0.1 Do you have an idea why it keeps crashing? You know it never asked permission to access my Downloads folder. Thanks!
Is this a question? Click here to post it to the Questions page.
Reply to this comment...
Log in to comment
I am trying to build version 1.3.1 which seems to be the latest at https://github.com/martinber/noaa-apt/releases The cargo build step is failing with this error:
❯ cargo build --release Updating crates.io index error: failed to select a version for the requirement
approx = "=0.5.0"candidate versions found which didn't match: 0.4.0, 0.3.2, 0.3.1, ... location searched: crates.io index required by packagenoaa-apt v1.3.1 (/.../noaa-apt-1.3.1)Thoughts about how to fix this?
Is this a question? Click here to post it to the Questions page.
Turns out that the rustup I installed via brew wasn't happy. I ran
curl --proto '=https' --tlsv1.2 -sSf https://sh.rustup.rs | sh
and got past the error
Reply to this comment...
Log in to comment
Hello! I'm gone through all the steps and successfully compiled the software, however the text of the interface has been replaced by little square symbols (see img below), does anyone know why this might have happened?
Is this a question? Click here to post it to the Questions page.
Reply to this comment...
Log in to comment
Login to comment.