Congratulations! You've created and used a do-it-yourself trawl like BabyLegs to monitor microplastics! Now, you have to see if you've caught any plastics. This guide will walk you through how to take the plastics out of your trawl in a kitchen, classroom, or laboratory.
Materials
● Trawl net (we are assuming BabyLegs, but you can use any trawl)
● Spaghetti strainer (as fine as possible. The size of the holes in the strainer will determine the size of microplastics you are studying, so the smaller the holes, the smaller the plastics you can study. Flour sifter also work)
● Coffee filter
● Tray or pan (we use Pyrex casserole dishes)
● Permanent, waterproof marker or pen
● Tweezers
● A sink or other source of controllable running water (any temperature)
Set out all your supplies ahead of time and make sure they are clean.
Make sure the work area is clear of breezes, dirt, and fleece (which might contaminate your sample!).
Removing the microplastics from the trawl
1. Over the tray/pan, flip your trawl net (baby tights) inside out to see if you have any plastics inside. The tray is to catch any plastics that fall out. Sometimes they fall out during transport. Make sure no part of your trawl net flops outside of the tray, since plastics can easily hop out via static electricity, or simply dropping out.

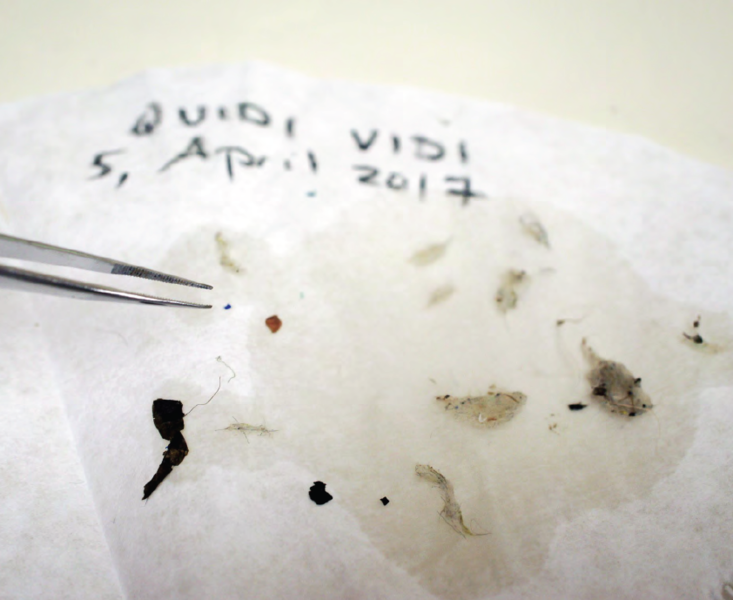
The image above shows plastics and other organic matter caught after tying BabyLegs to a wharf for 30 minutes. If you see plastics immediately, you can pick them out with the tweezers and put them in the coffee filter.
When you've picked out everything you think is plastic, go to the next step.
Make sure you haven't left any plastics behind in the tray! Always work over the tray whenever you can. Plastics often escape during study when they fall, are disturbed by a breeze or your breathing, or through static electricity!
2. Put the spaghetti strainer in the sink. Over the spaghetti strainer, turn the net inside out or upside down (depending on the trawl design). Make sure no part of the net droops outside the strainer.
3. Gently, with a small stream of water, rinse water through the net in the opposite direction of how the water flowed in during sampling. The water will flow through and around the trawl net and into the strainer in the sink. No splashing! All water must go through the strainer! Otherwise, you will miss some sample.
Constantly check your hands and tools for plastics that may have stuck. They prefer to stick to skin than to flow down the net. You can lose samples by not paying attention to all the sneaky places that tiny plastics can hide.

4. Ensure the net is completely rinsed into the strainer. There should be no organic specs or bits in the trawl net (baby tights).
5. Once the net is completely rinsed and the entire sample is in the strainer, hold the strainer up to a light and pick all the plastic items out (or items you think might be plastic!). When it doubt, pick it out.

6. Place the plastic items (and suspected plastic items) on the open coffee filter. If you have more than one trawl sample, label the coffee filter. Do this for every single plastic or suspected plastic. To make sure you have all the plastic out of the strainer, at the end, turn the strainer upside down and wash it into the pan. Sometimes you'll see an extra floating plastic that you missed in the strainer!

6. When you have all the items in the filter, fold the filter into a trumpet or flower shape so the plastics do not escape out the top, but that the top is loosely closed so that no airborne plastic microfibres enter the filter. Put the filter upright in a cup to dry overnight.
The items will dry in the filter and you will be able to see if they are plastic more easily, as some organic matter will dry and become brittle.
See the next guide on how to analyze your dried sample!
