Photometer Kit Breakdown
More updates soon
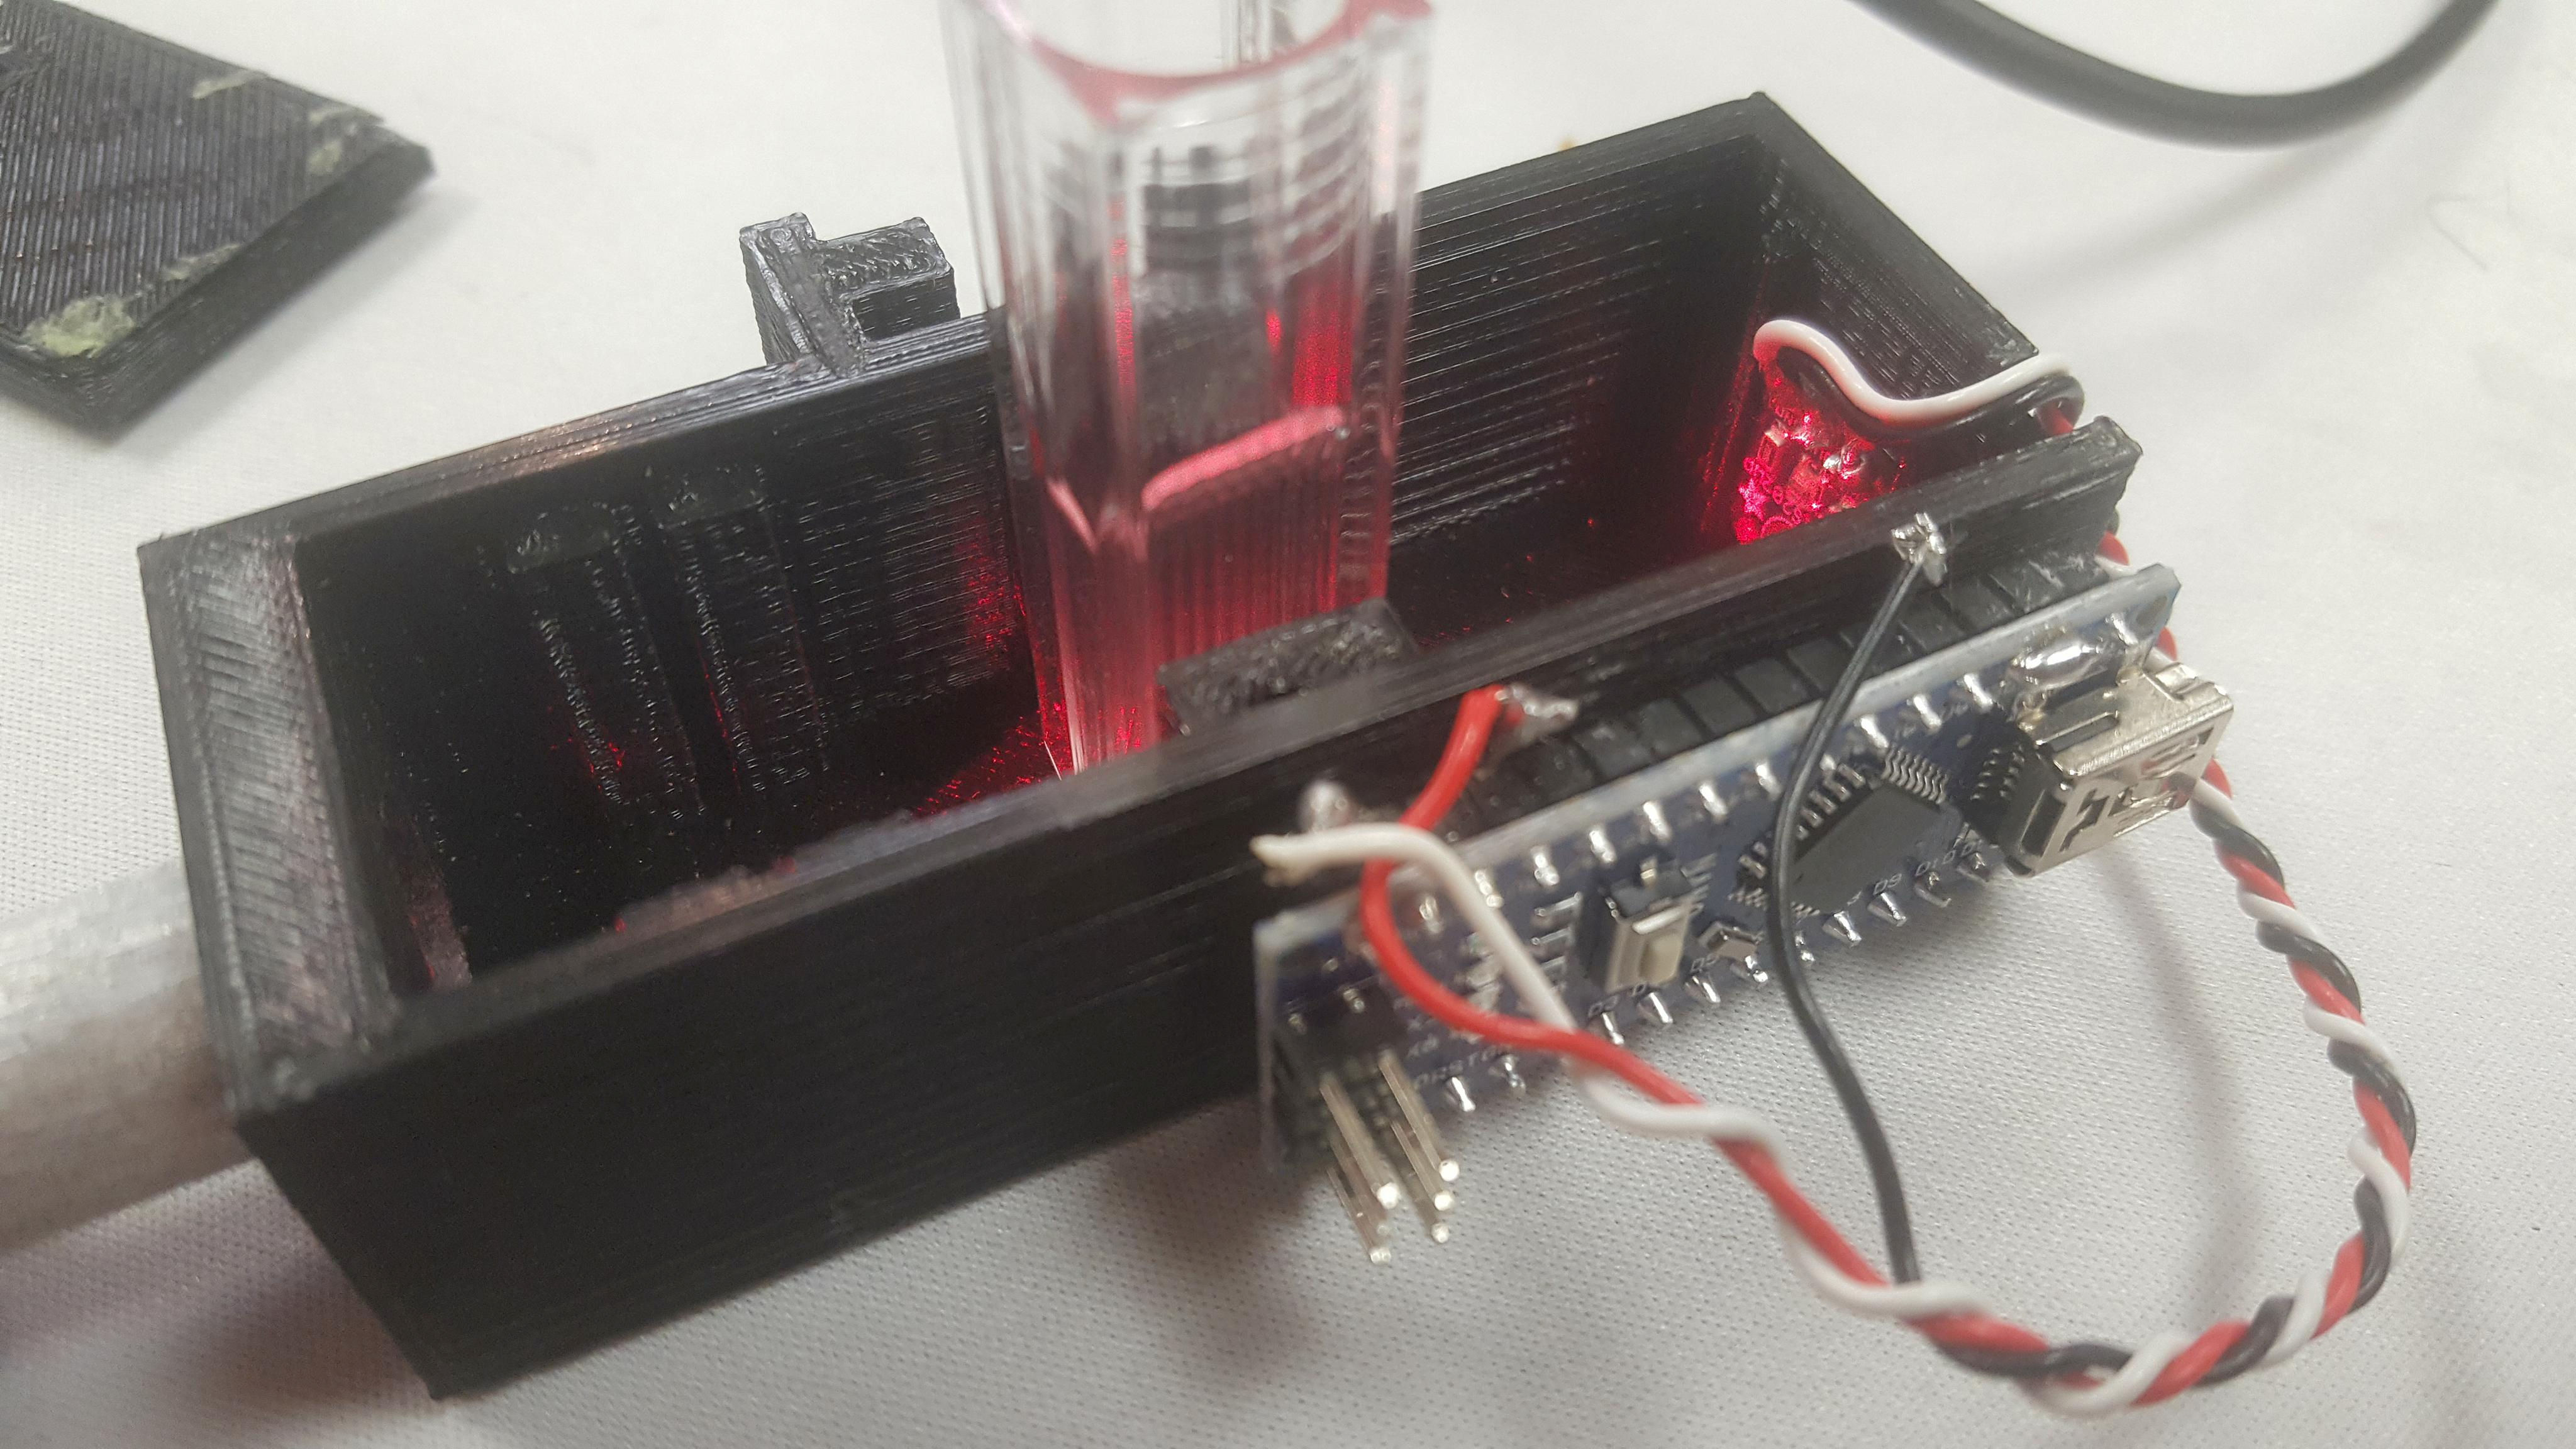
Over the last few months I have been working on designing a photometer that can easily be built and used by people around the world to test the clarity or Turbidity of the water with just a sample of the water. I wanted to keep it as affordable as possible so anyone can build it but i also wanted it to gather data so the information could be shared and could be used further in whatever study they are doing.

Design goals
The goals of this project are simple bring a very affordable and simple photometer kit to anyone that thinks they need one, make it small so it can easily fit in a pocket of a bag. The last goal make it possible to share your data from the photometer.
As I stated I wanted this small enough to fit in a bags pocket so I ended up with 80 mm x 30 mm. This size is big enough that it can support its self on a table or desk but small enough that it doesn't get in the way. The current price goal on this project is retail at $20-25 and I would like to get it cheaper than that but that’s the goal right now.

**Parts:
3D printed frame and lid (2 pieces)
Arduino Nano
GA1A12S202 sensor (Adafruit)
3 wires
Light source**
So, the Light source shines the light through the cuvette and the GA1A12S202 sensor reads the amount of light detected. This data is then processed on the Arduino Nano and sent to the computer for further processing and graphing. The GA1A12S202 sensor has a total of three connections so only 3 wires need to be soldered to the Arduino Nano these wires are the ground, 5v, and The A0. I have already written the code that will need to be uploaded to the Arduino so it’s simply plug, upload and play no coding is necessary.
Sensor to Arduino: VCC -> 5v OUT->A0 GND->GND
In the kit the 3.3v and AREF will already be soldered for simplicity, in doing this it will limit the board only for the Photometer. This is necessary for the Sensor needs these two connections connected.
Questions
Questions can be either frequently asked questions, or "next step" challenges we're looking to solve.
| Title | Author | Updated | Likes | Comments |
|---|---|---|---|---|
| Nothing yet on the topic "tagname" -- be the first to post something! |
Activities
The experiment that I have done so far was a simple coffee test. In this experiment I make two test cuvette with different amounts of coffee and one cuvette with distilled water. I took the reading from these samples and posted them into a line graph to see the different amount and the loss of light depending on the sample. To summarize the experiment the darkest sample saw a drop of 18% light. I did a post a more greater explanation of this experiment earlier on public lab
I am planning on doing an actual lake experiment soon to see the changes in the turbidity and different parts of the lake. I will update on that when it gets started soon