Passive dust monitors, where dust lands on a pad or in a container without any pumps, fans, electronics or moving parts, are very attractive option for particle sensing because they are inexpensive and can be put anywhere. Here I'll document my efforts to replicate a published methodology that may produce data equivalent to a Federal Reference Method, and relies on fairly low cost equipment.
Background
Previously... I looked at doing optical scans of sticky pads, but there was no means of extrapolating airborne particle concentrations in the PM2.5 and PM10 ranges (small dust roughly 2.5μm and 10μm in diameter). As Stevie and I asked around for low cost methods of potentially getting reliable low-cost data, Thomas Peters at the University of Iowa pointed us towards passive monitors initially developed at the University of North Carolina. see this summary of the research
 credit: Wagner and Leith, 2001
Originally conceived of as a means of collecting samples for a scanning electron microscope (SEM), Thomas Peters' colleague Darrin Ott came up with a novel revision, modifying the device to be scanned on a less expensive optical microscope. Ott and Peters also designed a wind and weather baffle that brought the device within the precision of a Federal Reference Method. This method and its field deployment is documented across three papers:
Darrin K. Ott, William Cyrs, Thomas M. Peters. Passive measurement of coarse particulate matter, PM10-2.5. Aerosol Science 39 156 – 167 (2008)
Darrin K. Ott, Naresh Kumar, Thomas M. Peters. Passive sampling to capture spatial variability in PM10–2.5. Atmospheric Environment 42 746–756 (2008)
Discussing this research with Amber Wise, she offered to help take a look at SEM and optical microscope samples at Chicago State. Together with Andrew Maselli we took a look. Much of my analysis of the options is owed to Andrew's analysis.
Making Ott & Peters Passive Sampler
tools list:
- 3D printer (Ultimaker 2) & Laser cutter (Full Spectrum Pro)
- at PSU's Electronics Prototyping Lab
- small philips head screw driver (#4 drive)
- very small philips head screw driver (#0 drive)
- micrometer
SEM Passive Monitor Parts List:
- 160μm Mesh Precision EForming #75HH-160
- 12.7mm SEM stub
- 12mm dia .015-.17mm thick circular cover glass for slides #12-545-80, Fisher Scientific
- Anti-static lab wipes #34155, Kimberly Clark
- 3M Post-It Flags
- 2x 0-80 1/8” screws, McMaster-Carr
- Rubber Cement
- 3D print file STL
- Mesh laser cut file
Optional? Polonium 210 de-ionizer such as Amstat Industries http://www.amstat.com/staticmaster-2/staticmaster-ionizers/
Ott & Peters Housing Parts List:
- 3x 4-40 1” phillips machine screws McMaster-Carr
- 6x 4-40 nuts , I used 1/4” wide, 3/32” high McMaster-Carr
- 3x 4-40 wing nuts McMaster-Carr
- 3x #6 0.12” ID, 0.25” OD, .047”-.077” thick rubber washer McMaster-Carr (or similar thickness rubber, i used rubber)
- 3/32” thick 12” x 12” acrylic sheet McMaster-Carr
- 1/8” ID, 11/32” OD rubber grommet (for 1/16” thick panel) McMaster-Carr
- Loc-Tite or superglue.
- Laser cut file (in mm)
SEM Cap Design & Production notes
Beginning this project I had only a few diagrams and incomplete parts lists spread across [Ott & Peters 2008] and [Wagner and Leith 2001]
In the diagrams its hard to see all the dimensions and parts needed:
 [Ott & Peters 2008]
At the end of the project I made this 2D cross-section and top view drawing of the dimensions of my printable cap using QCAD (print files are in the parts list):

But I started by taking notes using Skitch. This is a compilation of: Wagner & Leith 2001, Ott et al 2008, Ott & Peters 2008,

I then made a quick 3D model in 123D and 3D printed it, but it didn't fit on the SEM stub.

I was about to print a model that was a little bit wider, when I decided to check with a micrometer that my original had shrunk-- 4% vertically and 6% horizontally in the printing process-- and I put that stretch into the print. Use a micrometer to check the actual print dimensions of your print and adjust the print accordingly
Mesh
The mesh that is recommended in the literature is described as having "holes of conical cross section and dimensions of 160 μm (top diameter) and 225 μm (bottom diameter)... (Buckbee-Mears, St. Paul, Inc.)" Unfortunately, Buckbee-Mears is out of business, replaced by Precision Eforming of Cortland, NY. Calling around to different mesh suppliers, I was unable to find a mesh of this description. i therefore purchased Precision Eforming's mesh (linked above). It does not appear to match the description. Here I annotated in QCAD an image Andrew made in the Electron Microscope:


Will that matter? We'll see... I hope the effect won't be significant. Recommendations on mesh sourcing would be helpful.
Cut the mesh into a 16mm circles. Here's a cut file for a 3" square of mesh, making 20. I haven't tested the laser cutter with it yet, I cut this square out and trimmed it by hand. It shows in the frayed edges. Adhere the mesh to the top of the cap:

I used rubber cement, because they recommended spray adhesive, and spray adhesive is usually a rubber cement, but I think its messy and makes sticky aerosols. I only applied adhesive to the cap, never the mesh, and in a thin coat. It still clung to some dirt, giving the discoloration you see above.
Ott & Peters wind baffle
I started from this model and a description of parts in Ott & Peters 2008, and compiled the above list of parts.
 [Ott & Peters 2008]
I made this cut file, with all the cuts in the description, annotated here in mm:

If you convert these dimensions into US units, its a 5" circle up top and an 8" circle below. crucial to the design, but not pictured, is a thin groove on the underside of the top plate to catch rain drops.

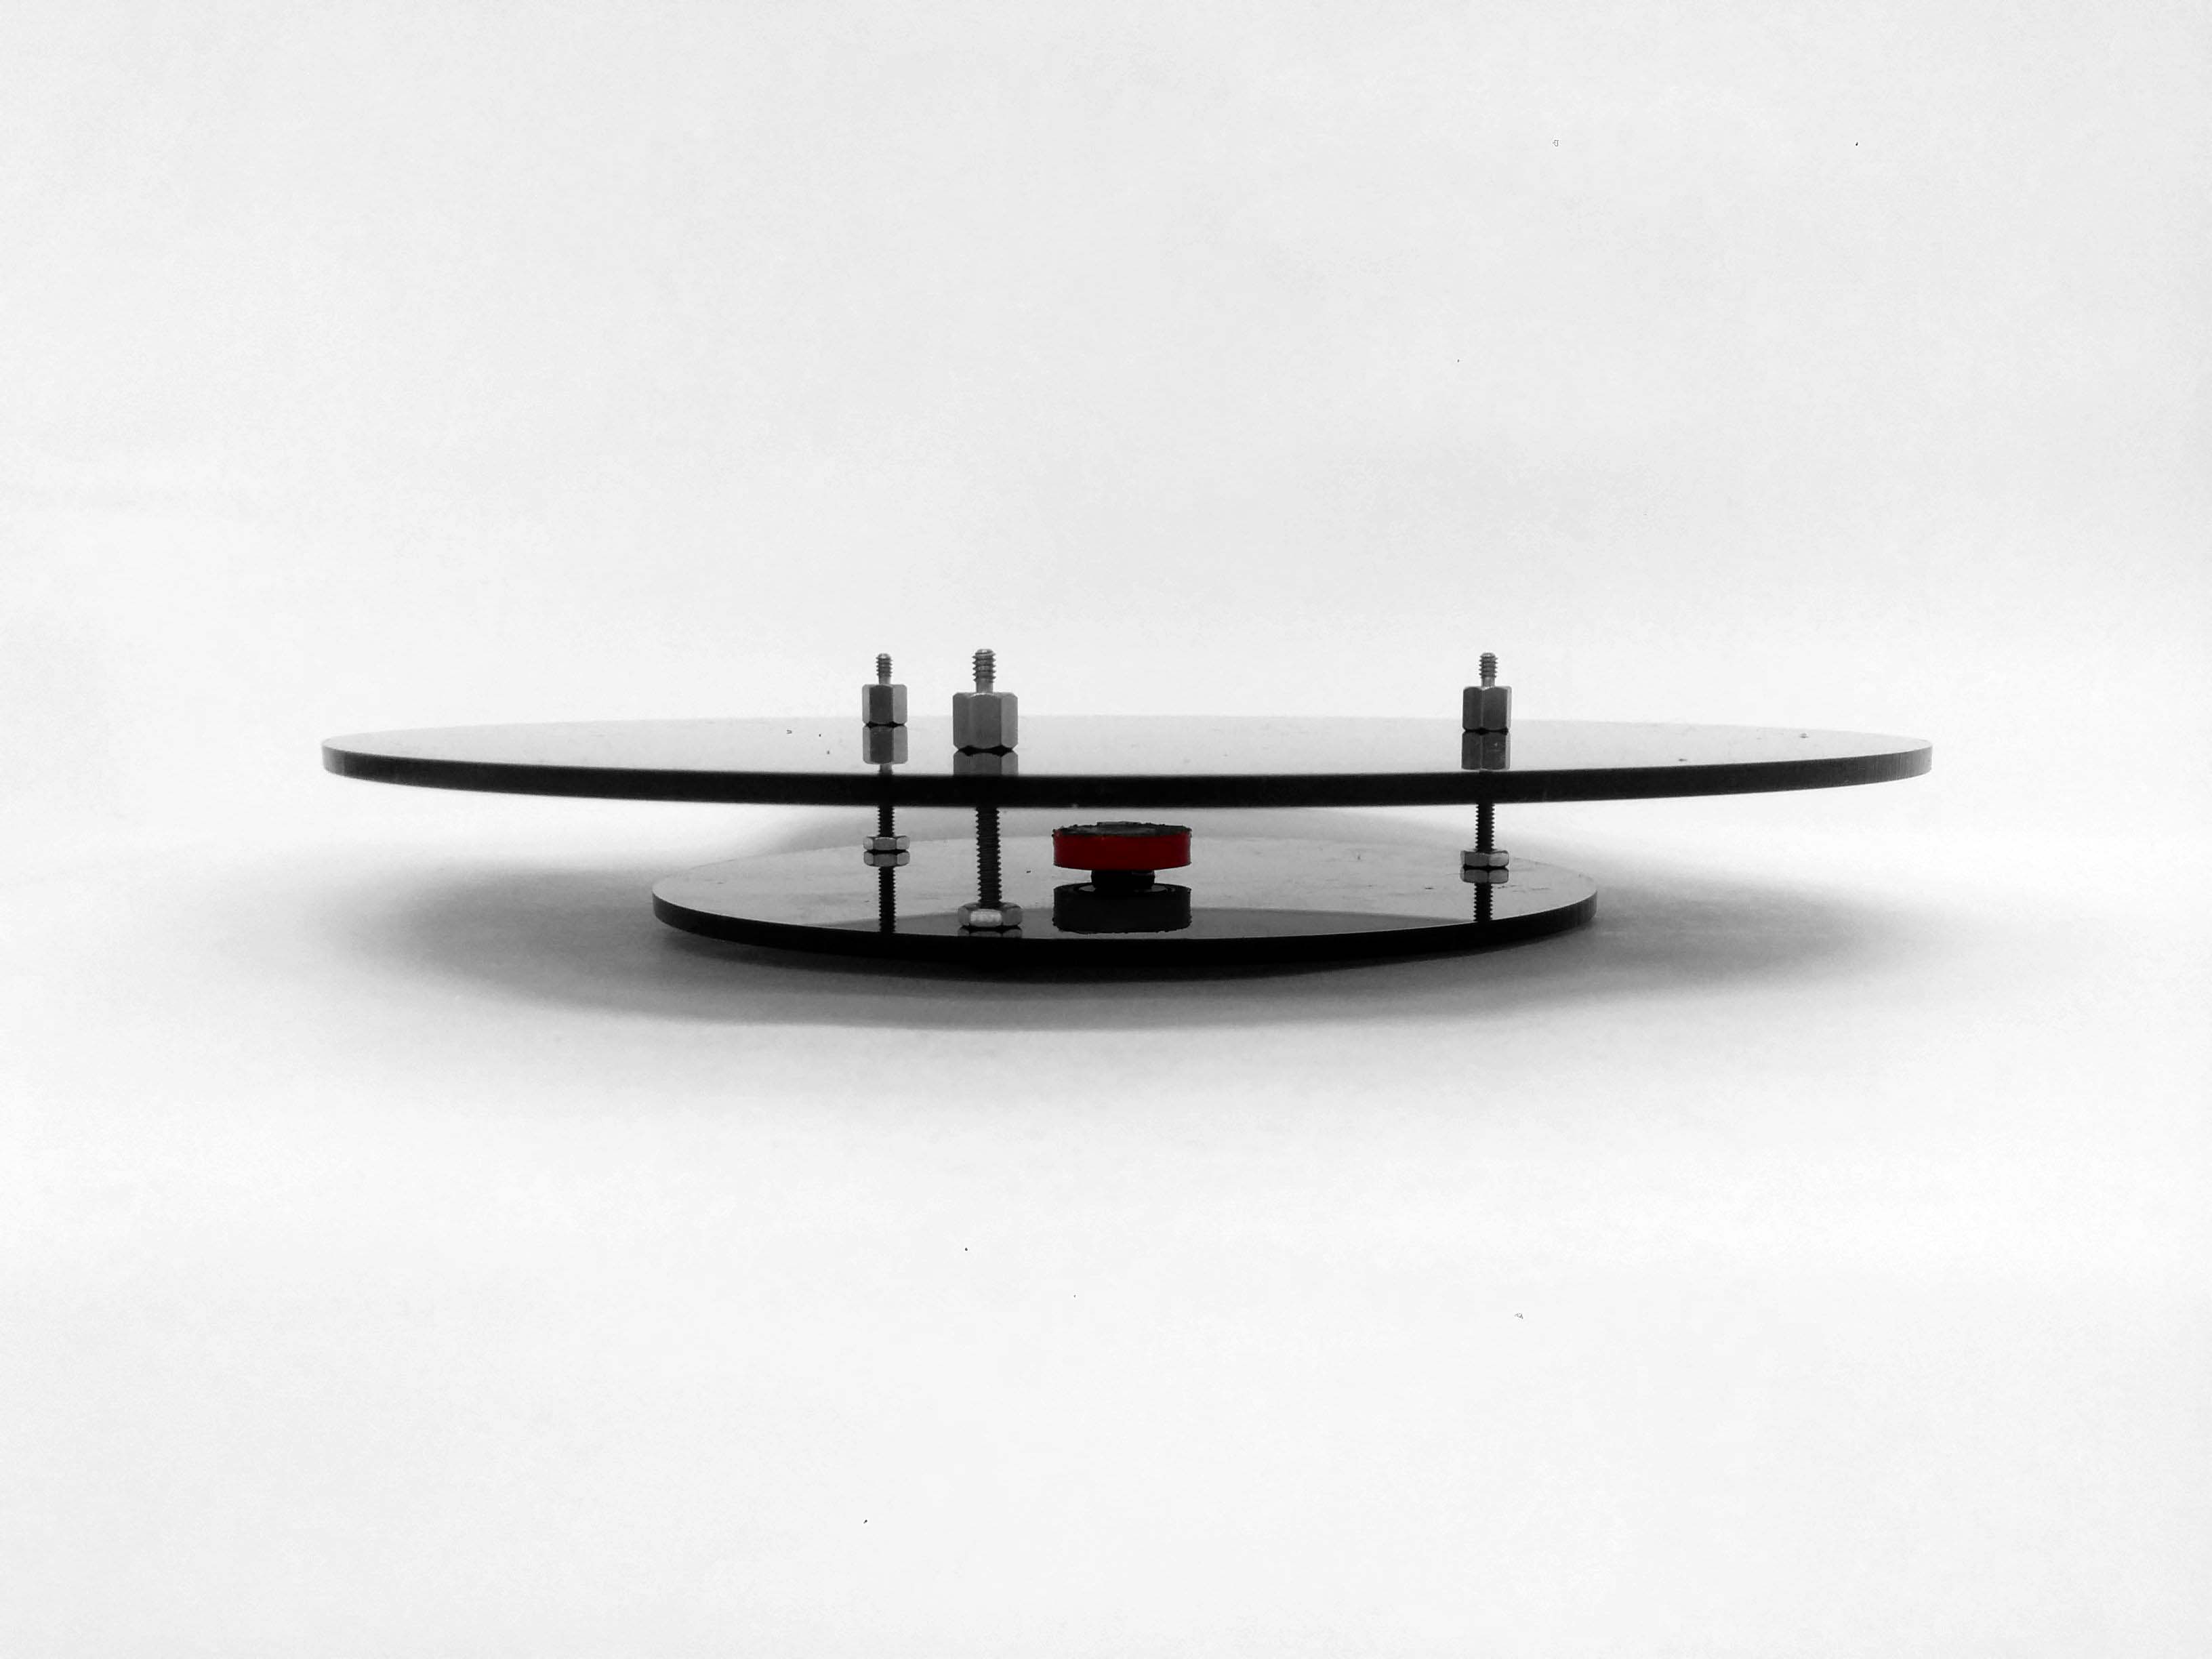
The distance between the two plates of 1.6cm is arrived at fairly easily by using 1" screws and standard 3/32" acrylic and 3/32" thick nuts in the parts list. The screws should extend slighly below the thickness of two 3/32" nuts:

Use nuts to hold the bottom plate down. Set nuts to rest the top plate on, and drip Loc-Tite or super glue on this set to hold them in place:

In Use

Clean a slide cover with the wipes and place in the cap:

Put the SEM stub in, and screw the 0-80 screws down:


Flip it over and cover the mesh with a 3M Post-It flag to protect it from dust:

Place it in the wind baffle and put the top on, and screw down the wing nuts (substituted here with stand-offs):

Place somewhere in an unrestricted airflow to be measured, and cover back up with a Post-It Flag when done. More on the procedure in Eric J Sawvel's 2013 PhD Thesis
A sketch at analysis:
Two methods of analysis are under consideration, Wagner and Leith's Scanning Electron Microscope (SEM) and Ott et al.'s optical method. The optical method would be much cheaper, and its automation means sampling more particles, potentially a source of increased accuracy [Ott et al 2008].
Under a Scanning Electron Microscope (SEM) and a graphite SEM stub, particles 2.5μm are just barely viewable:


They are easily seen on the slide at 20x with a much broader field of view.


Next steps
Our next steps are figuring out how to systematically sample the slide and use ImageJ's particle counting system to automate counting. Ott and Peters sampled 70% of the collection surface. How much should we sample/Do we need to sample?
We may also want to try polarized light microscopy for silica identification.
On the design side, the screws on the bottom of the cap are annoying. a better solution can be found, I'm sure.
Additional Citations:
Jeff Wagner and David Leith. Passive Aerosol Sampler. Part I: Principle of Operation. Aerosol Science and Technology 34: 186– 192 (2001)
Jeff Wagner and David Leith. Passive Aerosol Sampler. Part II: Wind Tunnel Experiments. Aerosol Science and Technology 34: 193– 201 (2001)
4 Comments
interesting
Reply to this comment...
Log in to comment
read my follow-up on imaging the samples
Reply to this comment...
Log in to comment
further followup on analysis of samples.
Reply to this comment...
Log in to comment
awesome effort.
Reply to this comment...
Log in to comment
Login to comment.