This activity is an attempt to use Lionel Milberger's copper rod hydrogen sulfide detection method, described here.
Scope
Purpose
The purpose of this activity is to practice setting up and conducting the method developed by Lionel Milberger, described here. This is a low cost, passive method for detecting hydrogen sulfide gas, in which you prepare a copper pipe or sheet for potential hydrogen sulfide exposure, mount it for potential exposure, and then take it down in a few days. You will take pictures of the copper before and after this exposure period to observe any discoloration of the copper.
This activity is meant to practice Lionel's method, rather than to observe hydrogen sulfide or identify a source of hydrogen sulfide emissions. Thus, did not be include a study design in this activity, and rather, simply mounted copper sheets at convenient locations around the grounds at LUMCON, near the wetlands.
Limitations
The limit of detection, rate of reaction, and chemical selectivity are unknown for this method. It is also currently unknown what copper sulfide compounds are formed, and what potential copper oxides are formed in the absence or presence of hydrogen sulfide. Since oxygen is orders of magnitude more concentrated in the atmosphere than hydrogen sulfide, understanding copper-oxygen reactions, and how they may influence copper-sulfur reactions will be important. There are good preliminary indications that copper sulfide (also known as cupric sulfide) tarnish is visible and distinguishable from cuprous oxide, and forms over the course of a few days exposure to hydrogen sulfide laden air. It may prove difficult to distinguish between cupric oxide and copper sulfide though (see more in the Future Questions section below).
Materials
To conduct this method, you will need:
- Copper rods or sheets, as high purity as possible. (like: https://www.amazon.com/gp/product/B00AKMNNE8/ref=od_aui_detailpages01?ie=UTF8&psc=1)
- If necessary, wire cutters to cut the sheet into smaller strips. (like: https://www.amazon.com/gp/product/B00HUJ0DZG/ref=od_aui_detailpages01?ie=UTF8&psc=1)
- If using copper rods, use a hammer, clamp, or vice grip to flatten the rod.
- Sandpaper to prepare the exposure surface. (we tried this, but it’s almost more like a polisher: https://www.amazon.com/gp/product/B075FXP292/ref=od_aui_detailpages01?ie=UTF8&psc=1)
- Clean cloth to remove sanded dust from exposure surface.
- Acetone to finish the exposure surface. (like: https://www.amazon.com/gp/product/B01F2MELPU/ref=od_aui_detailpages00?ie=UTF8&psc=1)
- Mounting or hanging apparatus to secure the copper outside where it will be exposed. (We hung them from strings with these, but be aware that they are tiny: https://www.amazon.com/gp/product/B0748DL3LR/ref=od_aui_detailpages03?ie=UTF8&psc=1)
Physical Description
We conducted this activity at the Louisiana University Marine Consortium campus in Cocodrie, Louisiana. We mounted them mid-afternoon on Saturday and gathered them again mid-afternoon on Sunday. Both days were sunny, with highs around 75. The night was cool, with an overnight low around 55. We did not measure the relative humidity, but it was notably humid, though not compared to Louisiana in the summer. There were no noticeable odors, and no marine vessel diesel engine activity near our field area.
Procedure

Preparation of copper sheet
- Take a single copper sheet and place it on a clean surface, such as a clean table or bench.
- Using scissors capable of thin metal sheets, cut the copper sheet into strips of the desired size. We cut our 8"x10" sheets into strips of various sizes.
- If you need to cut a hole in the sheet in order to mount it for exposure, use scissors or another sharp device to cut a hole in the top or bottom (lengthwise) of the sheet.
- Use sandpaper to scrub the central area of each copper sheet. Scrub a large portion of the copper sheet, including the entire width and only leaving approximately one inch on either end of the sheet that can be used for handling and mounting.
- Shake and brush off any particles that were removed by sanding.
- Wet a cloth generously with acetone and wipe the sanded area of the copper sheet, or pour acetone directly on the copper sheet. This is the last time that you should have any contact with the prepared (sanded, wiped with acetone) area of the copper sheet.
- After wiping, spray a small amount of acetone on the sanded area and let it air dry.
- If you need to travel to your mounting location, slide the copper sheet into a plastic bag, taking care to not touch the prepared surface.
Setting up copper sheets for exposure
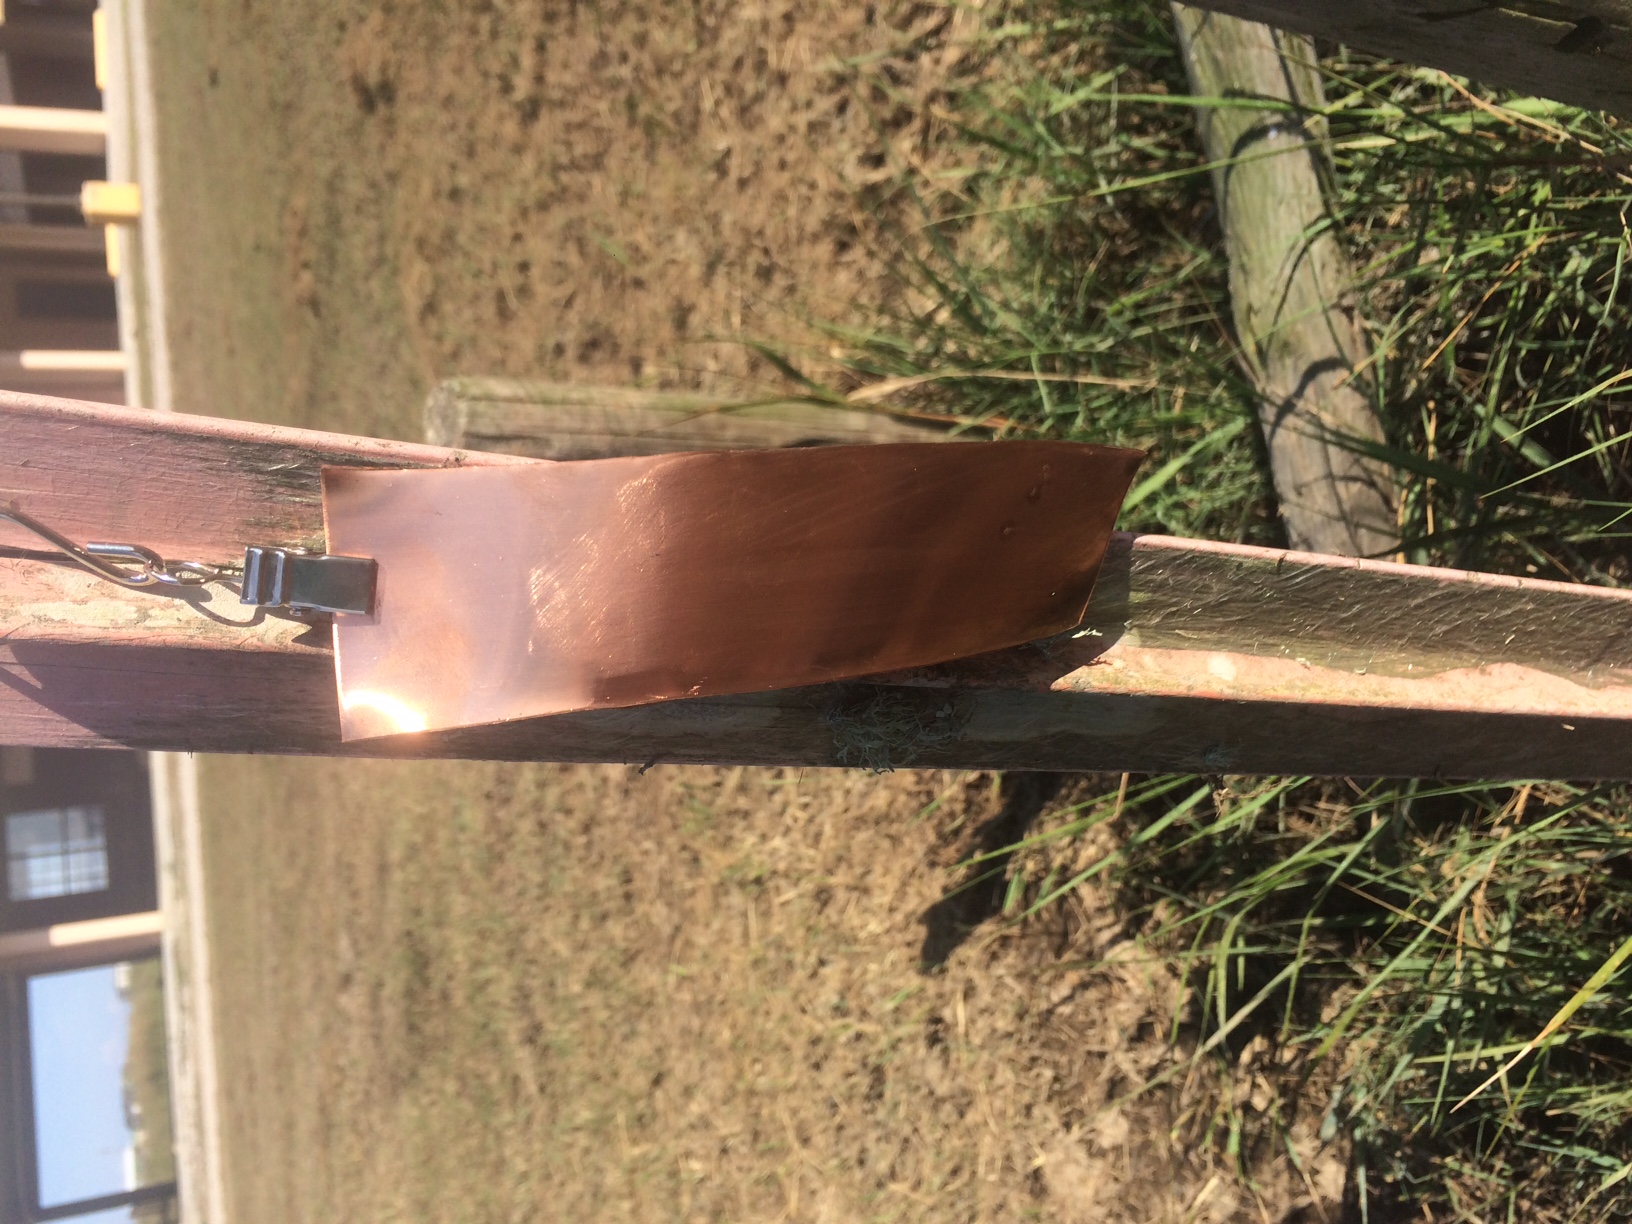
- Being careful to not touch the prepared area of the sheet, mount the copper sheet. For our activity, we will be using clips with hooks to hang sheets. We will mount them by clipping the sheet to the hook, and hanging the hook from a railing.
- Note the date, time, location (GPS and descriptive), approximate height of sheet above the ground, and ambient weather conditions.
- Take a picture of your set up to go with your notes in the previous step.
- Holding a white sheet of paper behind the copper sheet, take a picture of the copper sheet in order to demonstrate the initial color of the sheet prior to exposure.

Removing sheets after exposure
- In 24 hours, return to the copper sheet location.
- At the copper sheet, note the date, time, location (GPS and descriptive), approximate height of sheet above the ground, and ambient weather conditions, and any known weather conditions that have occurred over the past 24 hours.
- Take a picture of your set up to go with your notes in the previous step.
- Holding a white sheet of paper behind the copper sheet, take a picture of the copper sheet in order to demonstrate the color of the sheet after 24 hours exposure.
- Note any color changes that have occurred in the prepared exposure area over these 24 hours.
- If no color change or only slight color change is visible, leave the copper sheet mounted and return in another 24 hours to follow these steps again.
- When there has been substantial color change, or when other factors necessitate it, it will be time to remove the copper sheet.
- Ensuring that final pictures have been taken and all relevant information has been noted (see step 14) right before removing the sheet, carefully remove the copper sheet from its mounting device without touching the exposure surface. In our activity, we will do this by unclipping the sheets.
- Carefully place the exposed copper sheets in ziplock plastic baggies, press the air out of the bags, and close.
- Note the date and time the copper sheets were placed in the plastic bags.
- Compare the color of the prepared exposure surface in the pre-exposure and post-exposure pictures and your notes.
- Create a spreadsheet including all of the information noted in steps 10 and 14 (and any subsequent rounds of checking on the copper sheets), notes about color comparisons, and links to the pre- and post-exposure pictures. If you checked on the sheets multiple times, include information and pictures for each time you checked the sheets.
- Compare sheets placed in various locations with regards to the color change and exposure durations.
Expected Results
In initial methods development tests conducted by Lionel Milberger, it was observed that in areas downwind of oil operations with known hydrogen sulfide emissions, it could take a few days for the copper sheets to discolor. Since we mounted copper sheets for approximately 24 hours in an area without known hydrogen sulfide emissions, we did not anticipate any, and did not observe any visible color change during our activity.
If exposing the copper sheets for longer, it is anticipated that reddish cuprous oxide (Cu2O) or blackish cupric oxide (CuO) would form, or blackish cupric sulfide (CuS). See below for Further Questions.
Future Questions
This method has potential to be a highly accessible way to monitor hydrogen sulfide. It is low cost, easy to set up and conduct, and requires very little attentive monitoring time (i.e. for most of the exposure time, people do not need to be present with the sheets). However, many questions exist with regards to the sensitivity and selectivity of this method. As mentioned in the Scope section, the detection limit, or the lowest concentration of hydrogen sulfide that would produce an observable color change on the copper surface is unknown. The rates of reaction between copper and hydrogen sulfide, and between copper and oxygen in this experimental setup, are unknown. We do know that copper reacts with oxygen under low temperatures (e.g. ambient air temperature) to create cuprous oxide (Cu2O), which has a reddish color. This cuprous oxide can further react with oxygen under humid conditions to form cupric oxide (CuO), which has a blackish color. Cupric sulfide (CuS) also has a blackish color, and we do not yet know if we can distinguish Cu0 and CuS visually using this copper sheet method. Another factor that may be important is understanding how much the formation of a Cu2O layer on the exposure area surface may inhibit CuS formation.
In order to assess how well this method can detect and distinguish hydrogen sulfide gas, we first need to understand what copper species are formed on the exposure surface. To gain an understanding of how qualitative or perhaps quantitative this method can be, we need to know the rates at which various copper species form with different hydrogen sulfide concentrations. Then, we will need to understand how different ambient conditions (such as UV intensity, temperature, and relative humidity) influence reaction rates and product species. This method is exciting in that it has great promise and many pressing questions for further development!
14 Comments
@gretchengehrke Do you know if copper tape can be used? I'm considering giving testers out at the Factory Farm Summit mounted on cardboard. Also, should these be hung in a protective area away from rain?
Is this a question? Click here to post it to the Questions page.
Reply to this comment...
Log in to comment
Hi @Zengirl2,
I'm not sure about the copper strips. Whatever copper is used needs to be fairly pure, and I'm not sure if the copper tape is pure copper, or is a thin copper coating, or is compound. I'm also not sure if the adhesive or its decomposition vapors would become corrosive to the copper. I don't think the adhesive would be corrosive, but I really don't know.
For weather considerations, I think the copper should be okay in the rain, but oxidation of copper may be enhanced by rain and humidity. That said, hydrogen sulfide dissolves in water, so if you were to protect the copper from getting wet, you may also be removing it from hydrogen sulfide that would have been airborne. I think it's worth trying in dry and wet conditions at the same locations, if possible. If you attach the copper to cardboard (which could be great -- you made such beautiful prototypes), then of course you would want to protect the cardboard from the rain.
Reply to this comment...
Log in to comment
@gretchengehrke OK, ty for the response. Sounds like I need to check manufacturers about the copper tape to see how pure it is. Also, I was thinking of mounting under an awning or creating something like a plastic dome (similar to a squirrel baffle). However, I could also try mounting the copper tape to pieces of plastic like upcycled milk jugs. That way I would only have to worry about the copper tape adhesive failing in humidity.
Reply to this comment...
Log in to comment
Hi! Do you have photos you can attach for what the copper should look like before/after H2S exposure? Or after any possible false positives?
Is this a question? Click here to post it to the Questions page.
Reply to this comment...
Log in to comment
And if there are any photos of these steps, i'd love to help make diagrams to illustrate the process!
Reply to this comment...
Log in to comment
Hi @warren, Thanks for the reminder to add pictures. I have tried inserting photos a few times today, but it keeps crashing the edit (and, seemingly, causes me to be logged out. weird). I'll add photos in comments. Would you try inserting them into the body of the activity and see if it will work for you?
Is this a question? Click here to post it to the Questions page.
Reply to this comment...
Log in to comment
Here is a picture of cutting the copper sheet into strips.
Reply to this comment...
Log in to comment
Here is a picture after sanding one of the little copper strips. The green pad is actually soft sandpaper / polishing paper.
Reply to this comment...
Log in to comment
Here are before and after photos. We did not expect (and did not observe) any discoloration since we were only putting them out for less than 24 hours, and not near a likely source of hydrogen sulfide.
Before:
After:
Reply to this comment...
Log in to comment
Hi, gretchen - the photos are great. Do you have a list of Amazon links and prices you could add -- as a step in getting a prototyping kit together? Thanks!
Is this a question? Click here to post it to the Questions page.
Reply to this comment...
Log in to comment
Just linking in here to the question where some of us have been looking for different materials and setups to do this test with:
https://publiclab.org/questions/warren/11-14-2017/what-s-the-best-setup-for-a-copper-rod-or-copper-plate-test-for-hydrogen-sulfide-detection
Reply to this comment...
Log in to comment
Hi, i saw you mentioned:
regarding the sandpaper -- was that a bad thing? Would you opt for a different grade of sandpaper ideally? (thinking for #community-kits)
Is this a question? Click here to post it to the Questions page.
Reply to this comment...
Log in to comment
And do you have to discard the sandpaper on each use, or can it be used over and over? Thanks!
Is this a question? Click here to post it to the Questions page.
Reply to this comment...
Log in to comment
@warren, I thought the sandpaper we used (that was like a polisher) worked well to remove grime on the surface of the copper, which is its purpose. That said, I'm not sure if other sandpaper would work better or not -- I have no basis for comparison. This did seem to get the job done though. For usability, this sandpaper seemed like any other, where the surface gets used up after a while, but it's not like you need a brand new piece each time -- just use a fresh section of the piece.
Reply to this comment...
Log in to comment
Login to comment.