Introduction
These instructions will guide you through the assembly process of the foldable paper spectrometer, our low-cost introductory spectrometry kit. These instructions are an activity and you can find other spectrometry related activities in our spectrometry activity grid
Update: There's an updated version of this design available at Papercraft Spectrometry Kit
Public Lab is collaborative, and we very much want YOU to post your activities to that grid too for others to see, replicate, and learn from.
If you have found any way to improve this kit, share it!
If you think you might have found a way to improve this kit --even if you aren't certain-- share your ideas! All of our tools and processes are collaborative, and we rely on you, (yes, you!) to drive us forward. If you can think of any improvement, post it in our upgrades grid.
Have a question?
If you have a question about spectrometry, submit your specific queries at publiclab.org/questions using a specific, relevant title and specific tags (like spectrometry among others) to make sure that people find it.
If you have a customer service, shipping, ordering, bulk ordering, sales, or business related query then please send an E-mail to kits@publiclab.org
What you'll need
The Foldable Spectrometry Starter Kit comes with everything necessary to construct this, so if you bought one you can skip down to assembly; but if you'd like to build your own, you'll need:
To print this letter sized pdf; the first page has build instructions, but the second page should be printed onto sturdy black paper.
You'll also need:
- scissors to cut out the pattern
- a DVD
- a narrow slit - very precise slits printed on plastic sheets are available on the Public Lab Store, but you can also make your own using two pieces of paper.
Assembly
Instructions for your spectrometer can be printed or viewed on this letter-sized PDF pattern which should also come included in your kit.
You can also follow along with these instructions:
Cut out along the outer edge if not already cut out.
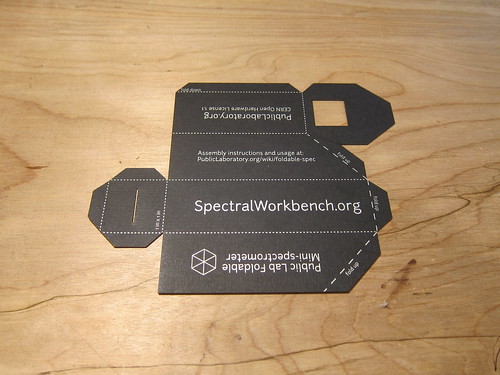
Fold as indicated by the lines. Thinly dotted lines are folded down, dashed lines folded up.
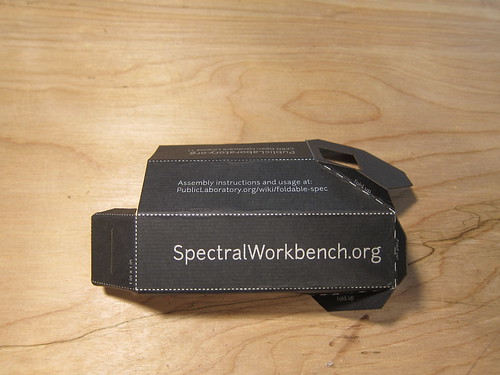
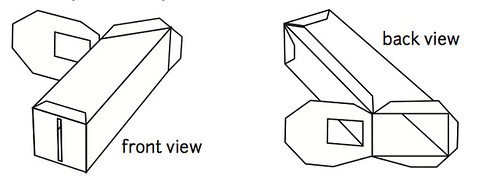
Glue or tape together. Start with the top flap and make sure the edges are aligned.

Except for the Diffraction grating on door, glue or tape all flaps down to the outside.
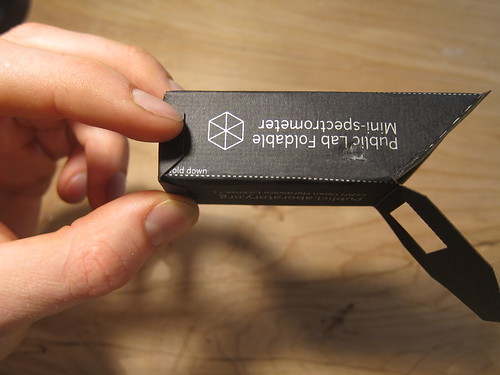
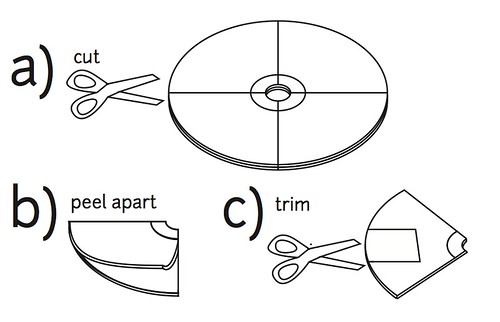
To make a diffraction grating from a DVD-R, peel back the reflective layer, and cut a small square out of the transparent layer. See also: Preparing a DVD-R to act as a diffraction grating for more information on the optional removal of the residual aluminium and dye layers.

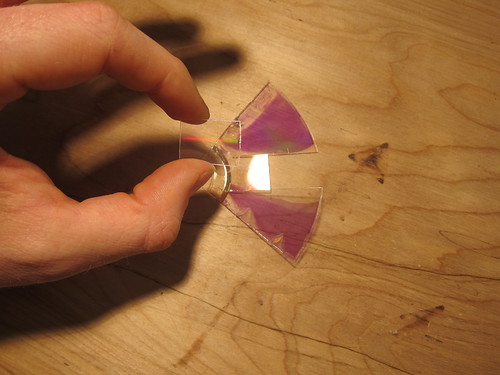
Tape or glue down the DVD-R diffraction grating to the inside of the spectrometer so that the diffraction grating is vertical, producing a horizontal spectral rainbow. Then glue the door closed.
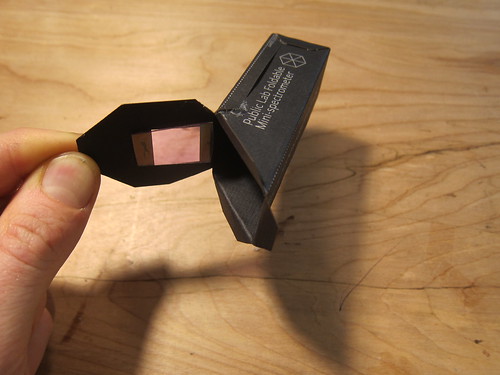
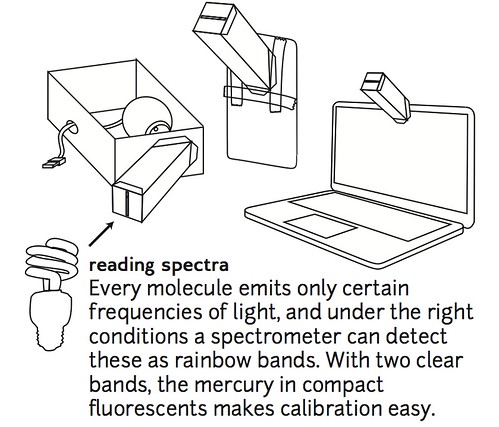
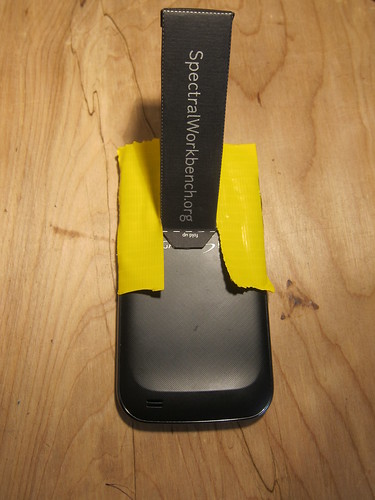
Attach The spectrometer to a webcam with the aid of a box, to a phone, or to a computer.
Illustrated Assembly Guide
Cut out along the outer edge if not already cut out.

Fold as indicated by the lines. Thinly dotted lines are folded down, dashed lines folded up.
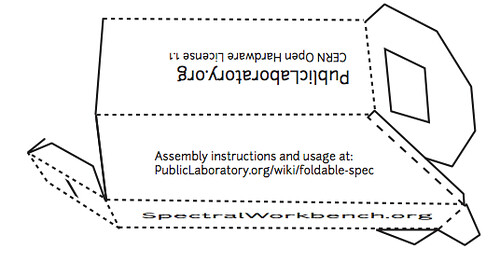
Except for the Diffraction grating on door, glue or tape all flaps down to the outside.
To make a diffraction grating from a DVD-R, cu a square from the outer edge. The DVD has is two layers of plastic. Peel back the reflective layer, and cut a small square out of the transparent layer.
Tape or glue down the DVD-R diffraction grating to the inside of the spectrometer so that the diffraction grating is vertical, producing a horizontal spectral rainbow. Then glue the door closed.
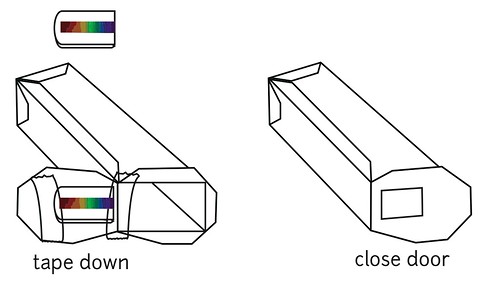
Attach The spectrometer to a webcam with the aid of a box, to a phone, or to a computer.

2 Comments
Created a spectrometer! :) here are the pics below!
Reply to this comment...
Log in to comment
That's so awesome, @sanchittechnogeek -- did it go smoothly for you? any trouble, or improvements you made?
Is this a question? Click here to post it to the Questions page.
Reply to this comment...
Log in to comment
Login to comment.