All The Shingle Ladies
Put Your Roofs Up
Clare, Helena, Pria and Zoe
AP Environmental Science
May 30, 2017
Introduction
There's no place like home right? If that's the case, then it's important to make sure that our homes are working and functioning properly; which is why we wanted to use aerial mapping techniques to find out if there was something wrong with the rooftops of the dorms at the Thacher School. After living at Thacher for three years, we are all aware of general information regarding each dorm, and we have lived in three out of the six dorms. Before starting this experiment, we suspected that the older dorms were potentially more vulnerable to water leakage and/or other complications. The oldest dorm at the school is Upper School, the junior/senior boys dorm, and the newest dorm is Casa, for freshman girls. Furthermore, we decided that aerial mapping would be a good way to deal with this issue by giving us the opportunity to look at the rooftops from above, instead of making observations from the ground. The bird's eye view makes it easier to spot complications because the images portray the full scope of the rooftop. Aerial mapping is also a cheap alternative to other photographic techniques, and so we thought it was the best method to deal with this issue.
Methods
Our group utilized the Public Lab aerial mapping kit provided to us by our AP Environmental Science class instructor which included all of the equipment we needed. For the most part, we followed the instructions provided by the Public Lab, which were extremely helpful and easy to follow, in constructing our rig and carrying out our mapping.
Instructions for constructing our rig and harness were found at:
https://publiclab.org/notes/mathew/02-22-2017/rubber-band-and-pet-bottle-camera-rig
The equipment from the aerial mapping kit that we ultimately used for our project was:
- A Canon PowerShot SD750
- Self-Constructed Camera Rig
- Ocean Spray Plastic Bottle
- Rubber Bands
- String
- Harness
- Rubber Bands
- String
- Tape
- Small Pebble
- Carabiner Clips
- Velcro Straps
- Helium Balloon
Our process of gathering data was relatively straightforward. For each aerial mapping session, our group set out towards a specific dormitory with all of our equipment. Once we reached the site, one person would hold onto the balloon, while the rest of the team members would proceed to set up the camera to shoot on continuous mode and assemble the harness and rig. In preparing the camera to shoot, it was important to focus it on somewhere well-lit and farther away so that the photographs of the roofs would be focused and correctly exposed. After doing so, we would then proceed to tape a small pebble onto the shutter button to commence continuous shooting, and quickly assemble the harness onto the camera and the harness onto the rig. The rig is then attached to the balloon with a carabiner clip. After this process is complete, the group member would then release the balloon, allowing it to rise to the appropriate height before reeling it back in.
Our method of mapping proved to be effective overall after we became more practiced in carrying it out. Though at times there were complications and the process has further room for improvement (see sections below), the method we utilized was easy to grasp and achieved what we set out to accomplish.
Results
While collecting data, we ran into some issues because our balloon did not have enough helium. This was evident on the day we collected data of the Upper School dormitory. The balloon could not get high enough to take pictures of larger sections of the roof. However, on almost all the other sites we were able to get high quality photos with good lighting. We ran into issues of exposure with the Lower School dormitory, with the photos being overexposed, however, after that we were able to readjust and avoid the issue for the next few sites. We also ran into some problems with the battery life of the camera. Because the battery life was short, we were limited as to the number of dorms we could photograph in one session. We had to be extremely efficient when setting up the camera after the shutter button had been pressed down. Our harness and rig were very effective in keeping the camera still enough to take photos \that were in focus.
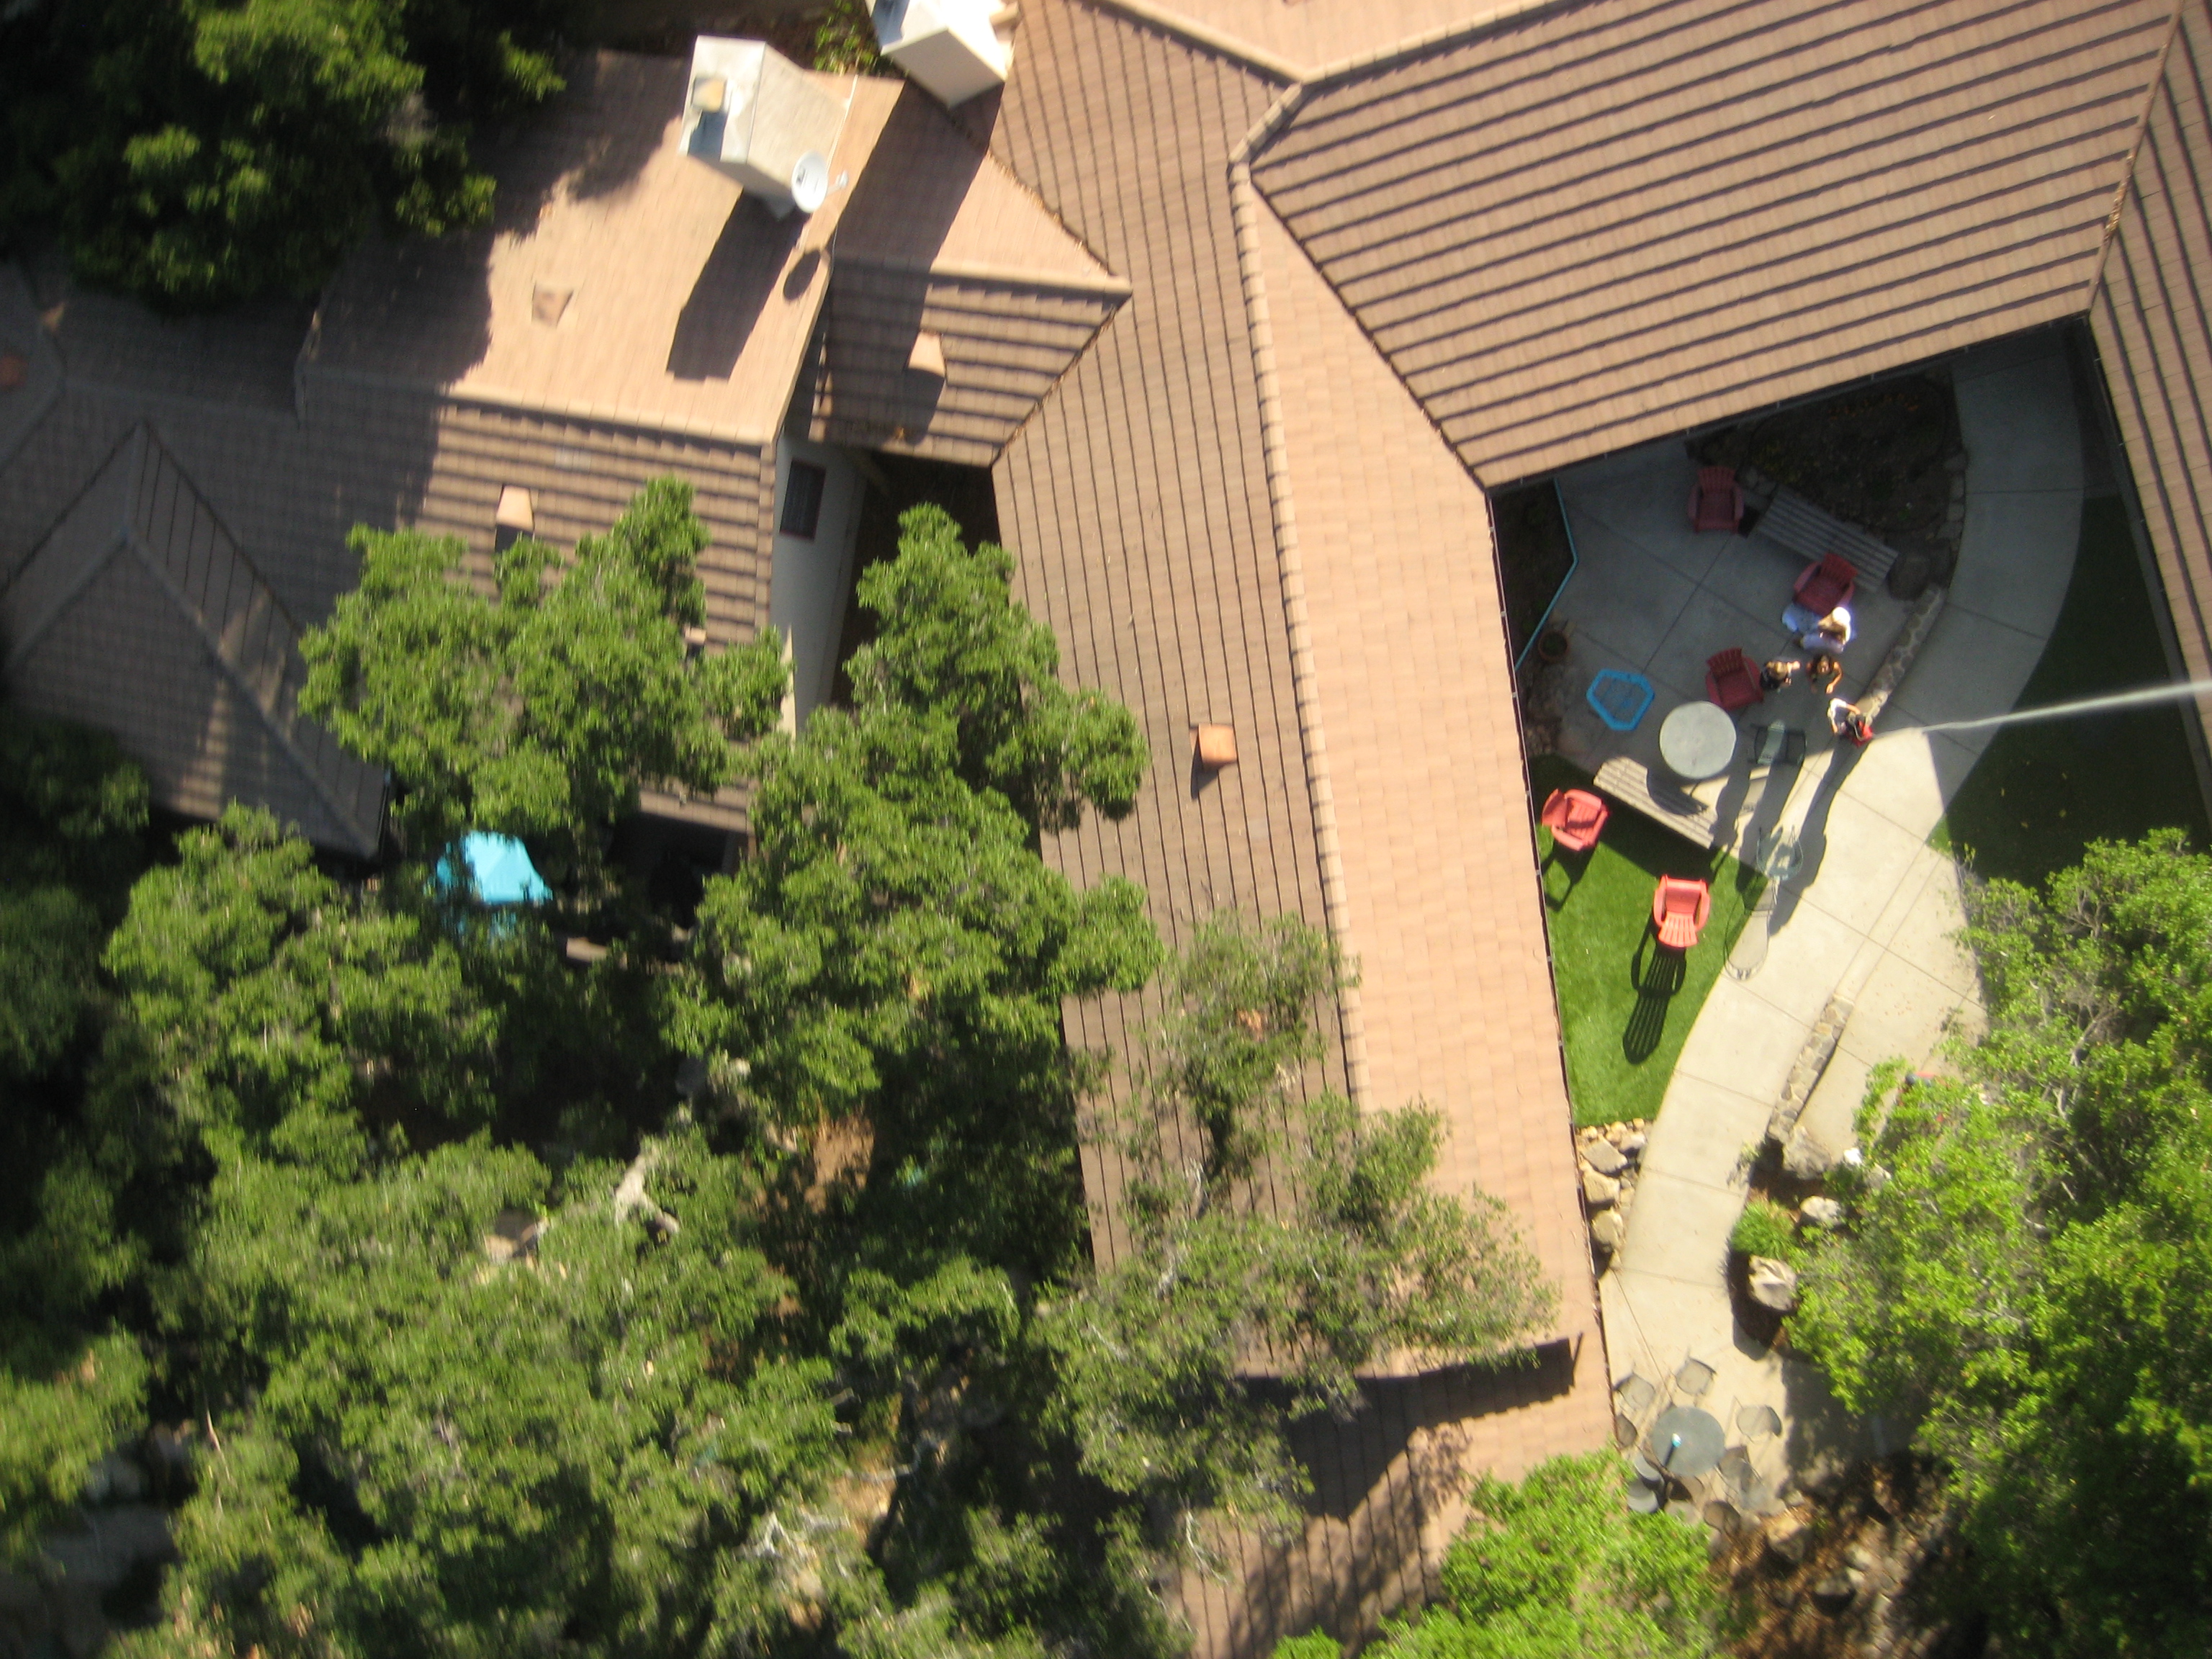
Looking at the photos, we could tell which roofs had any physical damage. We found that most of the roofs were in good shape. The oldest dorm, Upper School, appeared to have more discoloration and rusting on the roof. The most recently built dorm, Casa, had little to no damage on its roof.
Photos:
Lower School

Middle School

Los Padres

Upper School


Casa de Piedra

Throwing Down Some Roof Knowledge
The roofs of Lower School, Middle School, Los Padres and Upper School consist of asphalt shingles. This material was chosen for several reasons. First, asphalt tiles have a long life span warranty, which averages around twenty years depending on the brand; thus making them beneficial for use in dormitories because of their durability. Secondly, these tiles are flame-retardant and help keep the dorm safe from fire. This feature is imperative because the dry conditions in Southern California combined with Thacher's location adjacent to The Los Padres National Forest makes the school at risk for forest fires. Asphalt tiles are also non-toxic which therefore allow them to be suitable for the collection of rainwater for reuse as greywater. They are also low maintenance, effective at blocking out sound, and come in a variety of different colors.
On the other hand, the Casa de Piedra dorm, which was rebuilt in 2013, has metal roofing instead of tiles. Metal provides some of the same benefits of roof tiles, but it also has some drawbacks. When properly installed, a metal roof should last from twenty to fifty years. The metal is also resistant to fire, mildew, insects and rot. In comparison to concrete tiles, which weigh 900 pounds per square foot, most varieties of metal roofing weigh 50-150 pounds per square foot. Metal's ability to reflect radiant heat from the sun minimizes midday heat gain, which is extremely beneficial because of Ojai's toasty temperatures. On the downside, metal roofing is much more expensive, with a cost equivalent to other premium materials.
Mr. Bennett, the head of maintenance, stated that the roofing materials were chosen to "achieve an architectural look and feel rather than any functionality." However, according to Mr. Bennett, the materials chosen do come with plenty of concrete benefits. He noted that asphalt shingles metal roofing shed rainfall extremely well, as well as providing insulation.
Moreover, Thacher has also received an $857,000 grant to construct a rainwater capture system for all the dorms. Looking forward, Thacher's newest construction project for the dining hall will include a metal roof, which will look similar to Casa's but will be a different color.
Recommendations
Three primary recommendations our group has for future parties conducting this aerial mapping experiment are:
- Make sure that your batteries are charged and that you bring extras with you. . Our group encountered multiple instances in which our camera died during or between mapping sessions, forcing us to cut the process short. This severely hindered our efficiency
- Fill your balloon with plenty of helium.. Our group's mapping session of the Upper School Dormitory illustrated the risks of not having enough helium, during which the balloon failed to reach a sufficient height, continuously oscillated, and almost hit the roof on multiple instances.
- Explore an alternative methods for assembling the camera, harness and rig. After taping the pebble onto the camera and commencing continuous shooting, our group often had to rush the assembly of the harness and rig in order to save battery life, thus reducing the number of unusable photos taken. This also increased the risk of sloppy assembly of the harness and rig, which would then entail in our group having to redo the set up.
Reflections
Although we did not observe any damage to any of the roofs besides the expected mild discoloration on some of the older dorms, we came to the conclusion that aerial mapping is an excellent method to find issues like cracks and leaks in roofs in a safe manner. However, due to the distance between the camera and the roof, it is very much a possibility that we missed small and unnoticeable cracks and leaks. It is cheaper than many other methods of observation and will most likely have higher quality pictures than that of a drone when executed properly. While Google Maps and Google Earth can give one a preliminary idea of what the building looks like, aerial mapping gives a quick and clear result of potential major issues with the roof. In addition, photos from Google Maps could have been taken years prior to any issues forming and therefore are not as reliable as aerial mapping. In order for this process to be most effective, this should be done on a relatively still (not windy) day to ensure the balloon doesn't run into any trees or roofs accidentally. One should also be sure that the balloon has enough helium, as not having enough helium can cause the balloon to take an unexpected path producing useless images. Additionally, when strapping the camera to the balloon, be sure that the camera is pointed at a patch of light and try as hard as you can not to cover the lens with your hand. This will help ensure the good quality of the photos and help them to not become overexposed.
1 Comments
Hi, just wanted to say we featured your story in our new Kickstarter campaign for Mini Balloon and Kite Kits:
https://publiclab.org/notes/warren/06-22-2017/balloon-mapping-stories-part-1
http://publiclab.org/ks
Thanks for your amazing work!
Reply to this comment...
Log in to comment
Login to comment.