Tips for Building a Mini-Kite
- Keep it light! Try to use the lightest materials available and to use only what's necessary to build the kite.
- Symmetry is our friend! We want our kites to by symmetrical about the vertical axis in area as well as weight. This is helped by cutting your kite sail while folded in half.
- The kite's bridle (where the flying string attached to the kite) can be moved to make flying easier. The goal is to tie the bridle point in such a way that, when hanging upside down, the kite hangs at an angle so that the nose is higher than the tail. NASA has a very detailed explanation of bridle points, kites, and the geometry involved here.
- Kite tails aren't just for looks! They can make kites more stable as well as more beautiful.
- If using a flying rod to fly your small kite indoors, the flying line should be shorter than the flying rod to maintain good control.
Materials
- Scissors
- Material for the Kite Sail*
- Thin string, like sewing thread or a light-weight fishing wire
- A kite tail (ribbons work well!)
- A straight rod (maybe 16-20 inches long) to use as a flying rod
- Here I used a stick from my backyard, but taped together plastic straws or other light, easy to hold materials can work well too. Share what you use in the comments!
- Tape
- A pen or marker for marking stencils on your kite sail material
- A ruler
- Material for spars**
*Kite Sail Material
You can create kites like these with a variety of materials and experimenting with the material for the kite’s sail is a great way to improve your kite. Check out this challenge for trying new kite sail materials (link to engineering challenge)!
Here, I make a kite sail from tissue paper. Other materials you might try are:
- Plastic bags
- Printer paper
- Cotton cloth
- Polyester cloth
**Kite Spars
You can use whatever materials you have available to create support for your kite. It’s important that these are lightweight. Here, I use some tooth picks taped together, but plastic straws, coffee stirrers, or light sticks can be used here too. I also tried out some spars made from scraps of cardboard.

Share what you use in the comments!
Step 1: Determining the Size of Your Kite
We’re building Rokaku Kites, which are 6-sided kites that look like elongated hexagons. Most rokkaku are made to ratios of 3,4,5 or 4,5,6. In these ratios, the first number is the height of the main body, the second number is the width of the kite, and the last number is the total height of the kite. Here’s an example of how that works:

I’m creating a kite that is 6 inches high, 5 inches wide, and the main body is 3 inches high. You can download a template for this kite here.
Step 2: Trace your pattern onto your kite sail

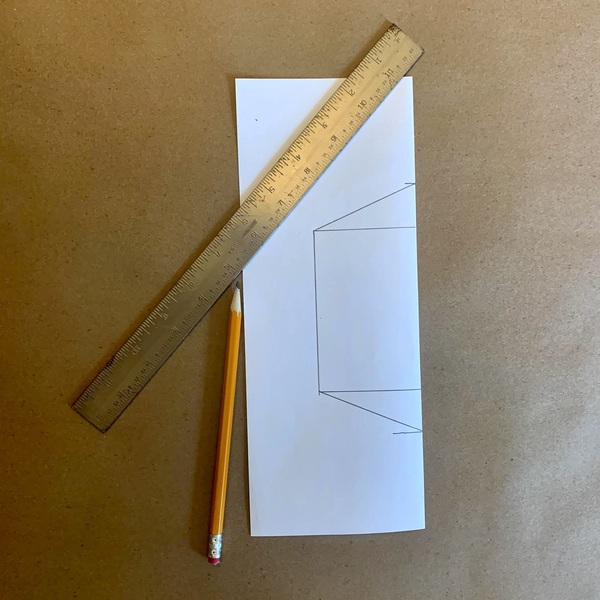
Fold the material for your kite sail in half. Make two short lines along the fold on your kite sail 6 inches apart. This will be the total height of your kite. You’ll now need to mark where to put your horizontal spars. These will be 1-inch from the total height marks towards the inside of your kite. At this spot, draw a line perpendicular to the fold that is 2.5 inches long. When you unfold the kite, this will be 5-inches long and the total width of the kite. Next, you’ll draw a line connecting the two horizontal lines which will be the outer-edge of your kite. Connect your kite-top marks with the corners of the outer edge to create the outline of your kite. You should have half of a hexagon drawn on your kite sail, it should look something like the photo above.
If you’re using the template shared above, cut it out along the solid lines and fold it in half along the dotted center (orange) line. Trace this shape onto your kite to create a pattern.
Step 3: Cut out your kite sail

Cut along the outside of your kite sail.
Step 4: Create your spars

For this kite, we'll create three spars: two horizontal and one vertical. I've found that toothpicks make great spars due to their light weight and strength. Experiment with materials of different weight and flexibility to see how it changes your kite.
The horizontal spars need to be the width of your kite, which for me was about two toothpicks. The vertical spar will be the same as the height of your kite, for which I taped together and trimmed 3 toothpicks.
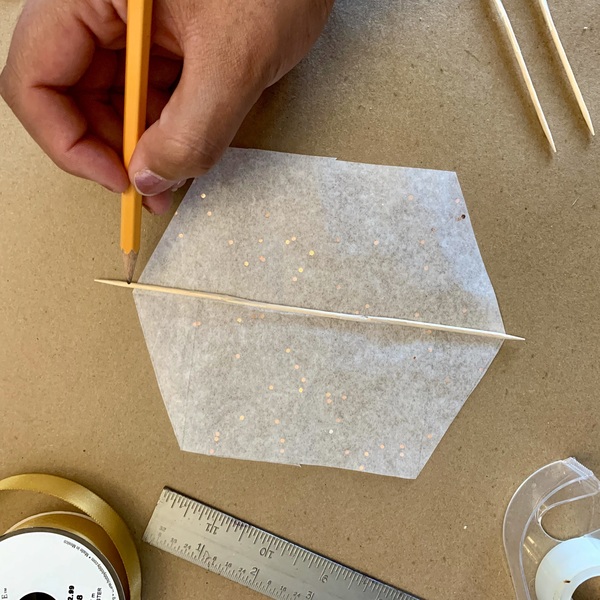
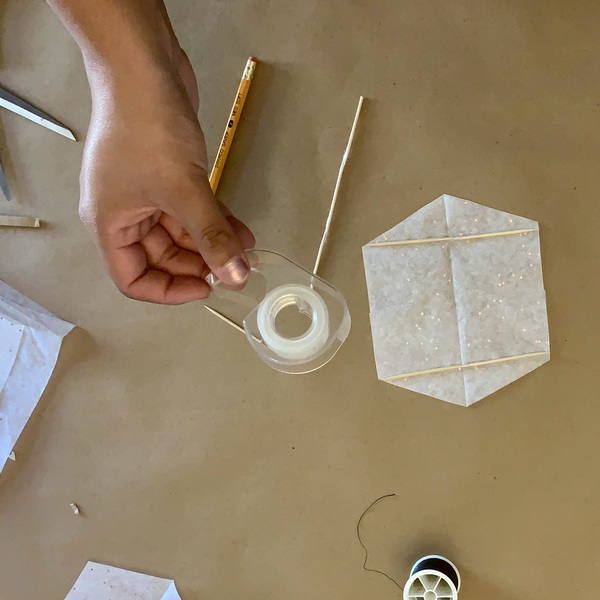
To create the spars, align two toothpicks on the edge of of a piece of tape, as shown in the center image above. Roll the toothpicks within the tape until you have a spar like the right-most image above.
Step 5: Trim your spars as necessary

You want your horizontal spars to be equal in length to the width of your kite, here that's 5 inches. Your vertical spar needs to be equal in length to the length of your kite, here that's 6 inches. Measure and trim your spars before attaching them.
Step 6: Tape your horizontal spars to the kite

We're going to attach the horizontal spars first. Place them parallel running the width of your kite as shown above.
Using as small a piece of tape as possible (remember, we want to keep the kites light!), attach the end of one of your horizontal spars to the kite. Repeat until you've attached both ends of the two horizontal spars.
Step 7: Attach the vertical spar to your kite

To attach the vertical spar to the kite, we will lay the spar along the center line of the kite. Place the piece of tape on the spar and sail. Fold over any excess tape around the point of the sail, one side after another, along the line of the kite to maintain the triangular point.
### Step 8: Attach a bridle to your kite.

To fly your kite, you'll need to attach a bridle. The kite’s bridle (where the flying string attached to the kite) can be moved to make flying easier. The goal is to tie the bridle point in such a way that, when hanging upside down, the kite hangs at an angle so that the nose is higher than the tail. NASA has a very detailed explanation of bridle points, kites, and the geometry involved here.
For this, I used a string about 15 inches long. It needs to be attached at the intersection of the vertical spar with both horizontal spars. You can tie this one with a simple double knot.
Step 9: Attach a tail to your kite

This kite needs a little help to be stable when flying and that's where the tail comes in. I used a light ribbon to create a tail that was 7 inches long. Tape it to one of the points.
Step 10: Connect a flying line to your kite
To fly your kite, you'll need to make a bridle point and attach a flying line to it. This flying line is just another piece of string. It can be as long or as short as you'd like, but generally you want it to be at least 15 inches long, and, if you intend to use a flying rod, the flying line should be shorter than that flying rod.
To attach the flying line to your kite bridle, you want to tie the flying line to your bridle at a point closer to the kite's nose than its tail. You may move your flying line around to improve your kite's flight.
Step 11: Attach your kite to a flying rod (optional)
If using a flying rod to fly your small kite indoors, the flying line should be shorter than the flying rod to maintain good control. Flying rods can help make flight easier by keeping the kite out of the wind turbulence created by your arms. Attach the end of your flying string to a flying rod and fly by moving the rod in a figure 8.
To attach your kite to a flying rod, simply tie the end of your flying line to the end of the rod.

1 Comments
This video has a great simple way to add an adjustable fly line that I think really makes this kite easier to fly. I'm sharing the video here and will update the post with the new bridle!
Reply to this comment...
Log in to comment
Login to comment.