Materials
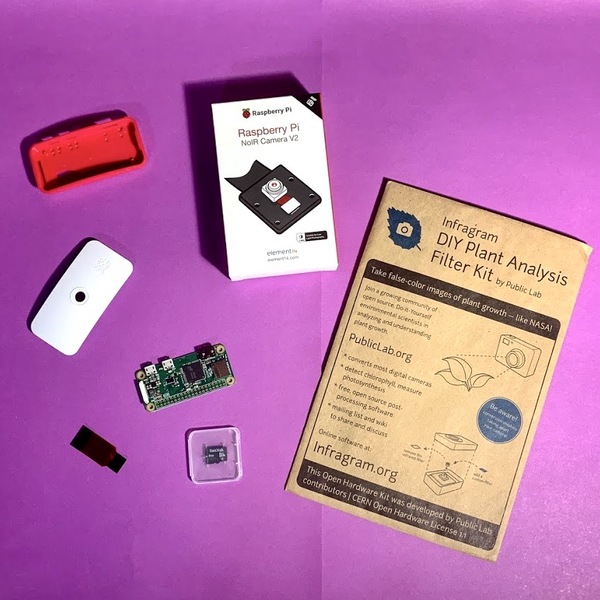
- Raspberry Pi (this post uses a Raspberry Pi V0)
- Raspberry Pi Compatible Camera with No IR
- Red or Blue Filter
- A micro SD card loaded with Infragram Software (check out this post to learn more about Pi-Builder)
- A short ribbon to connect the camera to the Raspberry Pi
- A case for the Raspberry Pi (optional)
- Tape (not included in the Infragram Pi Kits)
- Scissors (not included in the Infragram Pi Kits)
You can purchase all the parts listed above as a kit on the Public Lab Store.
Step 1: Connect the Camera to the Adapter ribbbon
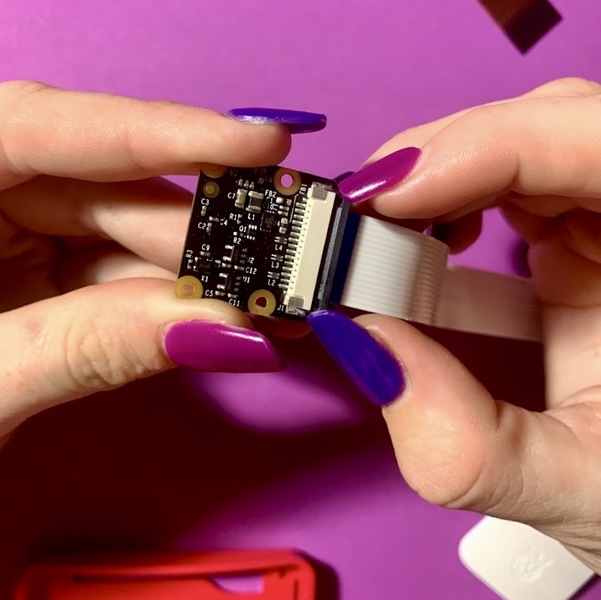
To loosen the ribbon, pull gently on the the black bar attached to the white ribbon holder as shown above. You can then pull the long ribbon out.
 Next, insert the short adapter ribbon to the camera. Be sure that you have the gold-side of the ribbon facing down and the black ribbon up as shown above. While holding the ribbon in place, push the black bar back into the holder. Make sure this is firm, you can tug the ribbon gently to make sure it remains in place.
Step 2: Connect the Camera to the Raspberry Pi
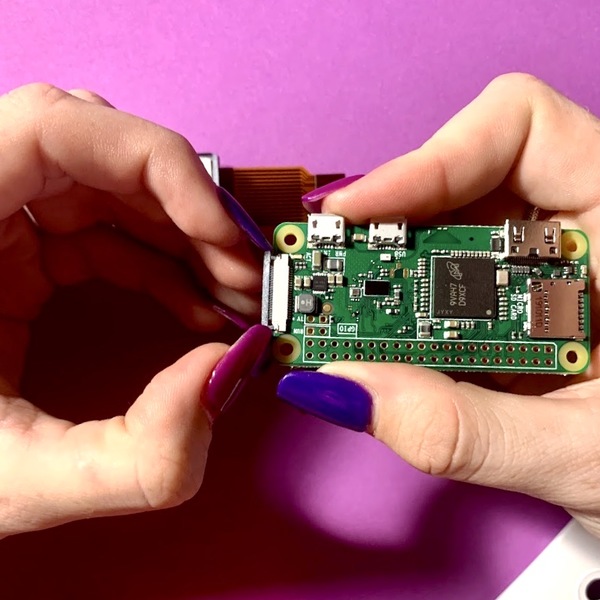
 Loosen the ribbon holder by pulling the black bar gently away from the white bar. Insert the small side of the ribbon here with the gold side facing down. Push the black bar back towards the white bar to attach the ribbon. You can gently tug on the ribbon to confirm that it is in place.
It may look like the camera is upside-down (as above) but we will rotate the camera when we put everything into the case.
Step 3: Insert the MicroSD Card
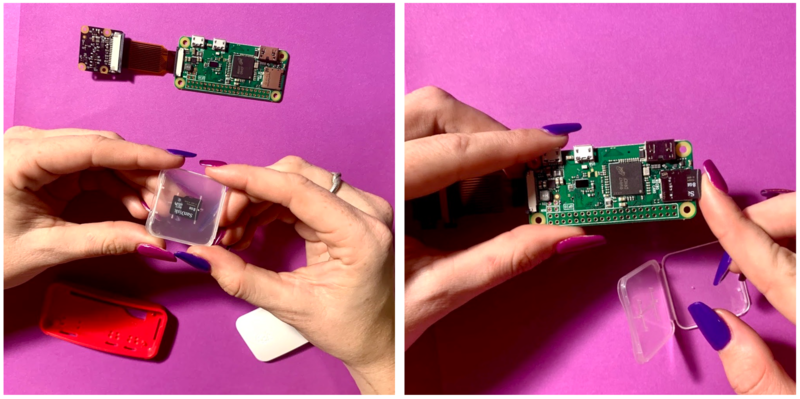
Locate your SD card. If you ordered through the Public Lab Store, your card already has the Infragram Software pre-installed. If you have your own SD card, you can get it setup with help from this post. Place your SD card in the SD card slot as shown.
Step 4: Insert the Camera into the top half of the case.
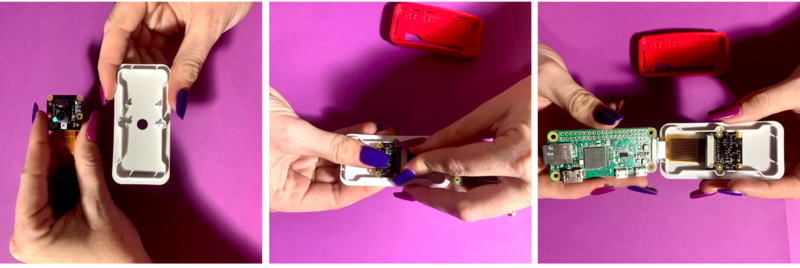
Find the top (white) half of your case. On the inside of the case, you'll find four plus-sign-shaped pegs around the hole for the lens. You'll find matching holes on the camera around the lens, outlined in yellow. Align the pegs with the holes and firmly press down on the camera to lock it into place, as shown above.
Step. 5: Insert the Raspberry Pi into the bottom half of the case
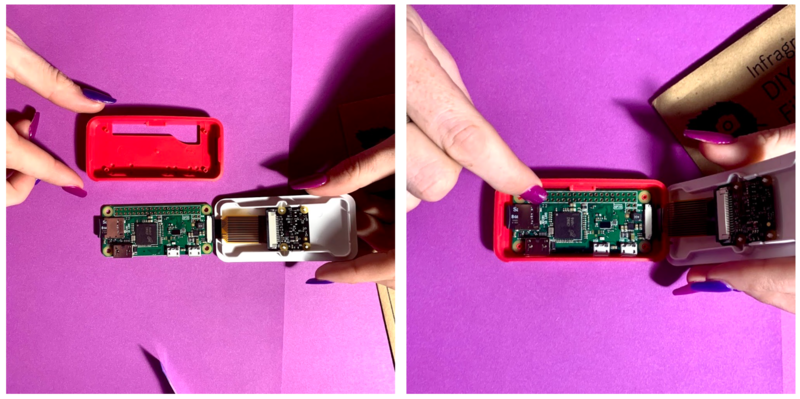
Find the bottom (red) half of your case. You'll find four pegs on the case that align with four holes on the Raspberry Pi that are outlined in yellow. Find the. holes on the side of the Raspberry Pi case that match the ports along the side of the Raspberry Pi. You can see how these things are aligned above. Once you have everything lined up, firmly press the Raspberry Pi into the case. This may include some slight bending of the ribbon.
Now you can attach the two halves of the case.
Step 6: Attach the filter to the camera case.
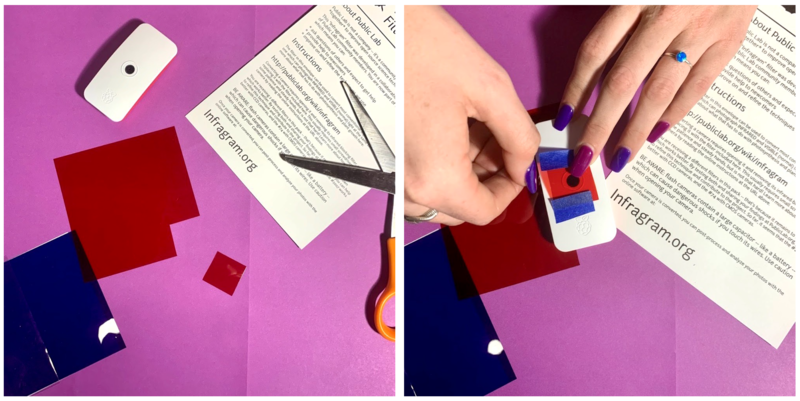 Take your red and blue filters out of the envelope. Choose either the red or blue filter (learn more about each here) and cut out a 1 inch by 1 inch square. Place this square over the camera lens and tape it to the case.
Step 7: Get started
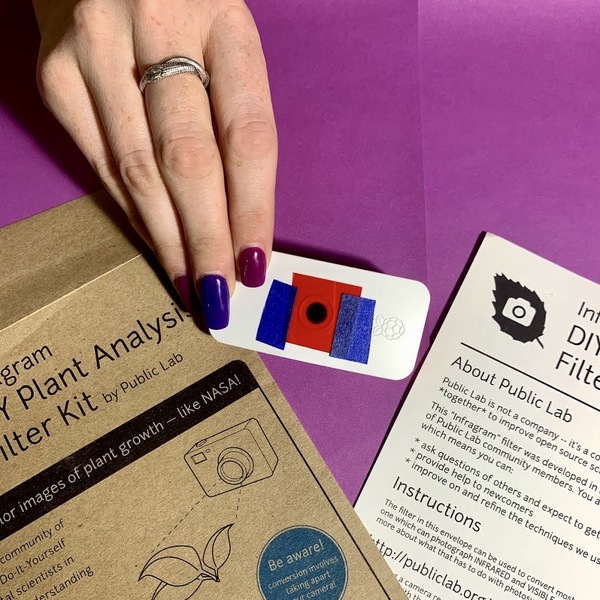
Once you connect your camera to power you are ready to begin taking multispectral images! Check out this post for some steps on how to get started.

1 Comments
Thank you for this easy-to-follow guide!
Reply to this comment...
Log in to comment
Login to comment.