
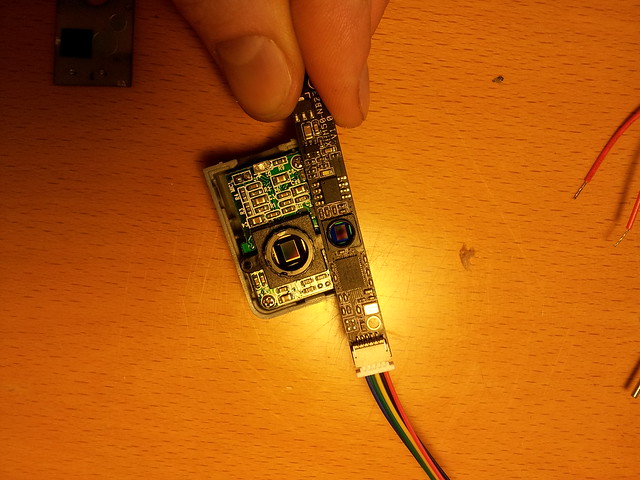
Today a small camera board made by Sanm arrived in the mail from Hong Kong. It came without a USB cable, just a 5-pin header, so I used the pinout diagram on its product page and wikipedia's USB pinout reference to put together a cable.
Sanm pinout: 1 VDD 2 D- 3 D+ 4 GND
Then I took out the filter by unscrewing the lens and prying it loose, closed it up, and plugged it in, and it worked. It identified itself to my computer as a "BisonCam NB Pro" which appears to be the internal webcam of the MSI GT780R.
The camera has a sensor half the size of the Syba webcams that currently come with the desktop spectrometry kit, and the board is much thinner 60mm long:
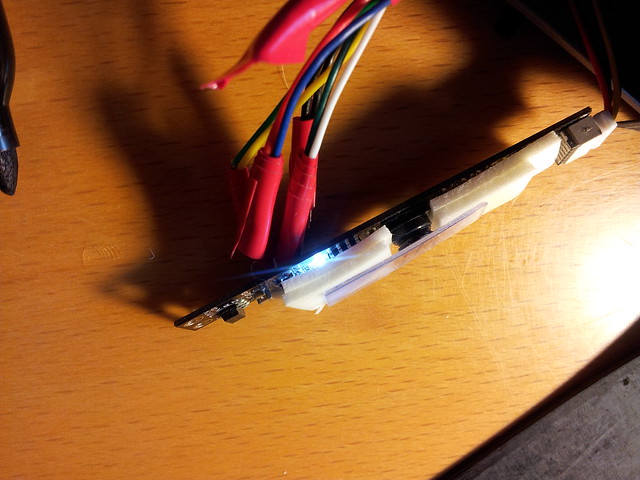
The board has a bright white LED on it that needs to be covered. I put some electrical tape over it:
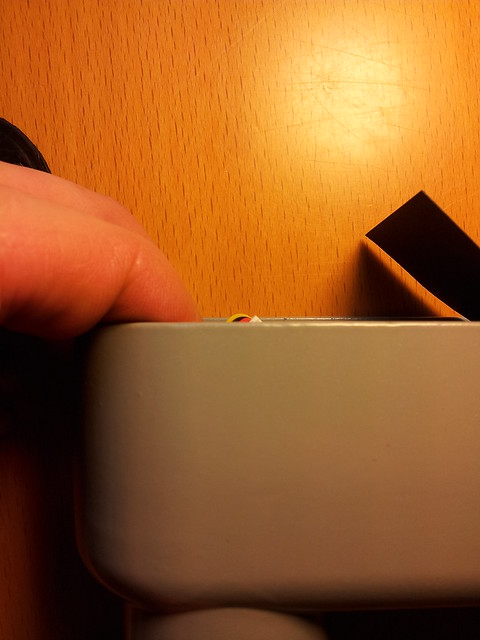
I mounted a DVD fragment using two layers of double-sided foam tape:
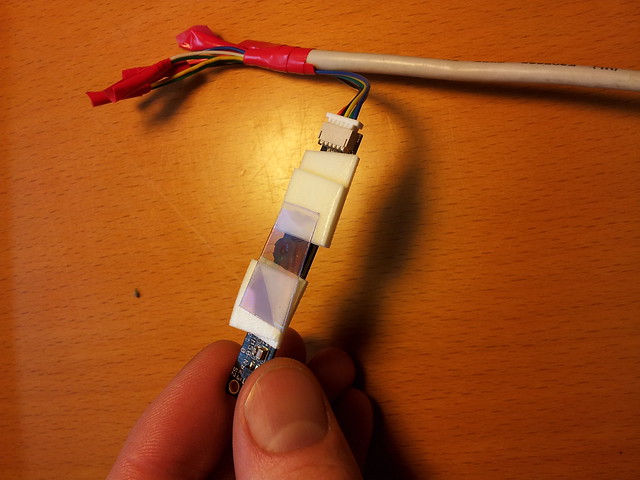
In order to get a flat surface for mounting, I used the broken off mounting point of a Syba cam, and stuck the Sanm board to the side of it with double sided tape. In this photo I marked where the body of the Syba cam had been with a pen, and ticked off the lens location, for comparison. I believe my lens placement for the Sanm camera is roughly the same place as the Syba cam:
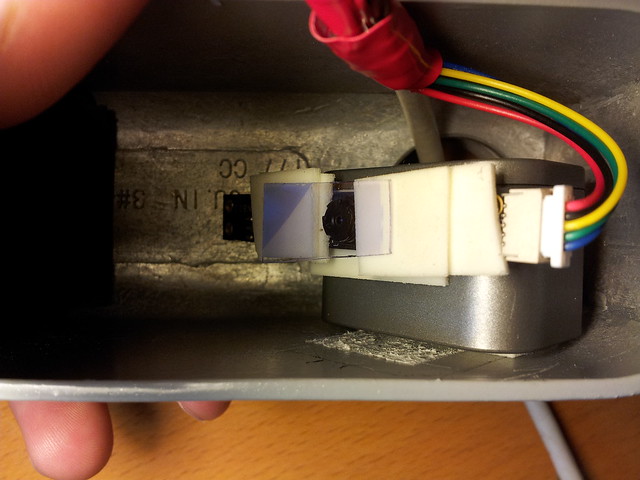
The Sanm cam barely fits. It sticks beyond the lip of the conduit box, but the lid bulges out a little bit and closes fine:
the results are a little dim, despite the otherwise great quality of the camera. Any thoughts?
20 Comments
wow, looks spectacular. Can you post a full frame grab instead of a spectrum? Maybe the brightest point is not on the sampling line.
Also, just to think about brightness, could you post a comparison with a syba-based spectrum from the same distance and setup?
Sometimes it helps to diffuse the incoming light by putting a napkin over the bulb, so you don't have to align it as well with the device. If this is an alignment issue, that'd solve this, but if it really is about the sensitivity of the camera, maybe we have to come up with another solution.
Very exciting! Keep us up to date about the USB cable too!
This board could easily be used with a raspberry pi as well, and would be so much thinner and more compact!
Is this a question? Click here to post it to the Questions page.
Reply to this comment...
Log in to comment
That's a really good spectrum, even though it looks a little dim. There are no overexposed peaks in any channel, but if the image had been brighter, some peaks would have been lost in the brightest channels. So the exposure is really as good as you can get.
A greater limitation of the hardware may be the resolution. There is not even one pixel per nm, so there is not much resolution to spare to define where the peaks are.
It's cool to see such good results from bare ingredients.
Reply to this comment...
Log in to comment
I think you understand. I didn't know that Live Capture downsamples, only that there are about 550 pixels between 400 and 700 nm in the Spectral Workbench data. I also should have known that 550/300 is substantially greater than one, but that is another issue. So that resolution is not too bad at all, about 1.8 pixels per nm.
Reply to this comment...
Log in to comment
So was Mat streaming 1600x1200 which got downsampled at the browser to 640x480? And it is now possible to do less downsampling? And if downsampling is reduced then all the Public Lab spectrometers will suddenly have more resolution?
Is this a question? Click here to post it to the Questions page.
Reply to this comment...
Log in to comment
This was direct capture to the Sanm webcam through spectralworkbench.org. When I get home this evening I'll try a 1400x1600 capture and upload. I don't think there is an alignment or diffusion issue-- That was the clearest position I could sample from.
before I disassembled the desktop spectrometer to replace it, I took a spectrum with my Sybacam desktop kit setup in the same place for comparison, much brighter, but also noisier:
Reply to this comment...
Log in to comment
It is possible to do less downsampling. Hopefully this'll be part of hte Capture page refresh. Originally it wasn't a high priority since it was already way past the expected resolution of the device. Now, people are challenging that assumption :-)
Yep!! Not retroactively, however. But really, many things we do in the software will "improve" the hardware. Such as noise reduction, or baselining, or autodetection of calibration lights, HDR compensation for overexposure, etc. One great thing about doing a combined hardware/software platform.
Is this a question? Click here to post it to the Questions page.
Reply to this comment...
Log in to comment
Ok, this spectrum is completely messed up in its calibration and graph... spectral workbench at its finest, github issue documented...
BUT it is a 1600x1200 full resolution capture. Its a clear reading but it is almost impossible to work with in spectral workbench because I can barely see the damned image on my monitor. A gain control may be warranted if we use this camera.
Reply to this comment...
Log in to comment
Reply to this comment...
Log in to comment
there's some lurking flipping bug which has really been chapping my caboose... chris is also complaining about it. After I get some plots alpha work done, i'll go in and fix that first, promise.
Reply to this comment...
Log in to comment
figuring in the shipping time, i looked into ordering one but couldn't find the info. Did you get yours as a sample or can i buy one to play with?
Is this a question? Click here to post it to the Questions page.
Reply to this comment...
Log in to comment
Cute little webcam. I'm assuming this has an MJPEG encoder onboard, otherwise it would monopolize the netbook's USB...unless they use a separate controller only for that purpose - don't really know what is cheaper. It looks like there are a few ICs on the board which is a good sign; whereas, the SYBA is mostly just a sensor with a few resistors and caps - typical of a lot of cheap "empty-box" USB devices that use a lot of resources from the host and have buggy complicated drivers.
BTW, I found it was much easier to remove the whole lens assembly from the SYBA by unscrewing it from behind rather than melting the glue and wrenching the barrel out. This way you don't have to refocus... but maybe you guys want to refocus anyway for the spectrometer app?
Is this a question? Click here to post it to the Questions page.
Reply to this comment...
Log in to comment
Yeah, on the SYBA you have to refocus to ~9" anyways.
Mathew -- on this one, we could presumably ask for a custom focus too, no? That would be incredible.
The SYBA also provides driverless UVC, but is pretty minimally featured... no ability to shut off gain, exposure. Mathew, would you be able to see if the SANM can have its exposure, etc, disabled with the utility listed at the bottom of this page: http://publiclaboratory.org/wiki/spectral-workbench-usage
Is this a question? Click here to post it to the Questions page.
Reply to this comment...
Log in to comment
Sonofaquark, the first link at the top of the post is the buy link, it was ~$14 and took about 2.5 weeks to arrive. http://www.aliexpress.com/store/product/2-0-megapixel-USB2-0-Camera-Module-HM2050-cmos-board-camera-with-LED-indicator/404311_663037480.html
Reply to this comment...
Log in to comment
Jeff, CameraControl works, but its a little buggy. The good news is that turning off auto exposure works perfectly.
But... turning white balance off crashes the app, and gain control is iffy-- Once I changed the gain I couldn't get it back to normal again, but the highest and lowest settings were available, until it crashed.
My hunch is that the demo app is just not up to date (it was made in 2009) but that the settings are otherwise available for adjustment.
Custom Focus
I'll check with the factory if they'll set a custom focus. that would be perfect, no futzing with the camera-- no filter, no focus change, just put it in the box!
Changing the Camera Angle
It seems like the ~60 degree angle being discussed on the list works fine for this camera (I can't tell the difference) and it fits in the box better at that angle.
Reply to this comment...
Log in to comment
for attaching inside the case, I think this 57 degree extruded styrene from TP extrusions (part #TP 1906) would be almost exactly the right thing, but can keep looking if we need an exact angle, or try to contact for a custom extrusion. I can chop it down to short pieces for the kits.
http://www.tpextrusions.com/plastic-pvc-angles-non-standard-angles.html
Reply to this comment...
Log in to comment
Can you upload one more image with the camera at 57 degrees? Just to be sure.
Also, let's ping the list, as Dave Stoft, Tom H, and Chris F may have input on the camera angle. If we can show them a good spectrum at 57 degrees I'm curious what they'll say.
Is this a question? Click here to post it to the Questions page.
Reply to this comment...
Log in to comment
Great find on the angled extrusion too!
Reply to this comment...
Log in to comment
Oh yeah, board shows up in Ubuntu, Windows 7 & 8 according to my quick samping of 3 random laptops around my coworking space.
Reply to this comment...
Log in to comment
Mat, Can I ignore the red wire on the Sanm plug? The number 5 one labeled SWELD Ground? Or should I connect it to the wirey stuff surrounding the four wires in the USB cable?
USB...... SANM 1 red...... 1 blue 2 white...... 2 green 3 green...... 3 yellow 4 black...... 4 black ??? ...... 5 red
Is this a question? Click here to post it to the Questions page.
Reply to this comment...
Log in to comment
more technical details on the Sanm camera: Sensor: HM2050 CMOS sensor Pixels: 2mega (UXGA) Top resolution:1600*1200 Lens type: 1/5 inch EFL: 2.85mm FOV: 68 degree Interface: USB2.0/1.1 Size: 60mmX8mmX5.2mm
Spec sheet: 20130903204430811.pdf
Reply to this comment...
Log in to comment
Login to comment.