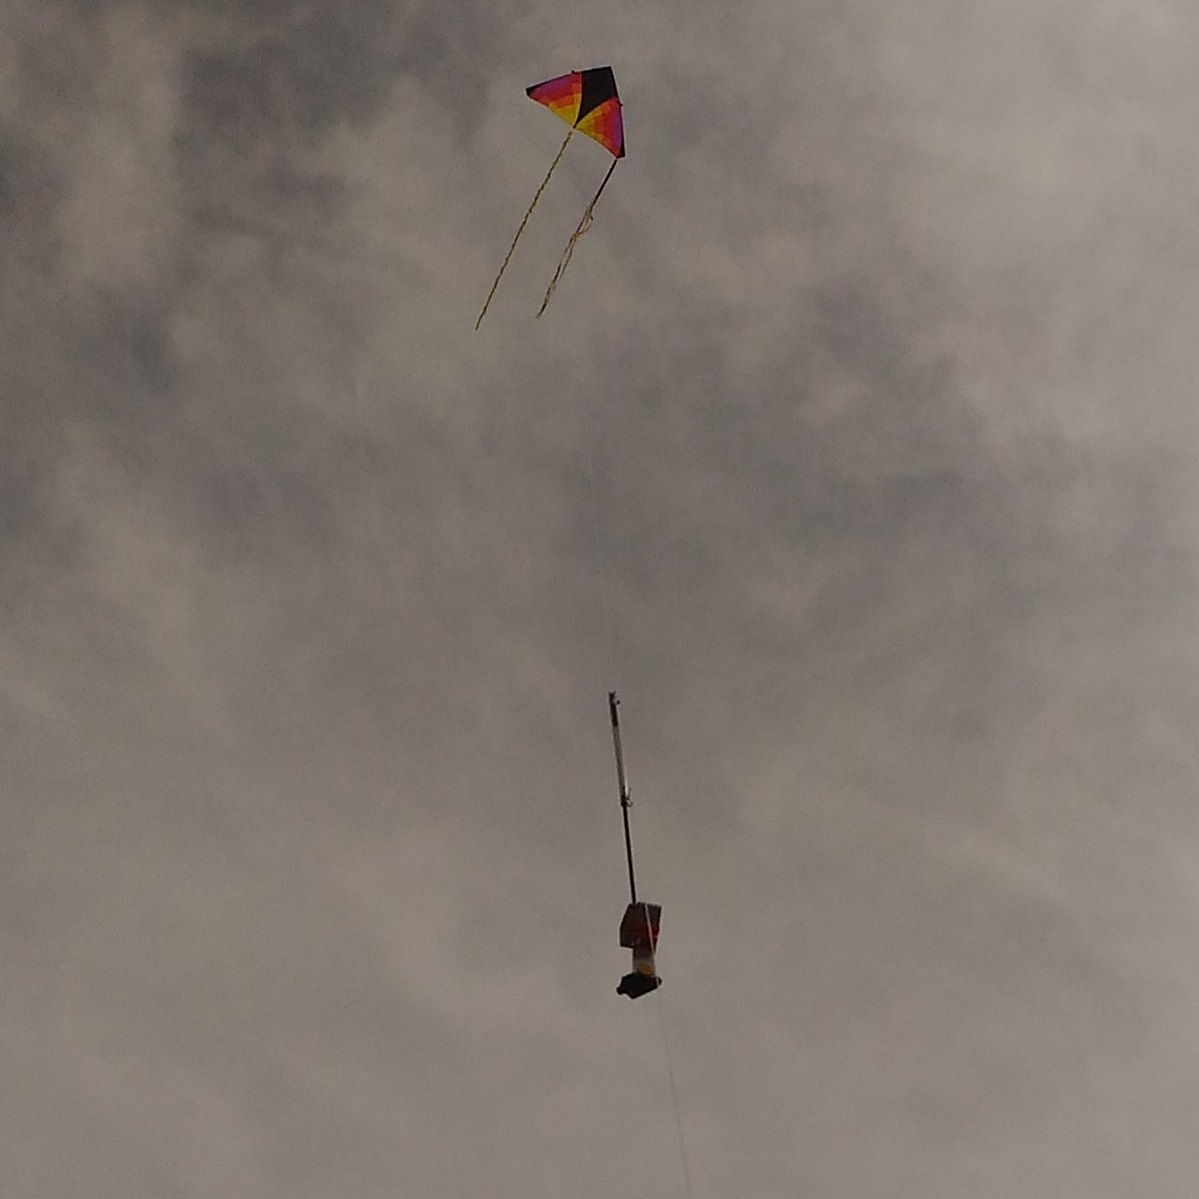
Last week I got a chance to test out an old favorite of mine-- flying off wind with asymmetrical tails, and added a recent acquisition-- the KAPtery Aerobee Rig.
I got several decent panoramas out of the flight and learned some good ways to handle the Jerkpan and make it turn reliably. Then the flight ended with a heart-in-the-throat moment as the Aerobee rig plummeted to the ground. It landed in a bush and the camera survived.
I'll cover the details of the flight, my technique with the Jerkpan, and some ideas about why the rig detached from the line, and some safety modifications/ideas.
Equipment
Kite Stuff:
- Levitation Light by Into The Wind
- Triple tail from In The Breeze 7.5sq ft parafoil (i.e. mini kite kit)
- tail from G-Kites Dazzle Delta
- G-Kites Fuzzy Tail
- 1000' reel of 110# string (Public lab store)
- Leather batting gloves (Wilson) love the sensitive touch of these, great grip
Kite Configuration: Fuzzy tail in the middle, triple tail and Dazzle Delta tail on the right:

I test-flew this configuration the previous day, and you can see the difference in angle between the waves coming into shore in the direction of the wind, and the kite line. I believe the angle shifted from 35-45 degrees off of the wind, going farther off wind as the wind picked up:

The kite still flew at a very high flying angle-- 70-80 degrees, higher than i would expect from the Dazzle Delta with so many tails. But I've had some trouble with this Dazzle delta flying at too high of an angle. The fuzzy tail corrects that, however.
Camera and Rig
- Aerobee Rig in vertical mounting mode
- additional hardware for vertical mount: two 1/4" lock washers, two #10 nylon washers
- Mobius Camera with 6mm lens
With the lightweight Mobius camera, the Aerobee balances best when pushed all the way in on the 3 sliding channels.
With the horizontal tilting platform removed, the 1/4-20 thumb screw is too long. I used two lock washers against the aluminum, and two #10 nylon washers, one against the thumb screw and the other against the camera. The #10 nylon washers are useful because they can screw down on the 1/4-20 thumb screw and prevent it from coming out of its mount hole:

JerkPan technique
I tried shaking the line, but this lead to unpredictable turns. I then tried plucking the line, but this sometimes jumped the camera, and sometimes not, also a somewhat unpredictable turn. I then settled on a technique of doing a rapid one-handed clockwise turn starting and ending at 6 o'clock and with a whipping down motion. This worked predictably to increment the camera one small hop around. It may have also unwound the rig from the line (see problems and fixes below)
Panorama Software:
- Microsoft Image Composite Editor
- Hugin (couldn't get a good panorama out)
Even with the addition of a lot of manually added control points, I couldn't get a good panorama out of Hugin. I may try again later. Microsoft ICE was a breeze, if slightly imperfect. Here are panoramas from three altitudes:


Problems and fixes
As mentioned before, my rig fell suddenly during the highest panorama. luckily it landed in the bushes and everything survived to fly again. I'm not interested in repeating this experience.
Why did it fall? The line wrap attachment of the Jerkpan seemed very secure to me. I was careful to keep the line wrapping in a single direction, like this:

Somehow, however, it got loose. I think a combination of the high flying angle of the kite and my clockwise turns of the line for the JerkPan were able to unwind the line. I almost always attach the rig by wrapping counter-clockwise, for some reason related to my handedness and kite holding preference. I think my clockwise jerks of the line unwrapped the string.
I'd like a little more safety. At minimum, I'd want the rig to run down the line to me, rather than drop straight to the ground. When I got back, I mentioned the problem to @Ranon and suggested finding a way to attach a carabiner. We settled on this simple configuration:

3 Comments
This is a really helpful report. You broke some new ground (but no cameras) and added lots of good information.
You might be right that the line jerking flipped the line windings off the wire. I don't think that would happen with a typical 150 gram camera, but the little Mobius does not add much mass to keep the windings taught. I should do some experiments. Even though you had the line correctly wrapped in a continuous spiral, this is a good opportunity to remind everyone how important that is. The kite has to be pulling very hard, but if the line is wrapped wrong the entire rig can fall off the line.
It looks like your carabiner fix uses a full coil of the stiff wire. That coil itself might be all that is needed to secure the line. Maybe a coil at each end of the wire, and the line can be tucked into the coils. It might be that if the ends of the stiff wire are bent more so that they almost close instead of forming a "J," that could prevent the line windings from getting flipped off one by one. Even a rubber band would probably have kept the line wrapped on during your flight. I guess one lesson is that more wrappings are better than fewer. More observations are needed.
It's good to see that you found the 1/4" holes in the Aerobee frame and used them for the tripod screw in lieu of the articulated camera tray. Those three 1/4" holes are a remnant of an earlier design which did not include the camera tray, but I retained them just for you. Removing the camera tray saves some weight, but I decided that the 25 grams was worth it for the convenience and flexibility.
I experimented with a separate plate to do the job of your washers and also snug up against the camera back to prevent rotation around the tripod screw and possible screw loosening. A piece of bicycle inner tube is glued to one side of the plate to allow a secure mount.
Of course you need one of these plates with a hole for the tripod screw in exactly the right place for each different camera, so it doesn't scale well.
Your panoramas look very cool. With different projections you should be able to get some nice tidy panoramas out of those wrap-around versions. Sometimes if you remove a few of the photos ICE produces fewer stitching artifacts, but it takes lots of trial and error to find the best combination.
Your results suggest that with a camera as lightweight as the Mobius, you could fly two of them with one pointed straight down. That one would capture enough nadir photos to fill in the center of the panoramas. Or when you fly a PowerShot in oblique portrait mode for JerkPan panoramas, you could also attach a Mobius in nadir position. Maybe the Aerobee should have a special mounting arrangement for that.
Thanks for this report,
Chris
Is this a question? Click here to post it to the Questions page.
Reply to this comment...
Log in to comment
@Ranon and I went out flying last night, and with the gusty conditions had trouble getting the panorama more than a few feet off the ground-- our 9' deltas were squirrelly. That said, we tried the carabiner wrap in the field, and the carabiner makes it tough to wrap and unwrap the down-line side of the wire. We ended up just wrapping into the carabiner and then wrapping the kite side of the line around the wire. That was felt very secure, but may eliminate some of the safety effect we were looking for. Ranon has pictures, so stay tuned..
I think the J shape you're talking about may be the way to go-- more experimentation is needed.
I really love the bike-tube plate, I might have to make myself one of those. I was thinking the same thing regarding mounting multiple Mobius cameras to capture several angles. Without servos a tilt mechanism gets real finicky, and your earlier concerns about getting a "spiral" panorama and being unable to match pan to tilt seem on the money from the limited tests we did.
Reply to this comment...
Log in to comment
Here's that picture of the pendulum with the carabiner wrapped around one end:
I started wrapping the line around the carabiner, which I now realize made it more difficult to wrap it around the rest of the wire. If I had started on the left side first, I could have wrapped the line all the way across the wire and around the carabiner last.
Reply to this comment...
Log in to comment
Login to comment.