
I am a high school teacher from Zhejiang Province, China. This semester I have a class to help my student to build a water monitoring system. I happen to know Knowflow and join its online course. This documentation is my homework as well as my making process.
本次作业是Knowflow组装的第一阶段,目标是通过连接传感器和烧录代码,实现pH和温度监测。
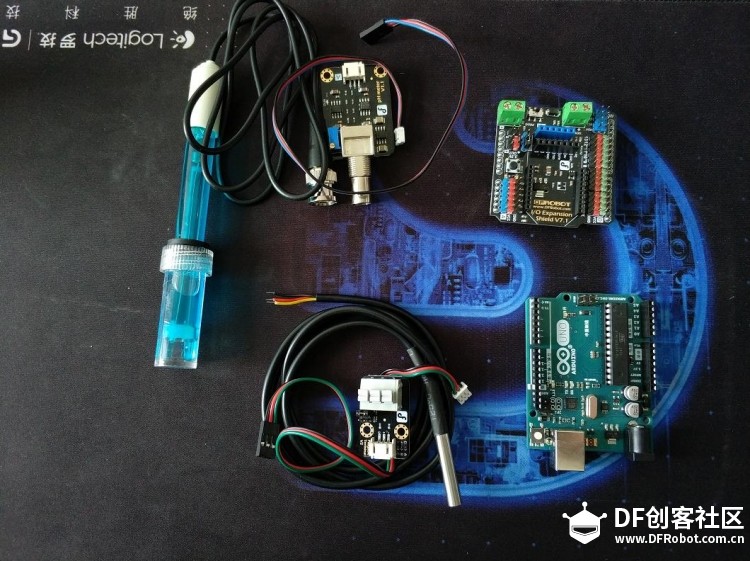
这一阶段一共需要用到:Arduino Uno(原来套材中配的是DFROBOT的Bluno,但是由于我第一天测试的时候,串口芯片就烧了,所以用了原版uno) 、Arduino 拓展板、pH传感器(pH探头及pH信号转接板)、温度传感器(温度探头及温度信号转接板)。
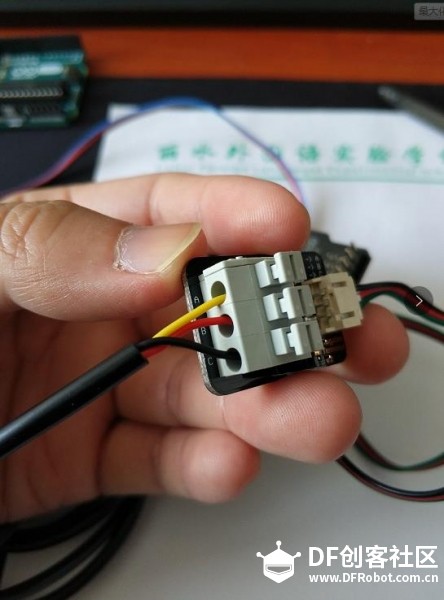
1、将温度探头的黄、红、黑三条线(分别表示数据、正极、负极)接到温度信号转接板的A、B、C三个口,接上后可以拉扯一下,检查是否夹紧。
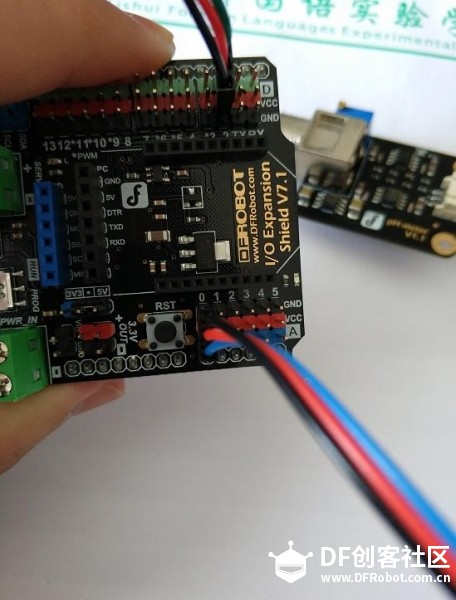
2、将温度信号转接板的信号线接到Arduino 拓展板的数字D2口,接的时候只要注意线与板上的针角的颜色一致就不会错,绿色接绿色、红色接红色、黑色接黑色。
(套材中的温度传感器借助软件将模拟信号转换成了数字信号,所以这里接了数字D2口)

3、pH探头金属接口与pH信号转接板金属接口进行对接,然后旋转拧紧。

4、将pH信号转接板的信号线接到Arduino 拓展板的模拟A0口,接的时候只要注意线与板上的针角的颜色一致就不会错,蓝色接蓝色、红色接红色、黑色接黑色。

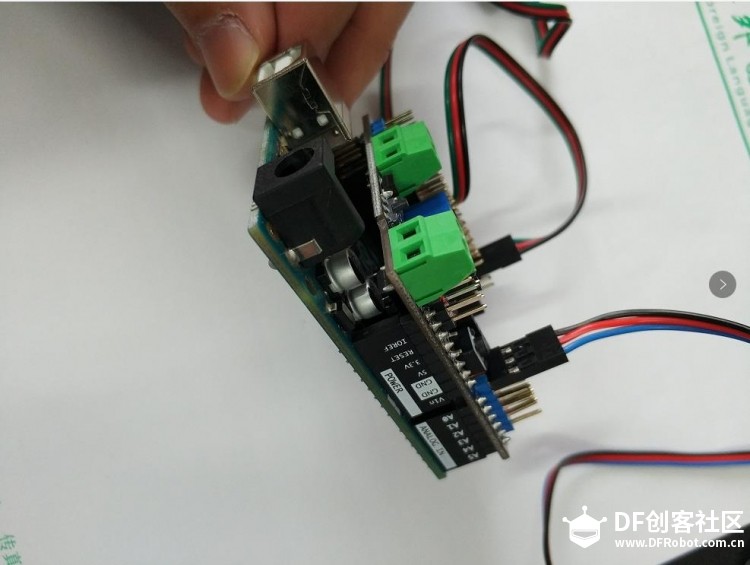
5、将Arduino Uno与Arduino 拓展板对应针角进行组合
6、将Arduino Uno接上数据线,连接电脑

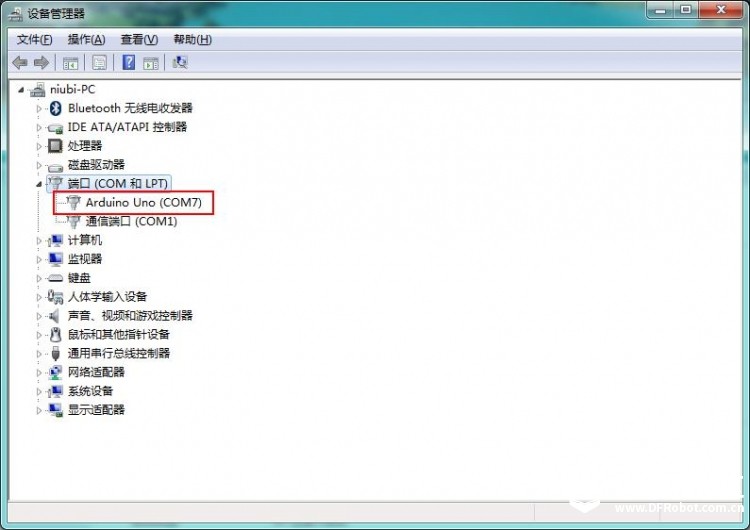
7、检查电脑的设备管理器中端口项有没有Arduino Uno,如果下图所示
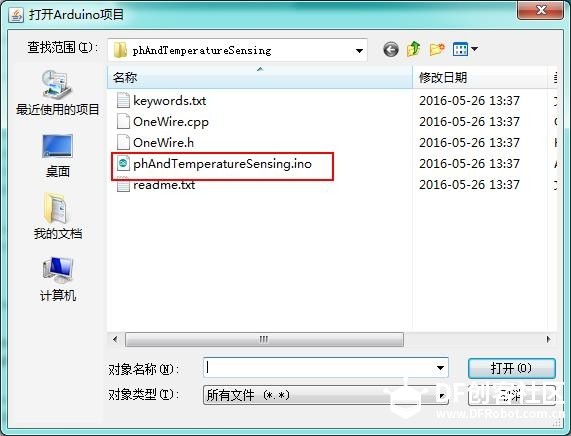
8、打开Arduino IDE,文件---打开------选择示例3中的"phAndTemperatureSensing.ino"
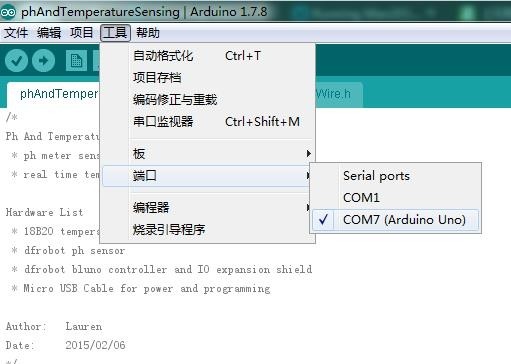
9、在Arduino IDE"工具"选项中选择主板和端口
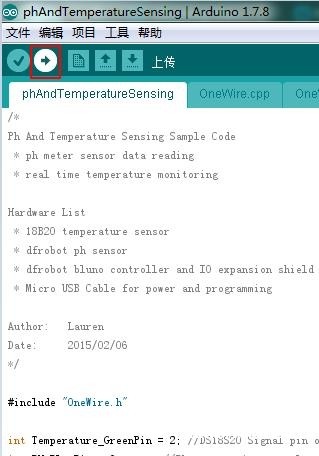
10、点击"上传"按钮,将代码烧录入Arduino Uno,成功后,Arduino IDE底部会显示上传成功的相关信息。

10、点击"串口监视器",就能看到实时的传感器数据了。

到此pH和温度监测的传感器连接与代码烧录与调试就完成了。在整个过程中,只要注意信号线与扩展板上颜色一致,基本就没什么问题了。杯具的是我的Arduino Bluno板第一天在测试的时候串口芯片变烧了,至于原因底部技术客服后说有多种可能,只能寄回返修了。总的来说这一阶段还是比较简单的,我需要花更多的时间去学习一下代码,以便更好的学习下阶段的内容。
下面是本次用到的代码:
/*
Ph And Temperature Sensing Sample Code
* ph meter sensor data reading
* real time temperature monitoring
Hardware List
* 18B20 temperature sensor
* dfrobot ph sensor
* dfrobot bluno controller and IO expansion shield
* Micro USB Cable for power and programming
Author: Lauren
Date: 2015/02/06
*/
include "OneWire.h"
int Temperature_GreenPin = 2; //DS18S20 Signal pin on digital 2
int PH_BluePin = 0; //Ph sensor pin on analog 0
//Temperature chip i/o
OneWire ds(Temperature_GreenPin); // on digital pin 2
void setup(void) {
Serial.begin(9600);
}
float temperature,phValue,ecValue;
void loop(void) {
temperature = readTemperature();
phValue = readPh();
Serial.print("Temp: ");
Serial.print(temperature);
Serial.print(" degree PH Value: ");
Serial.println(phValue);
delay(100); //just here to slow down the output so it is easier to read
}
float readPh(){
int buf[10],temp;
for(int i=0;i<10;i++) //Get 10 sample value from the sensor for smooth the value
{
buf[i]=analogRead(PH_BluePin);
delay(10);
}
for(int i=0;i<9;i++) //sort the analog from small to large
{
for(int j=i+1;j<10;j++)
{
if(buf[i]>buf[j])
{
temp=buf[i];
buf[i]=buf[j];
buf[j]=temp;
}
}
}
unsigned long int avgValue=0;
for(int i=2;i<8;i++) //take the average value of 6 center sample
avgValue+=buf[i];
float phValue=(float)avgValue*5.0/1024/6; //convert the analog into millivolt
phValue=3.5*phValue; //convert the millivolt into pH value
return phValue;
}
float readTemperature(){
//returns the temperature from one DS18S20 in DEG Celsius
byte data[12];
byte addr[8];
if ( !ds.search(addr)) {
//no more sensors on chain, reset search
ds.reset_search();
return -1000;
}
if ( OneWire::crc8( addr, 7) != addr[7]) {
Serial.println("CRC is not valid!");
return -1000;
}
if ( addr[0] != 0x10 && addr[0] != 0x28) {
Serial.print("Device is not recognized");
return -1000;
}
ds.reset();
ds.select(addr);
ds.write(0x44,1); // start conversion, with parasite power on at the end
byte present = ds.reset();
ds.select(addr);
ds.write(0xBE); // Read Scratchpad
for (int i = 0; i < 9; i++) { // we need 9 bytes
data[i] = ds.read();
}
ds.reset_search();
byte MSB = data[1];
byte LSB = data[0];
float tempRead = ((MSB << 8) | LSB); //using two's compliment
float TemperatureSum = tempRead / 16;
return TemperatureSum;
}
5 Comments
Hi, this looks awesome! Do you have a link to the Arduino sketch (.ino) file you've used?
Is this a question? Click here to post it to the Questions page.
Reply to this comment...
Log in to comment
thanks! @incaking!!! 非常详细的说明文档
~! 你可以把arduino的程序链接也上传一下吗?Reply to this comment...
Log in to comment
@shanlter awards a barnstar to incaking for their awesome contribution!
Reply to this comment...
Log in to comment
/* Ph And Temperature Sensing Sample Code * ph meter sensor data reading * real time temperature monitoring
Hardware List * 18B20 temperature sensor * dfrobot ph sensor * dfrobot bluno controller and IO expansion shield * Micro USB Cable for power and programming
Author: Lauren Date: 2015/02/06 */
#include "OneWire.h"
int Temperature_GreenPin = 2; //DS18S20 Signal pin on digital 2 int PH_BluePin = 0; //Ph sensor pin on analog 0
//Temperature chip i/o OneWire ds(Temperature_GreenPin); // on digital pin 2
void setup(void) { Serial.begin(9600); }
float temperature,phValue,ecValue;
void loop(void) {
temperature = readTemperature(); phValue = readPh();
Serial.print("Temp: "); Serial.print(temperature); Serial.print(" degree PH Value: "); Serial.println(phValue);
delay(100); //just here to slow down the output so it is easier to read
}
float readPh(){
int buf[10],temp; for(int i=0;i<10;i++) //Get 10 sample value from the sensor for smooth the value { buf[i]=analogRead(PH_BluePin); delay(10); }
for(int i=0;i<9;i++) //sort the analog from small to large { for(int j=i+1;j<10;j++) { if(buf[i]>buf[j]) { temp=buf[i]; buf[i]=buf[j]; buf[j]=temp; } } }
unsigned long int avgValue=0; for(int i=2;i<8;i++) //take the average value of 6 center sample avgValue+=buf[i]; float phValue=(float)avgValue5.0/1024/6; //convert the analog into millivolt phValue=3.5phValue; //convert the millivolt into pH value
return phValue; }
float readTemperature(){ //returns the temperature from one DS18S20 in DEG Celsius
byte data[12]; byte addr[8];
if ( !ds.search(addr)) { //no more sensors on chain, reset search ds.reset_search(); return -1000; }
if ( OneWire::crc8( addr, 7) != addr[7]) { Serial.println("CRC is not valid!"); return -1000; }
if ( addr[0] != 0x10 && addr[0] != 0x28) { Serial.print("Device is not recognized"); return -1000; }
ds.reset(); ds.select(addr); ds.write(0x44,1); // start conversion, with parasite power on at the end
byte present = ds.reset(); ds.select(addr);
ds.write(0xBE); // Read Scratchpad
for (int i = 0; i < 9; i++) { // we need 9 bytes data[i] = ds.read(); }
ds.reset_search();
byte MSB = data[1]; byte LSB = data[0];
float tempRead = ((MSB << 8) | LSB); //using two's compliment float TemperatureSum = tempRead / 16;
return TemperatureSum;
}
Reply to this comment...
Log in to comment
Nice work. That Arduino sketch (.ino) available?
Is this a question? Click here to post it to the Questions page.
Reply to this comment...
Log in to comment
Login to comment.