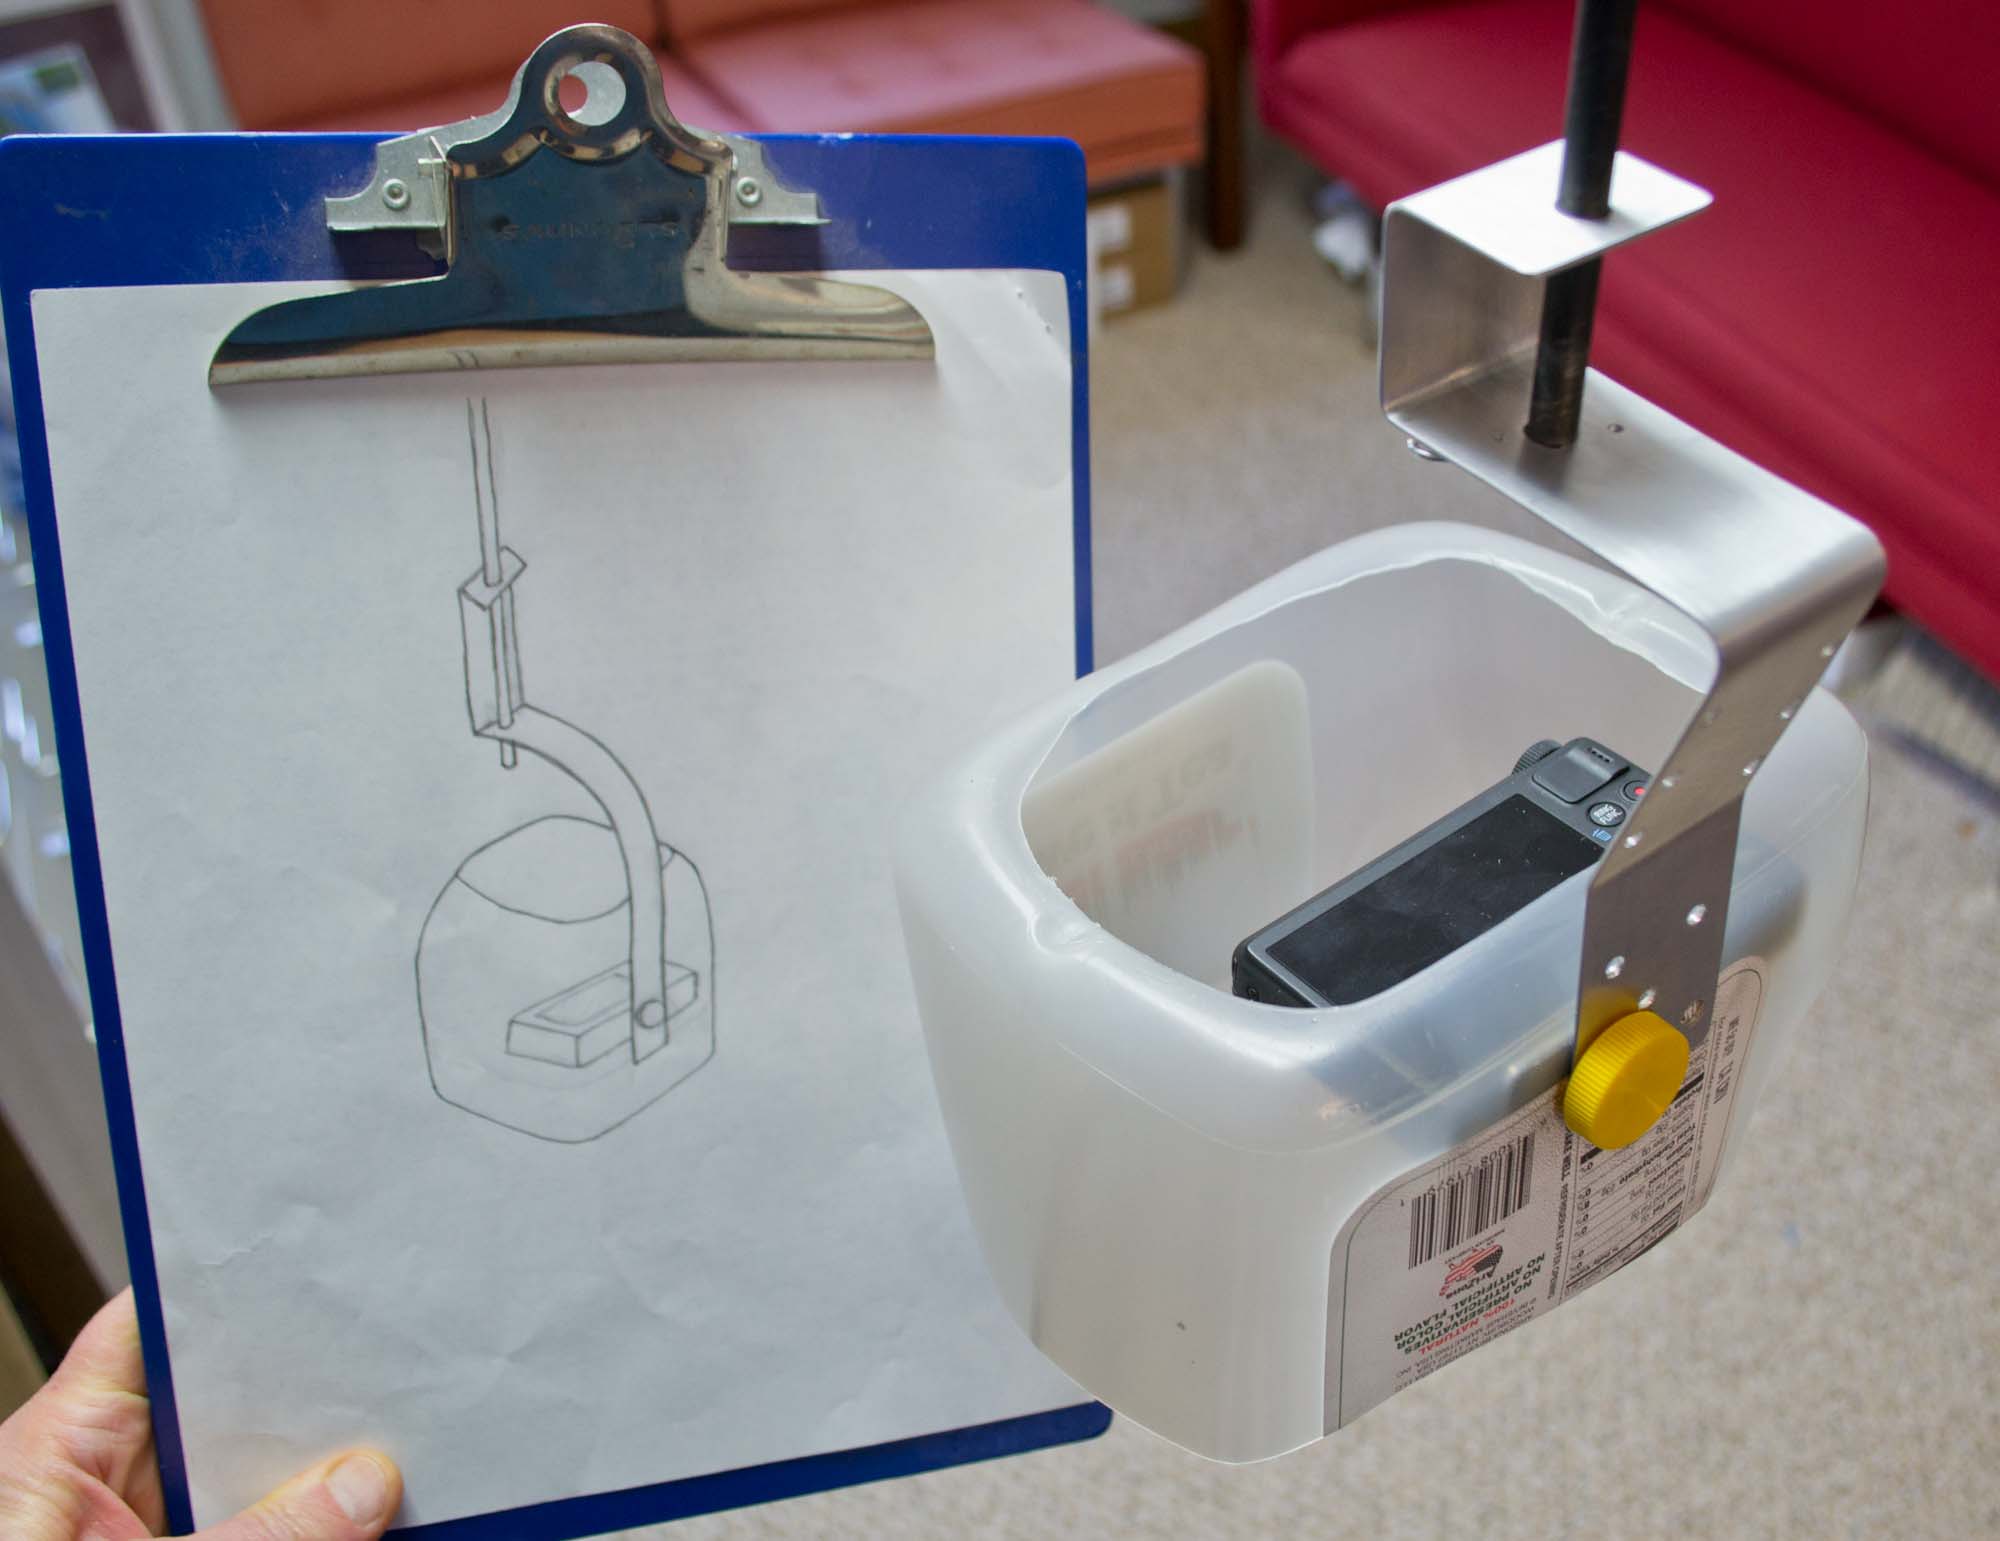
Above: A sketch (left) inspired by Pat's comment on Tony's Note and a rig inspired by the sketch (right).
I was intrigued by Tony's notes about new designs for simple camera rigs for kite and balloon mapping. I was especially inspired by Pat's comment on one of the notes in which he suggested combining a juice bottle with a rig that attached to the camera's tripod socket. I posted a couple of sketches (including the one in the lead image above), and several days later ordered some aluminum strips to see if such a rig was possible.
The goal was a rig that was as simple as possible but made a secure connection between the suspension (Picavet or pendulum) and the camera's tripod socket. As Pat noted, using the tripod socket would allow a plastic bottle to be used for camera protection just by sandwiching a side of the bottle between the tripod screw and the rig and camera. A rig like this could allow a smart attachment to the flying line (Picavet or pendulum), very easy camera attachment (thumb screw), and good camera protection that allowed the camera controls and LCD to be easily accessible (open plastic bottle).
I ordered five different size strips of 6061 aluminum from McMaster Carr, and none of them was what I needed for a rig. But I cut a two inch wide strip down to 1 1/2" wide, and that was perfect. So I think a good size is 1/16" thick strips which are 1 1/2" wide. The McMaster Carr number is 8975K199 (http://www.mcmaster.com/#catalog/122/3691/=10smbys).
This material is really fun to work with. It is easy to cut with a sabre saw (fine tooth blade), easy to drill with any power drill, easy to neaten up with a belt sander or sanding blocks, and easy to bend with a vise and some sturdy bars or boards. It seems to be the appropriate strength for rigs for point and shoot cameras.

A complicated version of the new simple rig.
It was easy to make a rig for taking mapping (nadir) photos that involved nothing but a suspension (Picavet or pendulum), the piece of aluminum, a 1/4" 20 thumb screw, and part of a plastic bottle (see lead image). But I thought it would be good to be able to take oblique photos as well. This required some not-so-simple additions. I haven't figured out how to allow oblique photos in landscape orientation without adding a lot of complexity and expense.
The video below describes the current impasse.
Maybe this rig will not be as simple as hoped, but will be very functional and mostly simple.
3 Comments
Nice work. Tradeoffs on user's part on complexity will be in order as to which route will make most sense for them.
Reply to this comment...
Log in to comment
These are both great, and an excellent video summary of the questions you are facing here.
My mind goes into a place of splitting the designs into two categories: one making the best possible rig assuming a person has access to a 3d printer, and one assuming no 3d printed parts whatsoever.
The addition of a simple mini-ball head to the rig would allow for the infinite oblique settings while only adding a couple bucks to the total cost. These are readily avail. I can even add them to the PL store since we stock the part for the pole kit. I think giving this option as well the the 3d-printed hinge is a flexible solution.
I especially liked the way you switch between oblique and mapping modes by changing the mount point of the dowel.
Also, I thought the first design had a great addition from the initial sketch: by putting the bend in the aluminum jutting back, it protects the camera from landing directly on the tripod screw, which would transfer force directly to the camera. The way you built it protects against such a landing by xfering force tot he aluminum and the base of the jug.
This is great work Chris. I think both are worth persuing, so a "fork" between the 3d/no-3d might be a good line to draw? That's my two bits.
I just love the look you give at the end, too.
Is this a question? Click here to post it to the Questions page.
Reply to this comment...
Log in to comment
Thanks Tony,
I like the idea of a universal ball head instead of a hinge. That would make it easier to switch between nadir and oblique when using no camera protection or when using KAPtery bumpers. Using a plastic jug for protection makes it harder to point the camera where you want because the jug has to pivot with the camera. Other than the second design with alternate points for attaching the suspension, I still don't have an elegant solution for pointing the camera when using a plastic jug. You need to allow the jug to pivot both ways, which is messy.
An advantage of the hinge is that the camera can be mounted solidly so the camera cannot rotate around the tripod screw. The hinge allows mounting the camera with its back edge snug against a ridge, just like KAPtery camera trays. A ball mount requires the tripod screw to stay tight even if the camera torques it.
That's a good point about the extra bend in the aluminum frame. I added that to accommodate the KAPtery leg brackets. The angle allows the PET bumpers to surround the camera better.
I am leaning towards the first design, the one which requires 3D printed parts for complete functionality. It will work without 3D printed parts unless you need landscape oblique mode. So that single design covers most needs and covers all needs with some small 3D printed parts (or other modifications).
I hope to post a note soon with a wild addition to the rig that compensates for the lack of landscape oblique mode (absent the printed hinge).
I learned that my local True Value hardware store carries 1/16" aluminum bars in 1 1/2" width. They are about the same price as McMaster Carr but you save on shipping. I am not sure which alloy it is, but it looks like it would work well. So it's easy for people to pick up one bar (4' long for <$8.00) and experiment. My goal is to make the rig with a length of aluminum under one foot so a 3' or 4' bar can be divided with no waste. That is turning out to be a challenge.
Chris
Reply to this comment...
Log in to comment
Login to comment.