Thermal flashlight Blog

Thermal flashlight tests at the p.irateship
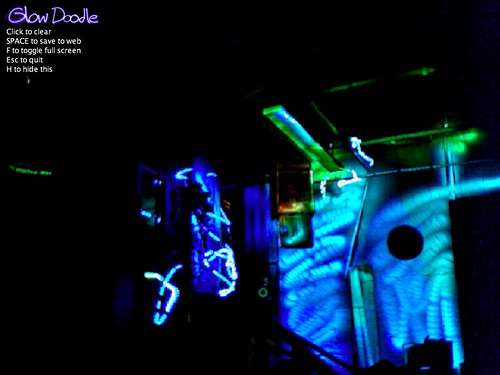
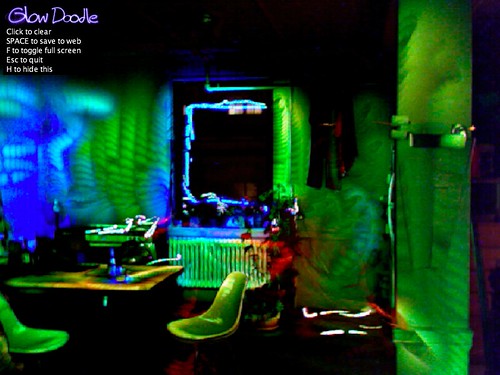
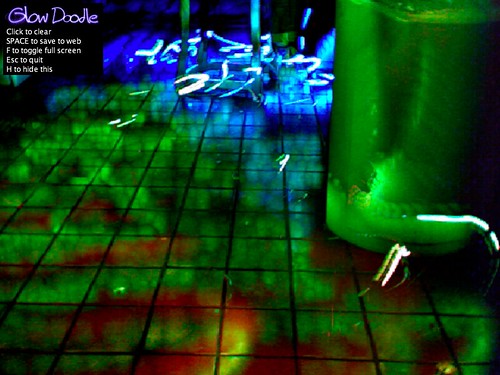
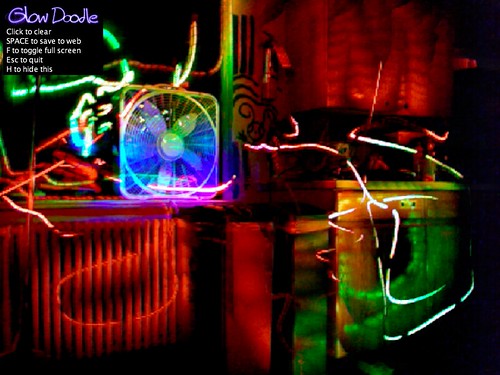
Built a thermal flashlight at the pirateship today. We need a way to set the base temperature and expected range of temperatures. (see updated code at https://publiclab.org/n/625)
Try it yourself at http://glowdoodle.com or https://editor.p5js.org/jywarren/full/dl7B2Upp-
More at home:
Follow related tags:
thermal-photography arduino thermal-flashlight temperature

Build a simple Thermal Flashlight
Assemble the Thermal Flashlight
Assembly is a bit easier in this new version (April 2019); below is the diagram both on and off of a mini breadboard; we've eliminated some unnecessary parts.
Parts list:
- 1 Melexis MLX90614 non-contact IR thermometer (3v)
- 1 RGB common-cathode LED
- 2 4.7k Ohm resistors (or close to that)
- a short wire (to extend one leg of the thermometer)
- a mini breadboard
- an Arduino Nano
- a mini USB cable to power it (and a USB battery)
(step-by-step coming soon!)

Program the Arduino
If it's not already programmed, you'll need to upload a program to your Arduino in the Arduino IDE (https://arduino.cc or the online editor at https://create.arduino.cc) using the following code:
https://gist.github.com/jywarren/1ad7dd997b6319ccb2525958709125ab
You'll need to install the Adafruit Melexis library here:

Using the Thermal Flashlight
You can use this program to "paint" colored light with your Thermal Flashlight:
- http://glowdoodle.com
- Also try (and modify) this version in p5js: https://editor.p5js.org/jywarren/full/dl7B2Upp-
See examples of use below!
All code and Fritzing files available here: https://github.com/publiclab/thermal-flashlight/
Old documentation:
https://gist.github.com/sdosemagen/1739961#file-thermalflashlight-ino
Based on a redrawn diagram of the thermal flashlight posted by @ad: http://publiclaboratory.org/notes/ad/11-28-2011/thermal-camera-arduino-uno-mlx90614-ir-thermometer
Follow related tags:
thermal-photography arduino thermal-flashlight fritzing

RGB color from a knob -- small steps towards thermal flashlight
Modified to go from Blue to Red, for use in heatmap "light-painting". More soon.
BlinkM MaxM example code: http://thingm.com/fileadmin/thingm/downloads/BlinkM_Examples.zip
From their website: http://thingm.com/products/blinkm-maxm.html
Follow related tags:
arduino thermal-flashlight rgb led

Thermal Camera: Arduino UNO + MLX90614 IR Thermometer
I did the following steps:
1) Hardware: Connect the MLX90614 (refer to the datasheet) as follows: Pin 1 on MLX (SCL) connect to ANALOG pin 5 on Arduino Pin 2 on MLX (SDA) connect to ANALOG pin 4 on Arduino Pin 3 on MLX (VDD) connect to 3.3V on Arduino Pin 4 on MLX (VSS) connect to GROUND on Arduino
Now use "pull ups" on the SCL and SDA lines by connecting a 4.7K ohm resistor from the Pin 3 VDD line to the SCC line and a 4.7K ohm resistor from the Pin 3 VDD line to the SDA line.

2) Connect the RBG LED. Simple wiring diagram for RGB LED: http://wiring.org.co/learning/basics/rgbled.html. For the attached Arduino sketch, hook up is as follows:

Leg 1 = RED pin of the LED to PWM pin 6 Leg 2 = Ground Leg 3 = GREEN pin of the LED to PWM pin 5 Leg 4 = BLUE pin of the LED to PWM pin 3 {***NOT pin 4 as shown in the diagram above!!!!!!!!!}
3) Software: Download MLX90614 IR Thermometer Library here: http://bildr.org/2011/02/mlx90614-arduino/
To make this code work, before you load the code, or even open the Arduino program, we need to place the “I2Cmaster” in your Arduino Library.
On your Mac:: In (home directory)/Documents/Arduino/libraries On your PC:: My Documents -> Arduino -> libraries On your Linux box:: (home directory)/sketchbook/libraries
Final Arduino sketch attached.
Follow related tags:
thermal-photography arduino thermal-flashlight

Pyrex thermal infrared transmissivity
Here's a $55 pyrex lens that you can measure temperature through with a thermal IR sensor:
http://www.bhphotovideo.com/c/product/471622-REG/Surefire_Z46_Z46_Bezel_Assembly_Replacement_.html
The above picture shows what range pyrex is transparent in, from this site:
http://www.pgo-online.com/intl/katalog/curves/pyrex_kurve.html
Follow related tags:
thermal-photography thermal-flashlight pyrex lenses