What I want to do
Build a cheap picavet to stabilise the camera for kite mapping (or balloon mapping). (a picavet is a platform suspended by several strings that hangs in such a way that it stabilises itself according to gravity; i.e. it 'absorbs and adjusts to' jerky movements and thus acts as a kind of 'movement buffer' so that one gets less blurry pictures)
My attempt and results
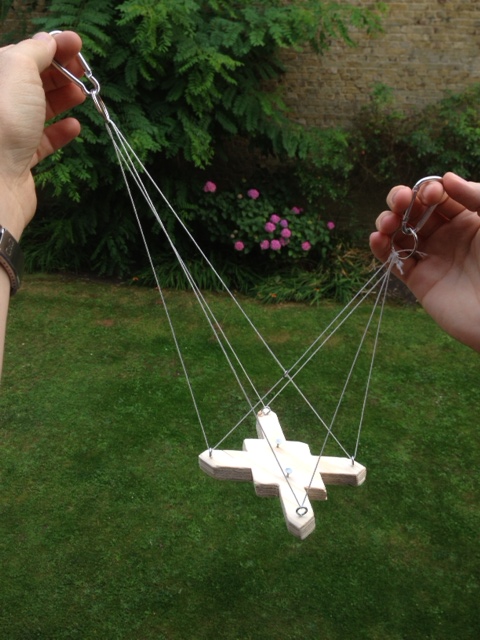
Cut out a ~120x120 mm cross-shaped piece of plywood.


The inner part of the shape has a jagged platform for securing the camera using elastic bands (the jagged edge helps secure the elastic bands). Then made holes at then ends of each 'arm' using a small nail (&hammer), followed by screwing in screws with loops at the end. Also put in 2 nails on the top part of the platform to secure elastic bands. Used the following site to set up the strings properly: http://aggle.blogspot.co.uk/2012/06/balloon-borne-camera-part-3-stringing.html
Attached the picavet using carabiners to 2 loops on the string holding the kite (approx. 20 m from the kite). Also used a kitchen clip to keep the strings in order during transport and storage:

Questions and next steps
I want to make the same picavet with real pulleys instead of the screws with loops. This will increase the price, but I suspect it will make the picavet stabilise more quickly and evenly (i.e. increase its 'movement buffering' capacity).
5 Comments
Can I attach more pictures???
Is this a question? Click here to post it to the Questions page.
Reply to this comment...
Log in to comment
TedF, Good design. Just drag and drop photos to where the cursor is in the edit window. Blocks (pulleys) will help a lot to keep it level, especially since the center of mass will not be far below the level of the eyes. To make it level quicker without blocks, lower the camera an inch or two by putting a piece of styrofoam or something between the camera and the plywood. Let us know how it works. Chris
Reply to this comment...
Log in to comment
Thanks for the reply... will try with the a (styrofoam) block between platform and camera, until I make the next one with pulleys. Cheers!
Reply to this comment...
Log in to comment
TedF, could you upload a photo of the camera held to the picavet with its elastic bands?
I've just tried to make a version of your Picavet using pulleys. I found that the smallest available pulleys in my local chandler's were too large. (See attached.) As these pulleys are also more expensive than eye-bolts, I'm going to revert to the simpler technology now.
Is this a question? Click here to post it to the Questions page.
Reply to this comment...
Log in to comment
Thanks espero - nicely done, sorry the pulleys were too big to use - I too continue to struggle to find small ones and am wondering if I couldn't just make some small pulleys from scratch?
Here's a picture of the elastic band camera assembly:
As others have asked me to clarify this, I decided to create a new post with more detailed instructions: See:
http://publiclab.org/notes/TedF/10-20-2014/attaching-a-camera-to-a-wooden-picavet-using-nails-and-elastics
Is this a question? Click here to post it to the Questions page.
Reply to this comment...
Log in to comment
Login to comment.