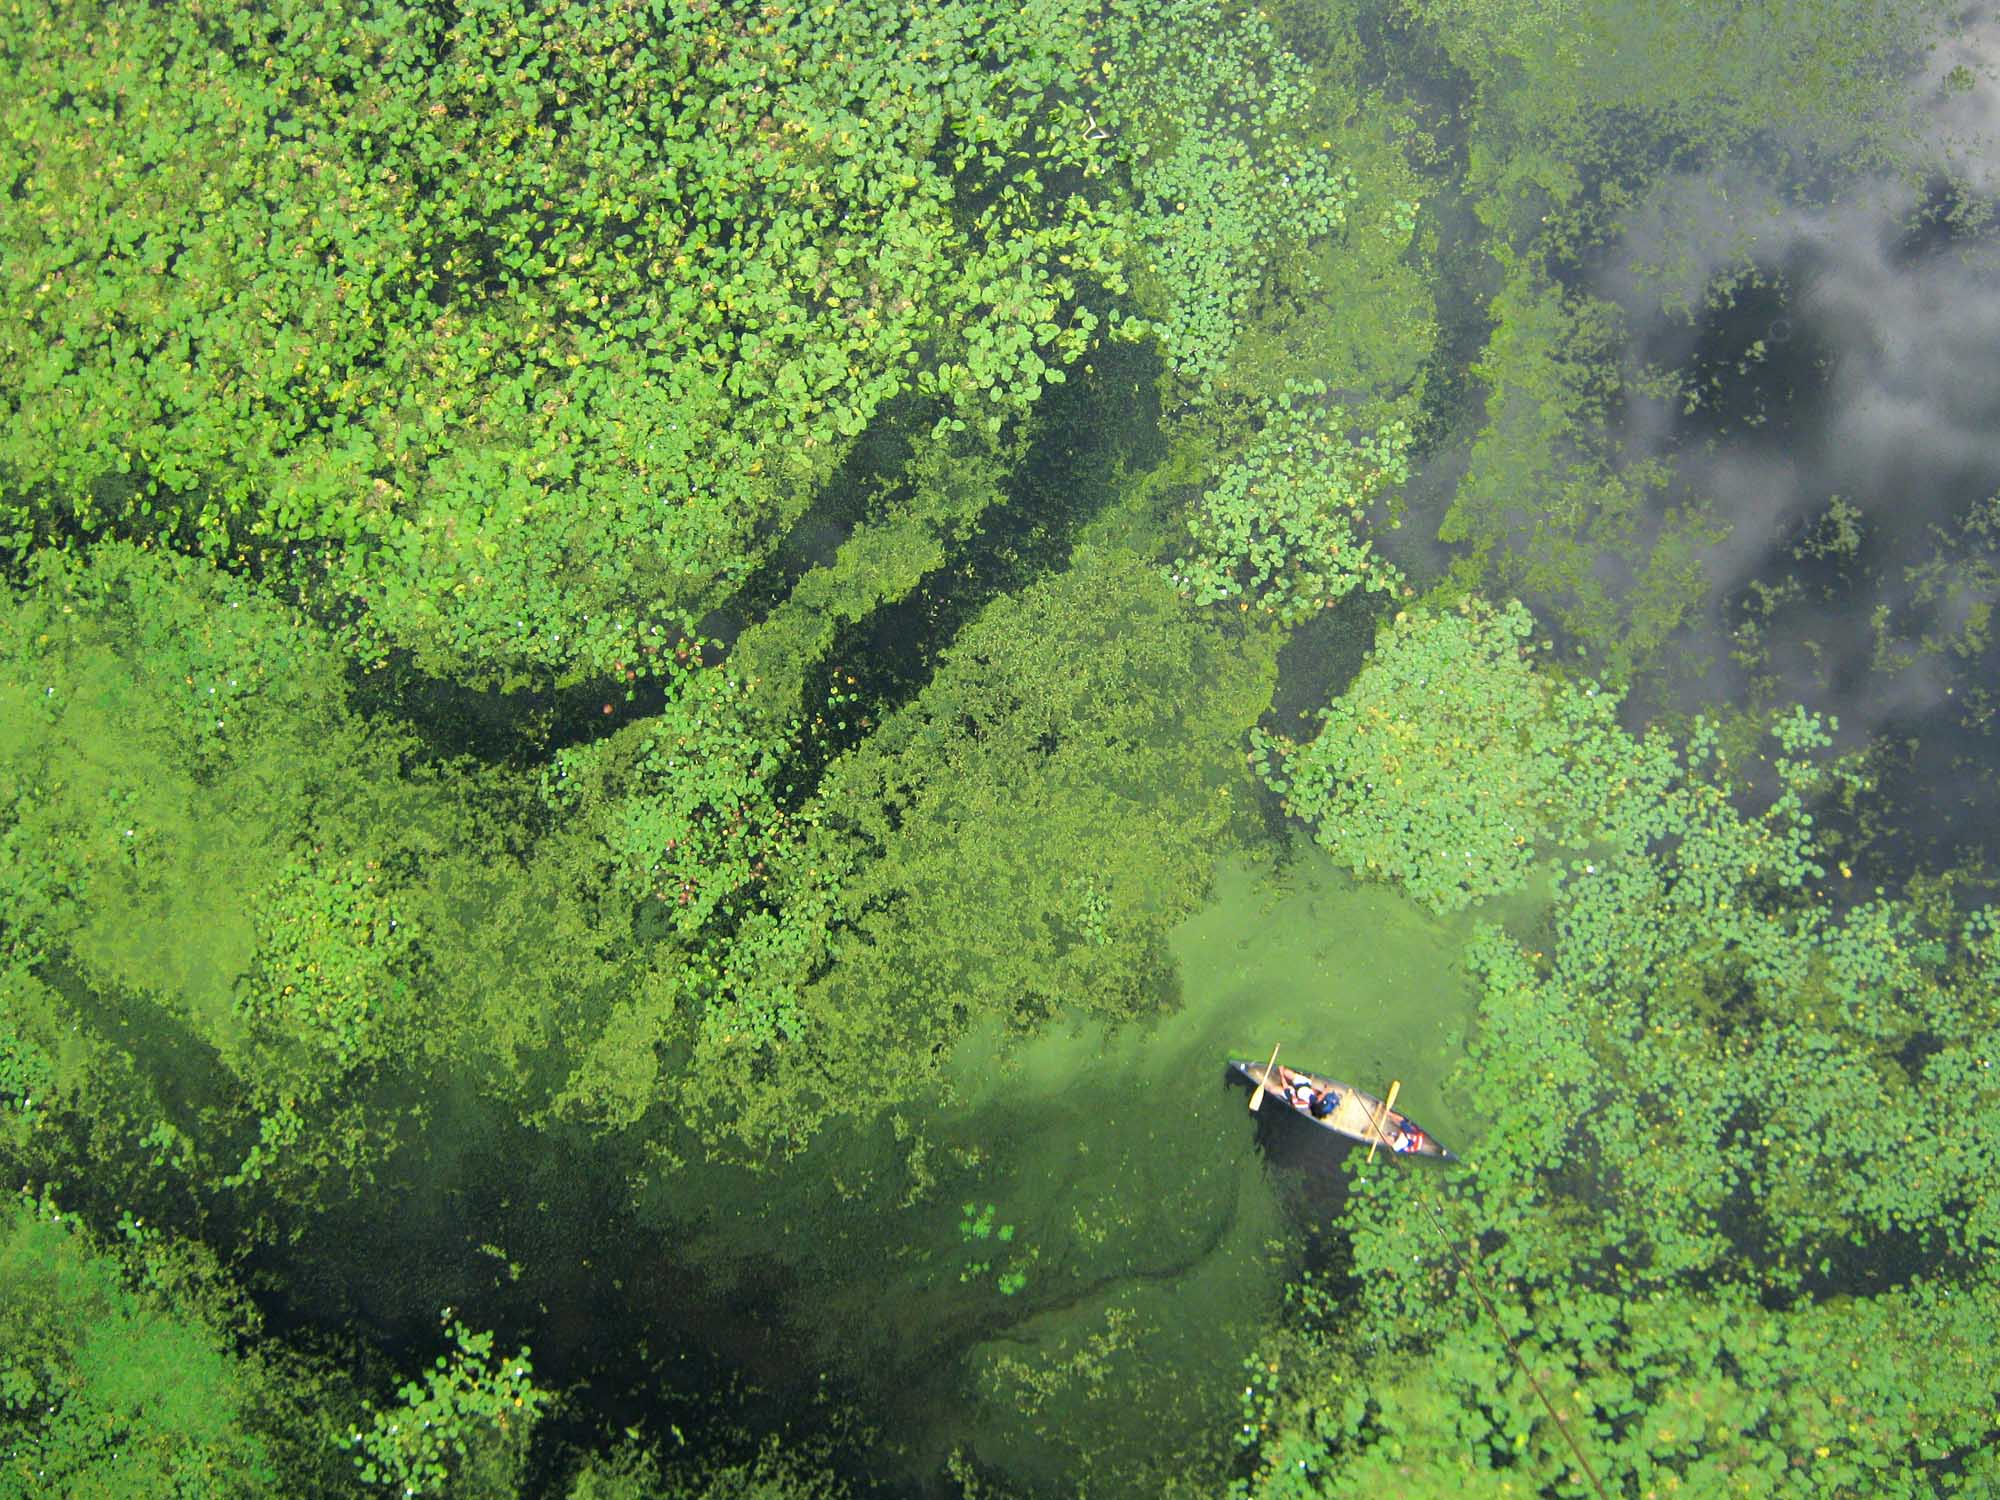
Image above: ASSUME WAYPOINT POSITION! When we were taking a waypoint (waiting for the GPSr to average for 60 seconds) Charlie and I put our paddles on the gunwales so we would know which photos had good ground control. This waypoint was to mark the big patch of pure water meal (Wolffia sp.) starboard of the canoe. The genus Wolffia includes the smallest flowering plants on Earth. Also visible in this scene (in order of abundance) are white water lily (Nymphaea odorata), pond weed (Potemageton sp.), water chestnut (Trapa natans), and white lawn chair (Seatus Peeveeseeus). Click to enlarge.
Here is an exploratory map of the section of Lake Warner, MA which was mapped by balloon on Monday. Exploratory is a euphemism for "produced by a profoundly illogical workflow." The goal was to align a few photos from our balloon flight to determine the maximum extent of coverage, to see how well the photos stitched together into a continuous map, and to learn how well our GPS efforts would translate into a georeferenced final map. Answers: 1) We got good coverage with not-too-blurry photos, but we still don't know how much of the map area is covered by good lower altitude (higher resolution) photos. 2) There is some variation in brightness and color among photos which could complicate algorithmic identification of water chestnut (via a supervised vegetation classification). This variation has been muted in the map below by adjusting the brightness ("exposure") of some images, but not the color, hue, or saturation. 3) Three sources of georeferencing were used to make this map: GPS points from a fancy Trimble (model?) GPSr, a GPS tracklog from a consumer grade Garmin 76CSx (blue line on map, one data point every 15 seconds), and the Google Maps basemap which was used to align most of the balloon photos. There is some unexplained lack of congruence among the three sources. Some of this is hidden below by stretching the final map image to match the blue GPS track because it made me cringe to see the GPS track offset from the trails made as the canoe parted the vegetation.
The map below is an embedded kml file which requires a Google Earth browser plugin. It takes a minute or two to load the data, but it does not seem to display correctly in all browsers. An embed of a similar map in Google Maps is below, and that may work better (or not). Here is the KMZ file so you can see it in your own copy of Google Earth where you have some control over what is displayed. Below the map is an outline of the workflow used to make it.
.
Preliminary map from the Lake Warner water chestnut reconnaissance balloon flight. Red diamonds are furniture GCPs, green stars are waterchestnut patches, yellow star is Wolffia patch, blue line is GPS tracklog from the balloon flier. The lawn furniture is marked on the images with small red circles. The map is not aligned well with the Google Earth base map because it is aligned with the GPS tracklog. Below is the same map in Google Maps.
.
Workflow
- Set the clocks in the cameras.
- Place white plastic lawn furniture in the lake on rooted aquatic vegetation. Take GPS waypoints of the floating furniture (we only forgot to GPS one of the chairs).
- Fly a helium balloon to loft a dual-camera visible/near-infrared rig taking synchronous photos every 12 seconds. We captured 796 pairs of photos during a 2 hour 40 minute flight. That is the longest continuous capture sequence those Canon A495s and MK111 timer have done.
- Record a tracklog during the flight in a GPSr carried by the person holding the balloon tether (a data point every 5 seconds would be better than every 15 seconds used here).
- Take a photo of the GPS screen with the flying cameras to determine the time offset between them.
.

Photos of the GPS screen by the RGB camera (left) and NIR camera (right) and dialogs from IrfanView (white insets) showing the timestamp on these photos. There is less than one second difference between the cameras' clocks and the GPS time signal (so the two cameras are also synched). The GPS text is very faint in the photo taken by the NIR camera.
.
After the flight, transfer the tracklog from the GPSr to the computer (I used Garmin Mapsource), and copy the photos to the computer.
Based on the synchronous timestamps on the photos and the GPS tracklog points, write the GPS coordinates into the EXIF header of each photo. This is the location of the bottom of the balloon tether at the time each photo was taken. I used RoboGeo to do this. Whenever the canoe appears in a photograph, the GPS coordinates of the canoe are in the jpeg file. This feature was not used for georeferencing the map shown here.
Import the photos into Adobe Lightroom. This allows attaching metadata to each photo (tags, captions) and also facilitates sorting through the photos looking for good ones. It is also possible to do batch adjustments (exposure, white balance, cropping, etc.), although none of that was done this time.
Start aligning photos into a map in MapKnitter. Stop when MapKnitter sees the EXIF data added by Lightroom and thinks I am trying to hack the server. It would not let me upload those photos, so Plan B was devised.
Start aligning photos in Photoshop. This required capturing the screen when Google Earth displayed the area around Lake Warner and using that image as a base map in Photoshop. Before I captured the Google Earth screen, I displayed icons for the GPS locations of the lawn furniture, so these were on my base map. I increased the resolution of that screen capture so the entire map would be the resolution of the individual balloon photos (or close).
I aligned only the high altitude photos that defined the maximum areal coverage of the flight. A few lower altitude photos were included because they extended the coverage for a total of 11 photos. I ordered the stacking of photos to hide the parts where the sun was reflecting off the water or wet plants. I adjusted the brightness of a few photos so they would match each other better, and blended the edges of photos to hide them. These last three things can't be done in MapKnitter.
When I was done, I saved the Photoshop project as a jpeg at full resolution and 60% quality. Had I done all this in MapKnitter, I would have been able to output a geotiff which was georeferenced. But the jpeg from Photoshop was less than 10 MB, which is size limit for uploads to MapKnitter.
I started a new map at MapKnitter and uploaded the jpeg of the stitched map. It was easy to align manually because the Google Earth image around the edges of my map was the same as the base map in MapKnitter. I then exported the map, which output a geotiff.
I imported the geotiff into Google Earth Pro which automatically placed it where it belonged. The free Google Earth will not import geotiffs.
In Garmin Mapsource, I edited the GPS tracklog to clip off the parts preceding and following the flight and opened it in Google Earth (View/View in Google Earth...).
In Google Earth I opened KML files for the furniture waypoints and some waypoints we took of water chestnut and Wolffia patches.
The three independent sources of georeferencing did not match as well as I had hoped. Also, the geotiff was a big file (80 MB) and made the resulting KMZ file 30 MB. So I imported a regular jpg of the map (3 MB) into Google Earth and manually aligned it with the GPS tracklog. So some more work is needed to figure out the best way to georeference the map.
With everything in one folder in Google Earth, I saved it as KMZ (right click/Save place as...).
I used the Google Earth Embed KML Gadget to get embedding code to display the map here.
I wrote a research note and pasted in the embedding code. When I clicked Preview, the embed did not appear, but I published the note anyway. After publishing, embeds appear only after refreshing the screen. The map did not appear when the embed was 1100 pixels across, but displayed okay when I changed it to 800 pixels across. It's still a little flaky.
.

One of two photos from the flight that include all four of the lawn furniture ground control points. There are also a couple of nice patches of water chestnut.
.

This is the result when the GPS track from my Garmin 76CSx is overlain on the geotiff made by aligning air photos with the lawn furniture GCPs which were located with another GPSr. The Garmin tracks are obviously offset from the tracks through the vegetation, which I don't think are moving much. Also, the furniture GCPs (red diamonds) are offset from the furniture in the photos, which might be an important clue.
3 Comments
Wow, formidable workflow, but intriguing results.The plug-in showed up on Mac with Firefox and Safari.
Reply to this comment...
Log in to comment
Chris - fantastic work! Thanks for your labor and good thinking on this. My theory on the offset is that the GPS' could have been using different datum settings. Do you know the datum used in your device? I'll ask Nate what the datum was set to for the Trimble device. My hunch is it will have been NAD83. Could yours be WGS84?
Is this a question? Click here to post it to the Questions page.
Reply to this comment...
Log in to comment
My GPS is set to WGS 84.
Reply to this comment...
Log in to comment
Login to comment.