Quick build instructions for Hackteria Remix Raspberry Pi Microscope
Materials

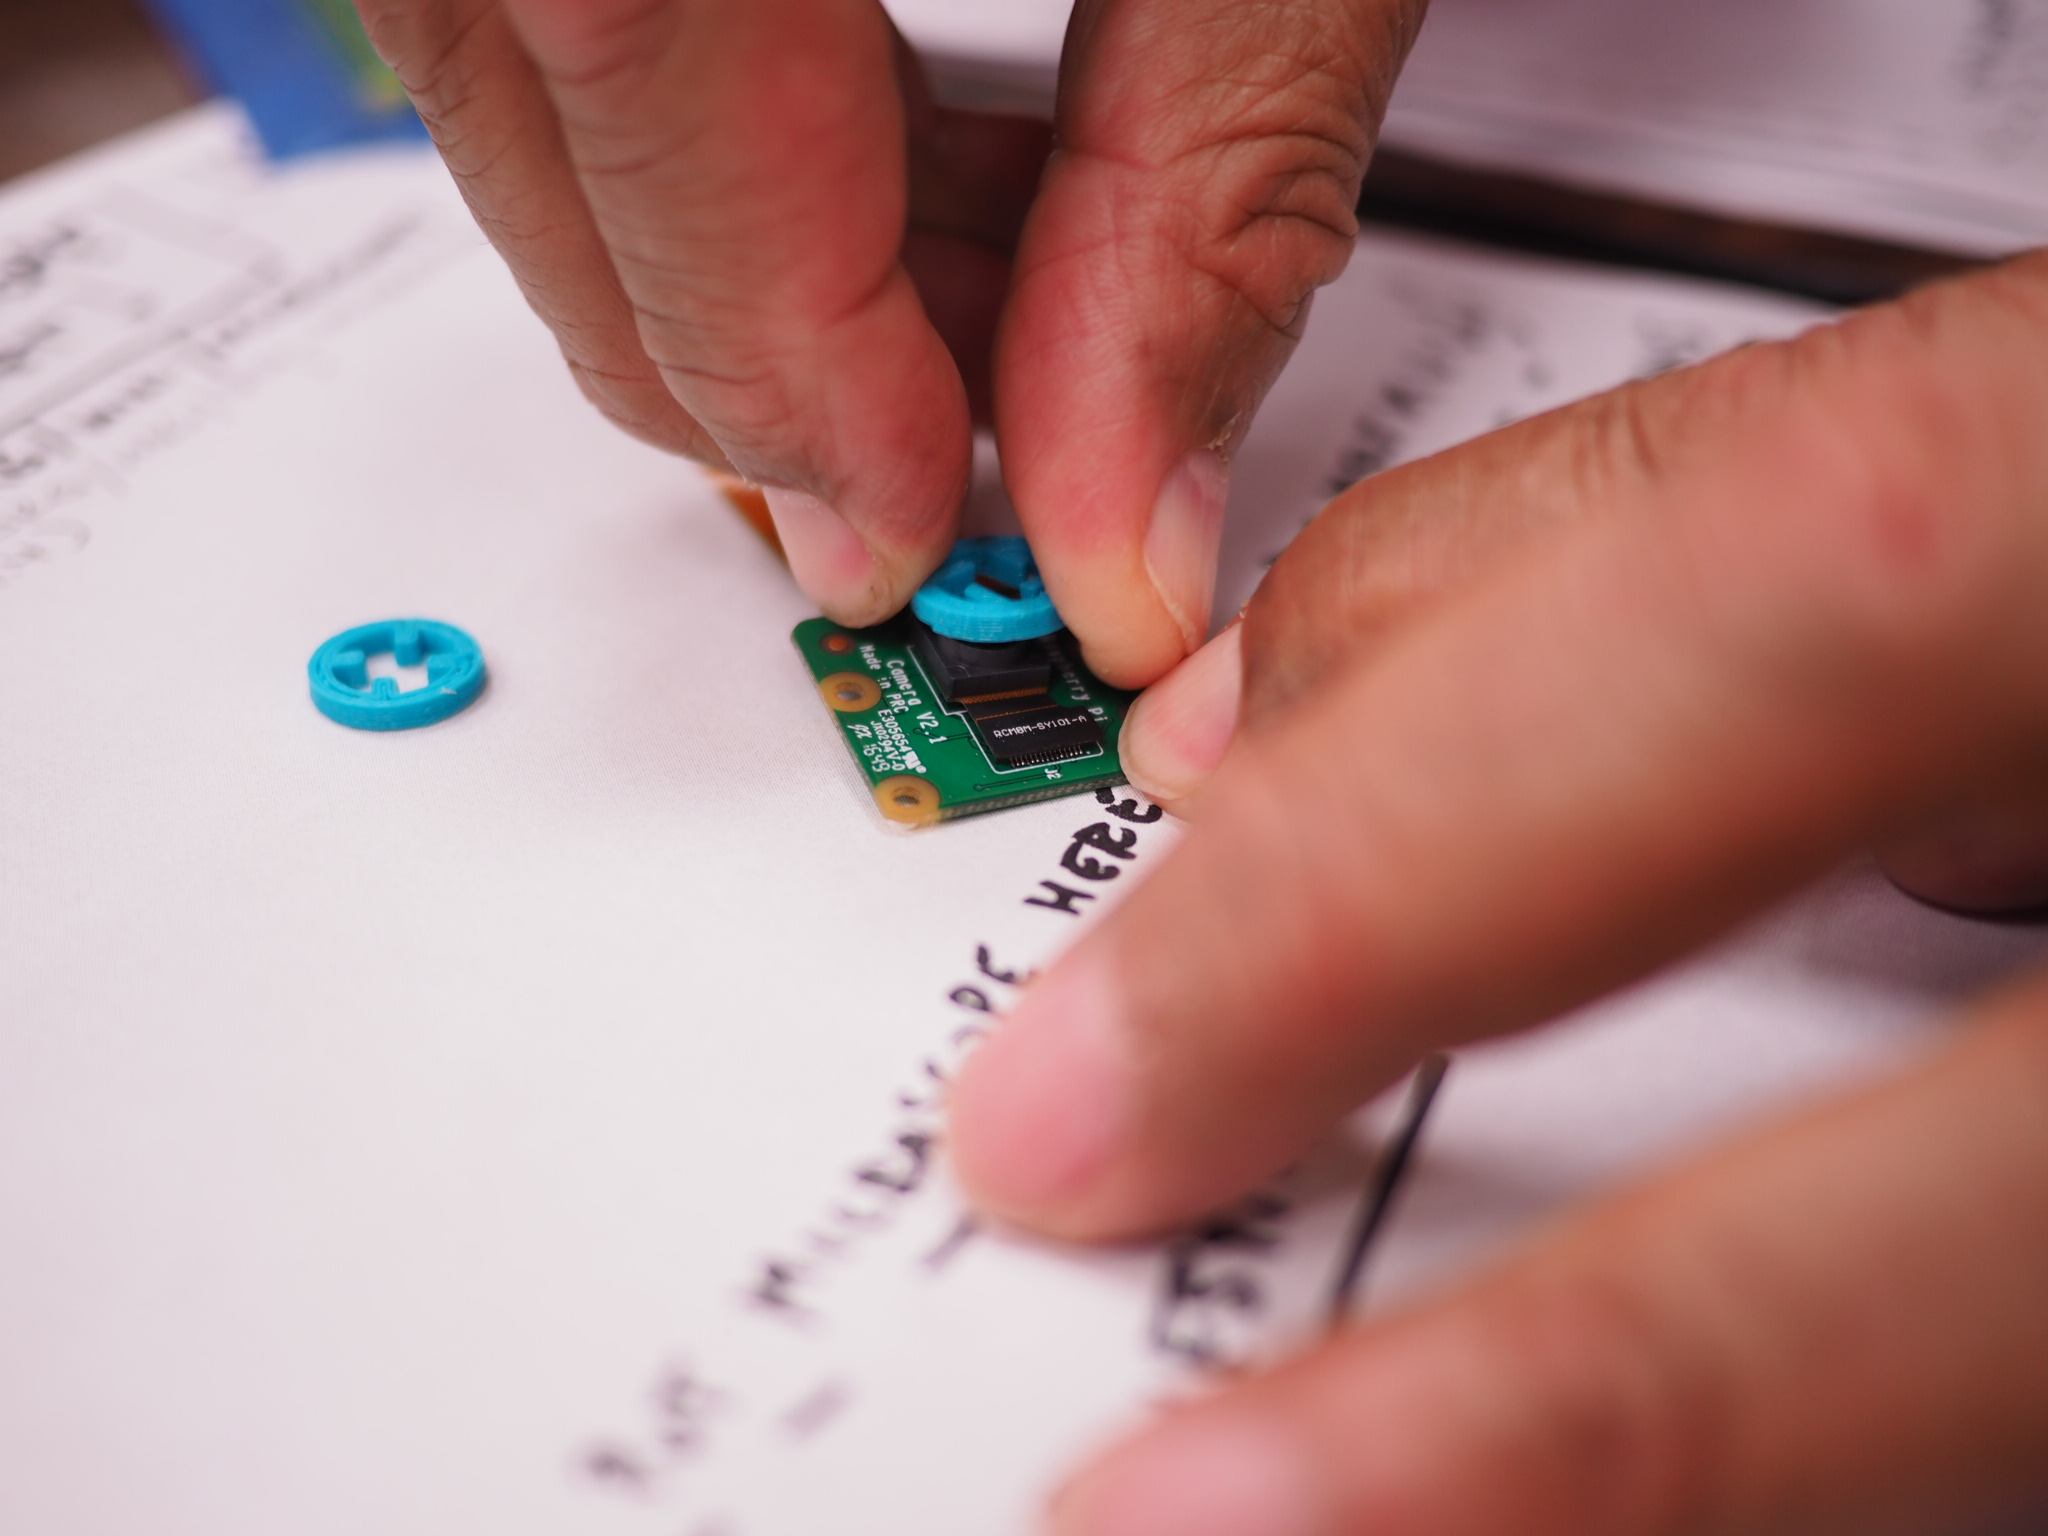
Mount the Camera
- Attach 3D printed camera holder to baseplate using M3 bolts(16mm)

- Attach camera to holder (NOTE: These M3 bolts were too large and I had to drill out the camera mounting holes -- should get smaller bolts for future versions)

- Attach optics mount to camera bottom

Build the Stand
- Attach back-holder to baseplate

- Attach back to back-holder with slide (20mm bolts + washers) so it can slide but stays in place

- Screw in objective to set table height. Objective tip should be at roughly the same height as top of table. You can get this precisely with combination of slide and notch height.

- Attach table

- Add feet -- feet elevate above screws and dampen vibration

Attach the Camera
- Plug ribbon into camera

- Plug ribbon into pi

- Connect the pi to laptop via USB to provide power

Attach the Focus Bolt
- The carriage bolt acts as a lead screw. Rotate it through the hole and screw it down until it touches the base plate

- Hold sample plate in tension with rubber band

Build a Light
You'll need a light source to illuminate your slides -- one that you can position precisely. We'll show you how to build one here the way we often do with kids at Parts & Crafts, but you can also buy a light to use. Tell us what works best for you!

- Extend the wires on the battery pack. The wires coming off of the battery pack are not quite as long as we would like them to be so we start by attaching extra lengths of wire. If you have a soldering iron you should solder these connections. Do this for both the red and black wires.

- Attach the LED. Red wire goes to the long lead, black wire goes to the short lead

- Glue to coathanger wire. This provides a flexible mount for your light


- Bend the wire to position the light. It should point directly down, facing into the objective lens.

- Take some pictures -- use binder clip to hold slide in place and bolt for focus adjustment. Make your light is pointing directly into lens to get enough light.
.jpg")
Final Assembly
Here's what our setup looked like in the end, hooked up to the laptop and viewing a tiny ruler (called a stage micrometer!). To enlarge the microscopic image you can just click on it from your laptop once it's streaming live from the microscope.

13 Comments
@stevie awards a barnstar to partsandcrafts for their awesome contribution!
Reply to this comment...
Log in to comment
This is great! Love the photos. Was thinking if there was a cheap product we could substitute for the LED and battery pack, to save a few steps, but not really sure if it's worth it. I saw these for ~$4.60 on Amazon, which is a bit pricey I guess:
https://www.amazon.com/I-MU-Flexible-Gooseneck-Brightness-Gray-White/dp/B071Y3P8ZC/
But maybe if we make a kit, we could bulk order them.
Reply to this comment...
Log in to comment
Having the point source seems pretty important -- however, it seems possible to do a micro LED copper tape coin battery solution, which would bring the price down a bit.
Reply to this comment...
Log in to comment
Oh, is it important that the light be a point, and not multiple point, or a diffuse source?
Is this a question? Click here to post it to the Questions page.
Reply to this comment...
Log in to comment
We tried it with a bunch of different light sources, including a diffuse multi-LED source (book light). The best source was a single LED at close range pointed straight into the lens.
Reply to this comment...
Log in to comment
@warren @kgradow1 -- it's true that we did try a bunch of different lights, and the best we found was a single LED. But the main reason this was true, I think, is that it was really obvious where the light was coming from so we could easily point it through the slide and into the lens.
I think any light that's sufficiently bright and even is fine. The trick is that most of the cheap lights I've been able to find are made up of a bunch of LEDs so they don't actually light evenly, even with a diffuser, so it's hard to point them correctly. But I think it would be possible to find a good off-the-shelf light, but it would involve some research and trial and error.
Reply to this comment...
Log in to comment
This is awesome. maybe we should build out a part of the Q&A specifically about lighting. @maxliboiron has mentioned lighting can be a challenge and varies depending on the type of work you're doing.
Reply to this comment...
Log in to comment
@warren @kgradow1 -- we also tried using one of these lights -- https://www.amazon.com/Cat-CT1000-Pocket-COB-Light/dp/B012BR6D1E/ -- and found that it was too bright, though now that I think about it I didn't look very hard at camera settings to see if manual white-balancing or other settings would fix the problem.
If we did enough experimentation to feel confident on there being an optimal light placement we could add some kind of LED holder to the design like the openflexure microscope has, but I'm not confident that there even is an ideal general placement, let alone what it is, which is why something adjustable seems nice.
Reply to this comment...
Log in to comment
Awesome. Trying to get a bunch of the parts and prices together here: https://publiclab.org/questions/warren/12-08-2017/how-cheaply-can-i-get-all-the-parts-of-the-basic-microscope-kit
Reply to this comment...
Log in to comment
@warren I just got and tried using that light you suggested: https://www.amazon.com/I-MU-Flexible-Gooseneck-Brightness-Gray-White/dp/B071Y3P8ZC/
It seems to work well! I didn't have the "on the go" USB mini to female adapter to connect it to the raspberry pi, so I had to use the computer, but it seems to light pretty well.
My camera sensor has gotten really scratched from too many take-aparts and too much careless travel, but the rest of the image looks great.
I also got one of these gooseneck cell phone holders https://www.amazon.com/dp/B01HDZJ1ZE/ref=sspa_dk_detail_2?psc=1&pd_rd_i=B01HDZJ1ZE&pd_rd_wg=6yw83&pd_rd_r=19T8CJ0623H0PWP5DVYS&pd_rd_w=Pu5FI
Primarily for taking photographs for documentation, but it also works pretty well as a holder for using my phone's flashlight as an illumination source.
Is this a question? Click here to post it to the Questions page.
Reply to this comment...
Log in to comment
@warren @kgradow I've also been experimenting with using a magnet sandwich to hold the carriage bolt in place, like so. It seems helpful. Though I've also found that it can sometimes be just as good or better to focus by screwing/unscrewing the lens.
Reply to this comment...
Log in to comment
Ooh! Cross post at https://publiclab.org/questions/stevie/01-22-2018/what-is-the-best-light-source-to-use-for-the-basic-microscope -- awesome!
Reply to this comment...
Log in to comment
Reply to this comment...
Log in to comment
Login to comment.