Mapping Curriculum: Ground Control Point Targets
As part of the Grassroots Mapping Curriculum series.
Sometimes the scenes you create with photos from your balloon or kite can't be referenced to existing georeferenced imagery. For example, the scale of your photos may be too different (often a much larger geographic scale than commonly available imagery), or your imaged don't match the time scale of the the available reference imagery (such as the last available photo was taken five years ago and too much has changed). To remedy the problem of not having useful reference imagery to reference your photos to, you can make your own targets that will be clearly visible in your photos, and mark the center of the target with a GPS device. Then, rather than matching your photos to a reference image, you can use a georefereing program (like the georeferencing plug-in for Quantum GIS) to match your targets with the locations you marked with the GPS. -Michele Tobias
These fabric ground control points are durable, reusable, and easily visible from high altitude. At low altitudes where ground features may not be distinguishable, it may be useful to make paper coded ground control points.

Materials & Tools:
- Fabric – something sturdy like nylon
- Ribbon – make sure it contrasts well with the fabric
- Thread
- Sewing Machine (or needle if you want to sew it by hand)
- Thin Bias Tape or Ribbon (optional) – for making corner loops
Steps:
- 1. Pick a size for your targets. You need to make them big enough to see in the photos but not so large that they cover important things.
- 2. Choose your fabric and ribbon. Consider bringing your cameras (color and infrared) to the fabric store to take test photos to make sure that the fabric and ribbon have a high degree of contrast in all the wavelengths you care about.
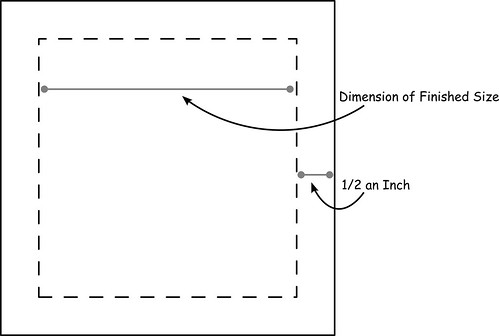
- 3. Make a pattern/template out of scrap paper (newspaper works great): take the dimensions you want for your finished target (the size you picked in Step 1), then add half an inch to each side (this leaves room to hem the edges and prevent fraying).
- 4. Place your pattern on the fabric (pin it in place if you want), and cut around it.
- 5. Cut two lengths of ribbon to the width of your pattern.
- 6. Pin the ribbons, crossed, on your fabric square.
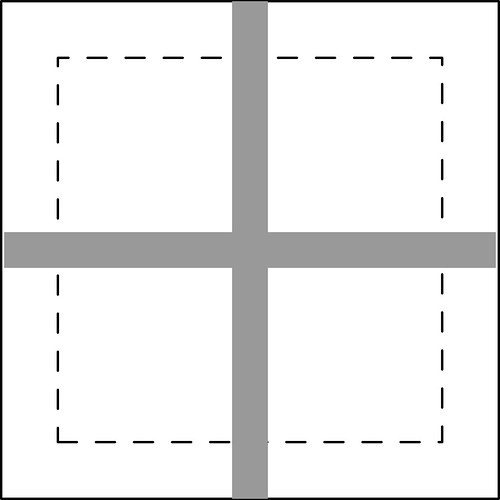
- 7. Sew the edges of the ribbon onto the fabric. A zig-zag stitch is useful here.
- 8. Turn the target over so the ribbon side is down. Fold the edge of each side of the target over 1/4 of an inch, then again 1/4 of an inch. You may want to iron the fold to help it stay folded. Pin the folds down so they stay in place. Now sew over all the edges you folded.
Optional Steps:
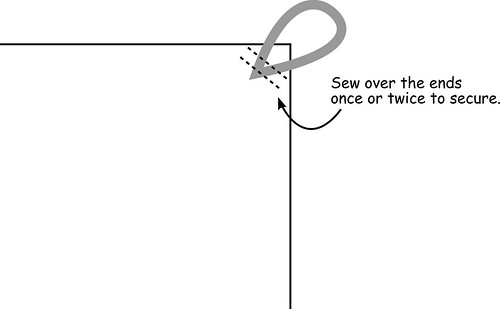
- 9. You can make loops on the corners of the squares by sewing loops of bias tape or thin ribbon to each corner. This allows you to put a stake through the loop to keep it from blowing away.
- 10. Use left-over pieces of ribbon to make identifying marks on your targets so they are easy to identify later. You could make numbers, or increasing numbers of dots, for example.